
Installation
To use this extension, you will require to install MageDelight Base Extension first. If it is not installed then please download it from https://www.magedelight.com/extensions/magedelight-base-extension.zip and unzip the package file into the root folder of your Magento 2 installation.
Before installing the extension, please make sure to Backup your web directory and store database
You will require to install MageDelight Base Extension first. If it is not installed then please download it from https://www.magedelight.com/pub/extensions/magedelight-base.zip and unzip the package file into the root folder of your Magento 2 installation.
Root Directory is - "app/code/magedelight/#YourExtensionName#"
- Unzip the extension package file into the root folder of your Magento 2 installation.
- Connect to SSH console of your server:
- Navigate to the root folder of your Magento 2 setup
Run command as per below sequence,
php bin/magento setup:upgrade
php bin/magento setup:di:compile
php bin/magento setup:static-content:deploy
php bin/magento cache:clean
- log out from the backend and log in again
If you are using Magento 2.3 or later then you do not need to activate license. Extension will be activated with silent activation mechanism and does not require activation keys to be entered manually.
Backend Configuration (Admin side)
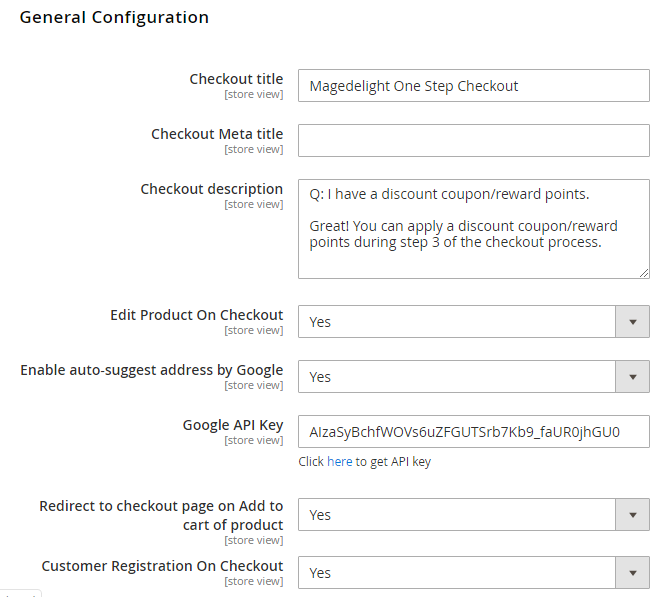
- Checkout Title: Write title of checkout page.
- Checkout Meta Title: Write meta title of checkout page. for SEO.
- Checkout Description: write description for checkout page and it will get displayed on frontend.
- Edit Product on Checkout: Enable to make product editable on checkout page.
- Enable auto-suggest address by Google: Specify "Yes", to enable auto-suggest address by Google
- Google API Key: Specify API Key to access Google App
- Redirect to checkout page on Add to cart of product: Specify "Yes" to Redirect to checkout page when user add the product to the cart.
- Customer Registration On Checkout: Specify "Yes" to enable customer registartion on checkout while guest customer checkout.

- Display Header: Specify "Yes" to enable header block on checkout. It will display static block on checkout page.
- Display Footer: Specify "Yes" to enable footer block on checkout. It will display static block on checkout page.
- Display Order Comments: Enable/disable order comment section on checkout page on which users can write comment about the order they are making.
- Display Newsletter: Enable/disable newsletter section on checkout page via which user can subscribe to newsletter.
- Display Newsletter Checked: Enable/disable newsletter checkbox as default selected on checkout page.
- Display Coupon Code: Enable/disable coupon code section on checkout page from which user can use the coupon code during purchase.
- Display Product Images: Enable/disable product images to get displayed on checkout page order section.
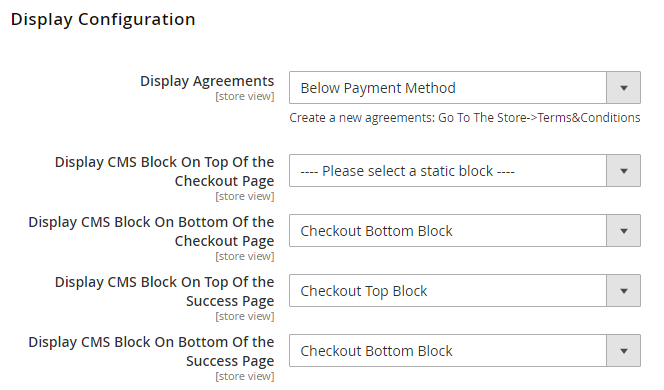
- Display Agreements: Enable/disable Terms & Conditions selection on checkout page.
- Display CMS Block on Top of the Checkout page: Enable static block before checkout page section.
- Display CMS Block on Bottom of the Checkout page: Enable static block after checkout page section.
- Display CMS Block On Top Of the Success Page: Enable static block before success page page section.
- Display CMS Block On Bottom Of the Success Page: Enable static block after success page page section.
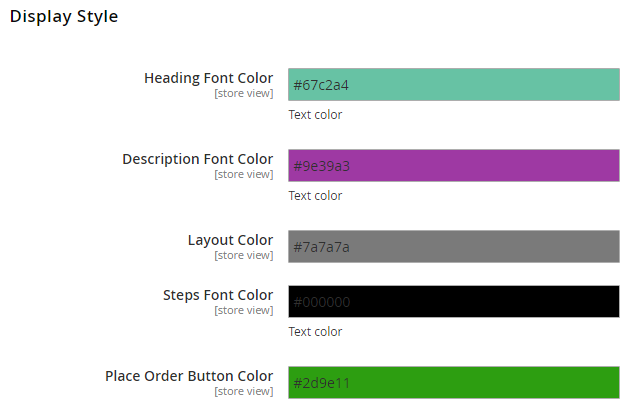
- Heading Font Color: Select the font color of headings on checkout page.
- Description Font Color: Select the font color of description about checkout page.
- Layout Color: Select color of layout on checkout page.
- Steps Font Color: Select font color of headings of all section.
- Place Order Button Color: Select color of Place Order button on checkout page.
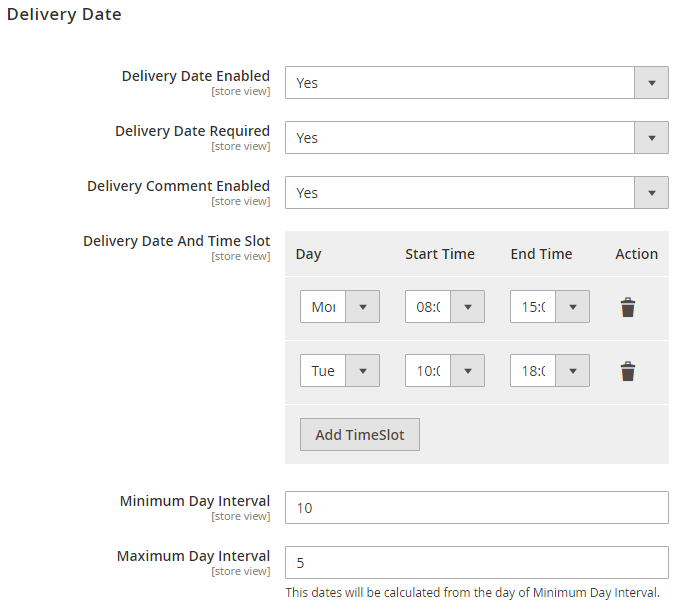
- Delivery Date Enabled: Specify "Yes" to enable delivery date selection on front-end. When enabled, customer will able to select delivery date and time slot.
- Delivery Date Required: Specify "Yes" to make delivery date selection mandatory.
- Delivery Comment Enabled: Specify "Yes" to enable delivery comment selection on front-end.
- Delivery Day And Time Slot: Specify delivery day and time slot to display on front-end.
- Minimum Day Interval: Specify number in day to keep minimum interval between order placed date and delivery date.
- Maximum Day Interval: Specify day to enable maximum days of interval for customer. This dates will be calculated from the day of Minimum Day Interval.
i.e.
Miminum Day Interval = 2
Maximum Day Interval = 5
Order Date: 01 Jan then delivery dates will starts from 03 Jan to 07 Jan.
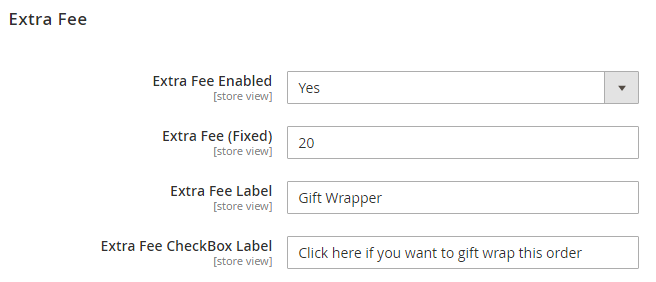
- Extra Fee Enabled: Specify "Yes" to enable Extra Fees on checkout page.
- Extra Fee (Fixed): Specify extra fees in fixed amount. This will be added as fixed amount on order values with provided title/label.
- Extra Fee Label: Specify label for Extra Fee to show on checkout page.
- Extra Fee CheckBox Label: Specify checkbox caption/label for Extra Fee to show on checkout page.
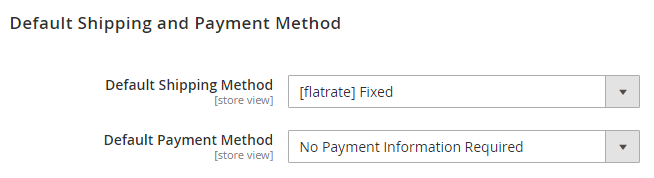
- Default Shipping Method: Specify default shipping method to be set on checkout page.
- Default Payment Method: Specify default payment method to be set on checkout page.
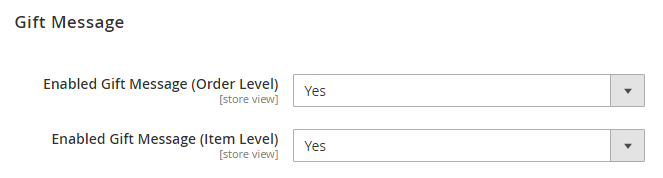
- Enabled Gift Message (Order Level): Specify "Yes" to enable Order Level gift message on checkout page.
- Enabled Gift Message (Item Level): Specify "Yes" to enable Item Level gift message on checkout page.

- Layout: Specifiy checkout page layout as either 2 colum or 3 column. Order review section will remain same in both the layouts.
- Step Configuration: Specify order of checkout steps, you can drag and drop to change order.
- Order Review Label: Specify custom text/label for order review step.
- Billing Address: Select place to display billing address. You can select either to display after shipping method or inside payment block.
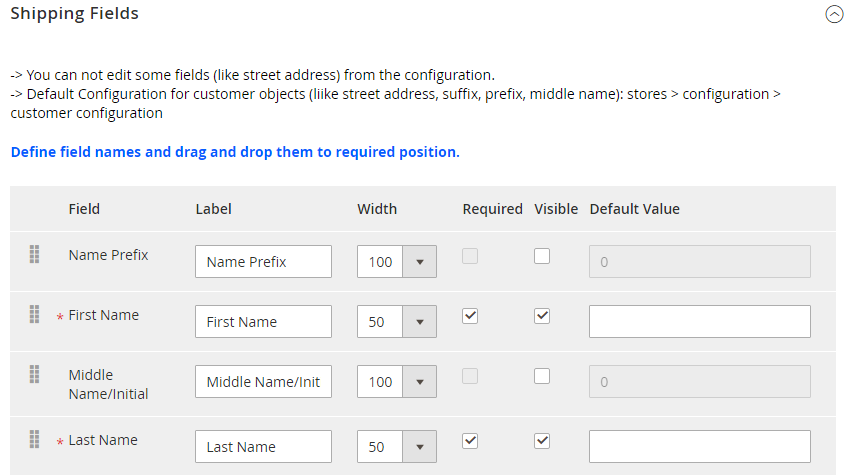
Shipping Fields:
You can arrange shipping fields with its custom labels, size, required or optional, visibility and default values. Please find below list of fields which can be set using this block:
- Name Prefix
- First Name
- Middle Name
- Last Name
- Name Suffix
- Company
- Street Address
- City
- Country
- State/Province
- Zip/Postal Code
- Phone Number
- Fax
- VAT Number
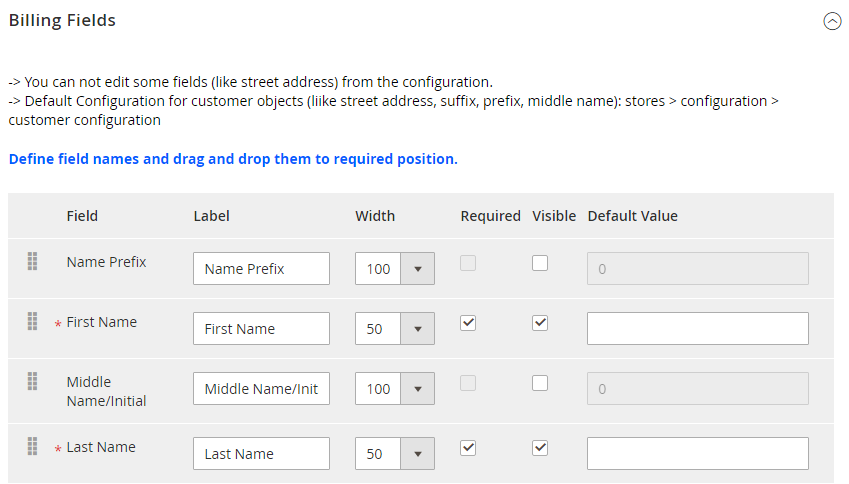
Billing Fields:
You can arrange billing fields with its custom labels, size, required or optional, visibility and default values. Please find below list of fields which can be set using this block:
- Name Prefix
- First Name
- Middle Name
- Last Name
- Name Suffix
- Company
- Street Address
- City
- Country
- State/Province
- Zip/Postal Code
- Phone Number
- Fax
- VAT Number
File Path: app\code\Magedelight\OneStepCheckout\view\frontend\layout\onestepcheckout.xml
If you are facing issue related to deteriorate styles and you have installed custom theme then some of theme providers remove default styles of Magento, In that case please go to the above path and uncomment included style "md-onestepcheckout.css" from the head tag.
Frontend Functionality
One step checkout looks as shown above on front end.
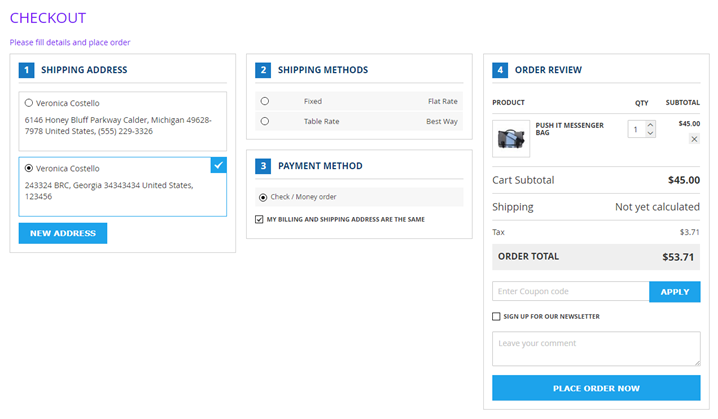
- New Address: Customers can enter new address (than saved one) on checkout page. As shown in below image.
- My Billing and Shipping Address are the Same: Customers can enter different shipping address than billing.
- Sign Up for Our Newsletter: Customers can subscribe for newsletter from checkout page.
- Leave your Comment: Customers can leave special comment about the order being placed.
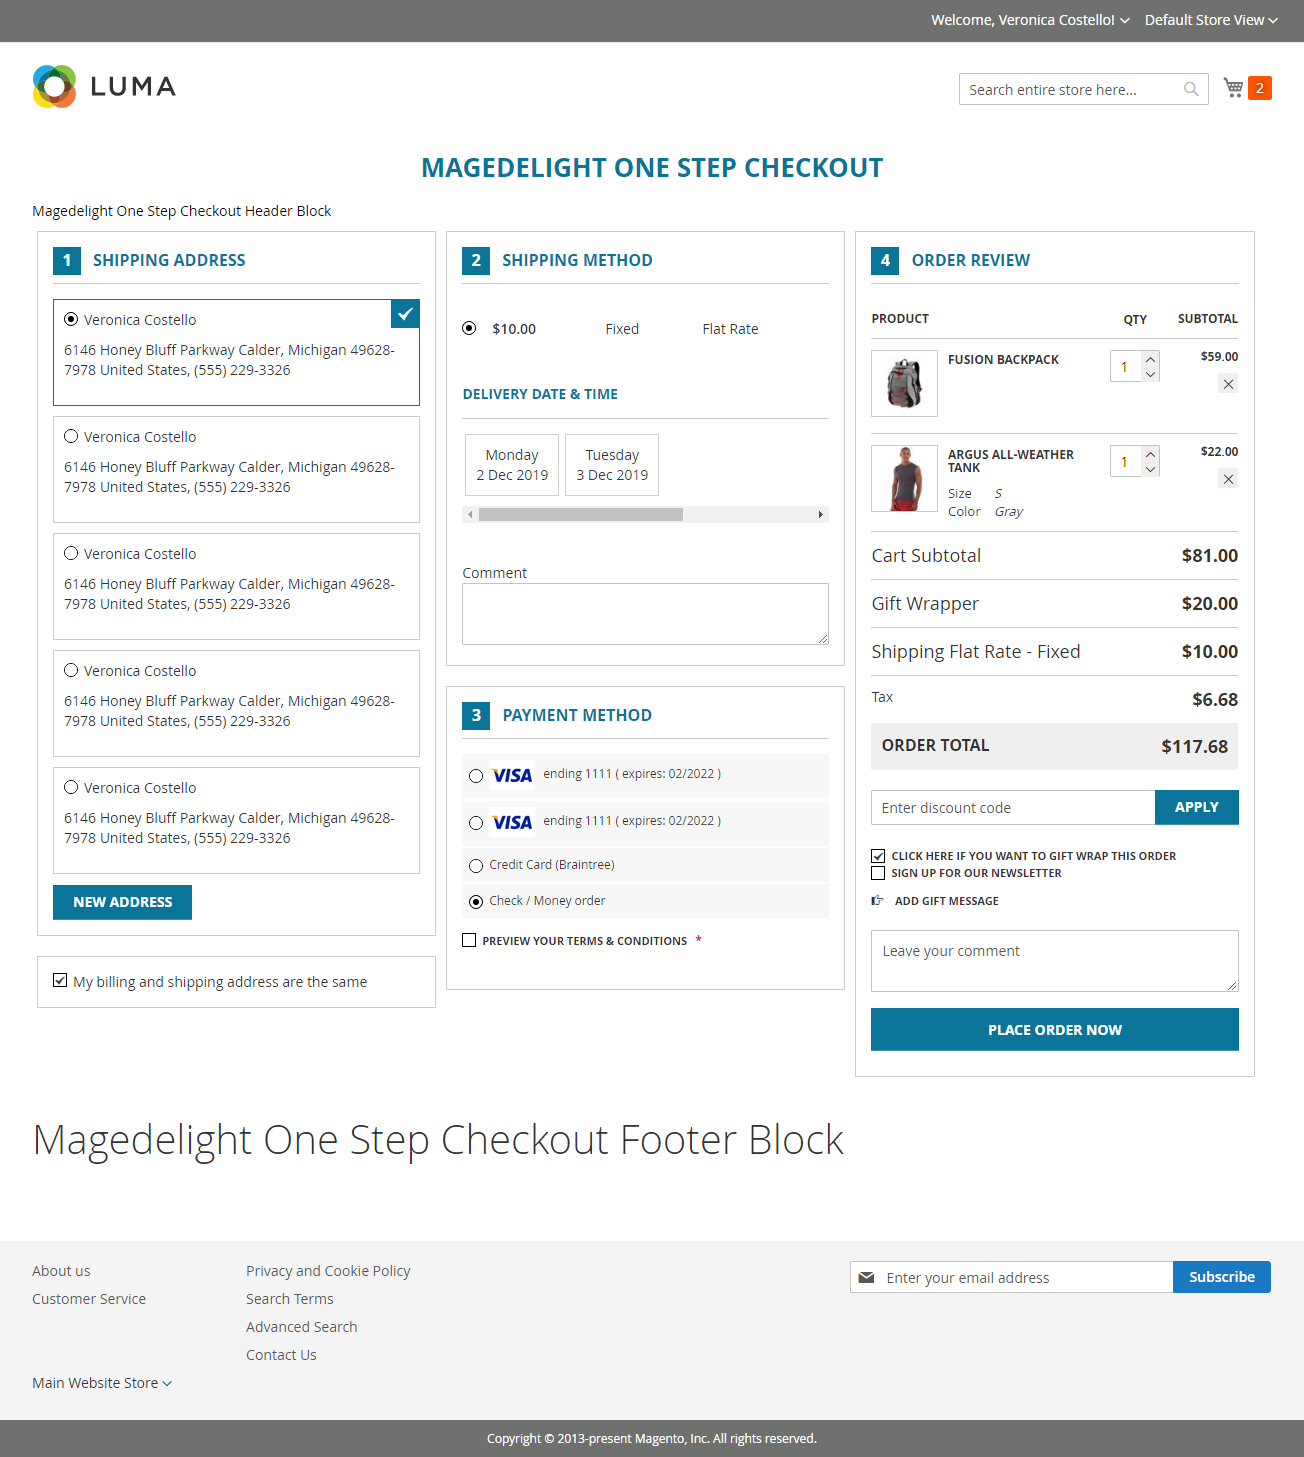
- Full page view of MageDelight one step checkout with all the features enabled.
Thank you for choosing MageDelight!