
Installation
Before installing the extension, please make sure to Backup your web directory and store database
- Unzip the extension package file into the root folder of your Magento 2 installation.
- Connect to SSH console of your server:
- Navigate to the root folder of your Magento 2 setup
Run command as per below sequence,
php -f bin/magento setup:upgrade
php -f bin/magento module:enable Magedelight_WalMart
php -f bin/magento setup:static-content:deploy
- Flush store cache
- log out from the backend and log in again
License Configuration
License activation is not required for extension purchased from Magento Marketplace.
After successful installation of Magento to Wallmart Pro extension, you are now required to configure the license key in the admin configuration section. You can set it from:
Step 1: Go to, Admin Control Panel > Stores > Configuration > Magedelight > Walmart Configuration > License Configuration.
You will find two text boxes asking for Serial Key and Activation Key, which you received on email upon the purchase of extension. See screenshot below:
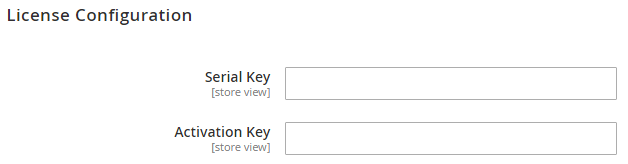
- Serial Key: Enter Serial Key
- Activation Key: Enter Activation Key
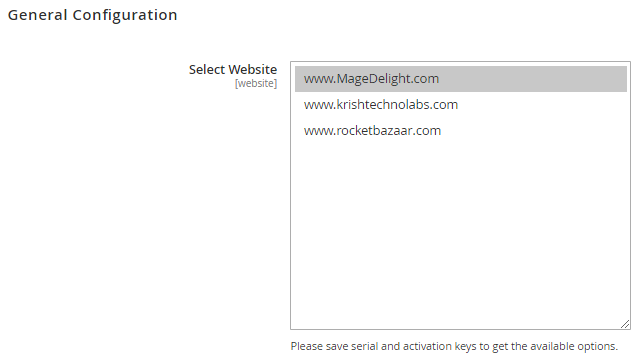
Step 2: Expand “General Configuration” tab, you will find a list of domains for which license is purchased and configured, now select the domain you are going to use, you can select multiple domains by clicking “Ctrl + Select”.
Step 3: Now, select “Yes” from “Enable Module” to enable extension and again click on “Save Config” button on the top right.

Backend Configuration (Admin side)

- API settings: Merchant needs to login to seller account on Walmart to get the consumer id, secret key and channel key. Once logged in, click on settings and go to API settings -> Consumer IDs & Private Keys

You will find the Consumer ID and a button to regenerate the secret key. This would ask you whether you want to regenerate the key. Click on yes and it will generate new secret key. Channel Key is mentioned on the same page under Note.

- Consumer ID: Copy consumer id from Walmart seller account and paste it in Magento admin
- Secret Key: Copy secret key from Walmart seller account and paste it in Magento admin
- Channel Key: Copy channel key from Walmart seller account and paste it in Magento admin
- Orders Fetch Start Date: Set the date from which orders can be fetched from Walmart

CRON
Set the cron configuration options to enable the automated syncing processes of feeds, orders, inventory, prices and status details of the product.
The cron configuration works same as default Magento cron job settings.
Run the following command to start the cron.
php bin/magento cron:run --group="magedelight_walmart"

Walmart Tax Codes
To get the list of Walmart tax run the below mentioned command and it will fetch all the attributes from .CSV file.
- Run the following command to get the tax codes.
Command: php bin/ magedelight:walmart:importtaxcode

Associate Categories
Create new category or select existing one and map with relevant Walmart category.
- Enable Category: Yes/No
- Include in Menu: Yes/No
- Category Name: Give name of category.
- Walmart Category: Select relevant Walmart category to map with Magento category.

Walmart Categories
View list of Walmart categories associated with Magento categories.
Delete one category at a time or select category checkboxes and delete using dropdown to delete multiple categories at a time.
Delete Categories: Delete one or multiple Walmart categories from the grid. Select the categories to be deleted and select delete from dropdown.

Walmart Attributes
To get the list of Walmart attribute click on “Sync Attribute” and it will fetch all the attributes from XSD file. This grid keeps all the information about the attributes like code, type, is default (it has any default value or not), is required and list of values if they are the only values you can use for your products.
Also attributes can be sync from command line. Execute the following command to get the latest attributes and their values.
Run the following command to import the list of Walmart attributes.
Command: php bin/magedelight:walmart:syncattributesUse the filters “is required” and “is default” while entering the attribute values for each product. It would tell you which attributes are required and what values you can set from given list of default values by Walmart.

Associate Attributes
View list of attributes in grid as shown above. It displays which Magento attribute is mapped with which Walmart attribute.
- Delete Attributes: To delete mapped attributes select one or multiple attributes from the grid and select delete from dropdown.

- Walmart Attribute Name: select Walmart attribute from dropdown to map with Magento attribute.
- Associate With: Associate selected Walmart attribute with either Magento attribute or give custom value.
- Map with Magento Attribute: Select Magento attribute to map with selected Walmart attribute.

View products of mapped Magento categories in Walmart Products grid (as soon as Magento categories are mapped with Walmart categories, all the products of mapped categories would automatically get loaded in the Walmart products grid). It keeps record of products with ID, SKU, Price on Walmart, name, is valid or not and status of the product on Walmart.
- Sync Data: would get the latest updates from Walmart about each product and sync the data in grid as shown above.
There are 5 actions merchant can perform on the product grid.
- Validate: before uploading the products on Walmart, validate them. If not validated successfully, then Activity Logs keep errors with details about what went wrong during validation (view the errors in the log, correct them and again validate the products). “Is valid” shows which products are validated and which are invalid.
- Upload Products: On successful validation, upload the products in bulk. Select products from grid and perform action “Upload Products”. After uploading the product(s), status in the grid shows which products are published or unpublished.
- Upload product would only affect price and other details of the product except inventory. To update the inventory it is compulsory to use update inventory option from dropdown. To update the price and other details of the products it is mandatory to set “yes” the update price and update other details from configuration setting.
- Retire Product: To retire the live products from Walmart, select the product(s) from grid and perform action “Retire Product”. This action would change the status from Published to Unpublished.
- Update Price: Use this option to update the product price in bulk. Edit each product price from the grid and select “update price” from action dropdown.
Update Inventory: Use this option to update the inventory in bulk. Edit each product inventory from the grid and select “update inventory” from action dropdown.
If any error occurs during upload or update, the activity logs keep records of the errors.

Walmart product grid with configurable products
As simple products you can upload configurable products from the walmart product grid. With single click you can upload all the associated products and upload them to walmart.
Configurable products would get displayed in Walmart products grid only along with simple products.

Configurable product attributes
How to configure Configurable Products
Attributes that need to be mapped when using configurable products.
- Variant Group Id: This is a unique ID that you create and use for all of the items in a variant group. A Variant Group ID can be alphanumeric and up to 20 characters long. For Example S001.
- Variant Attributes: Refer to the list of variant attributes here for each categories supported by walmart. You can map those attributes with magento attributes. Refer the image above.
Admin needs to make sure the associated products must have all walmart mapped attributes and should be defined properly.

Validate and upload configurable products
Admin validate the product by selecting only configurable product from walmart product grid. All associated products (simple products) will be automatically validated and the status will be updated. Once the product is validated admin can select same product and upload.
Admin can update price and inventory or retire associated products individually like other simple products.

Walmart Feeds
Walmart feeds keep record of all operations performed on the product in terms of feeds. Once product is updated or uploaded on Walmart, merchants can check feed status from the grid shown above.
Walmart Feeds can be sync in two ways.
- Click Sync Feeds button from Walmart Feeds grid.
- Set the Walmart cron. go to Stores -> Configuration -> Advanced -> System
Set the Cron configuration for the group: magedelight_walmart.
Delete: Admin can delete the feeds by selecting them from grid and delete from dropdown.

Walmart Activity Logs
Walmart activity logs keeps detailed records of each operations performed on Walmart products. It shows whether the operation is successfully performed or not. Check the Errors field value. If it is 0 then operation is successful and if it is one then there is some error. To view the details of errors click on Details. Upload the products again after resolving the errors.

Walmart Orders
Walmart orders can be sync in two ways.
- Click Sync Orders button from Walmart Orders grid.
- Set the Walmart cron. To set the cron go to Stores -> Configuration -> Advanced -> System
Set the Cron configuration for the group: magedelight_walmart.

Walmart Order Details
- Ship Walmart Order: click on the tab to ship, cancel or refund the Walmart order.
- Cancel: Enter quantity of the item to be cancelled and select the reason of cancellation.
- Refund: To manage the refund click on Refund button.

Walmart Order Refund
Select products to refund and reason of refund. Also add refund note if required and click on Submit Refund button.

Walmart Failed Orders
Walmart failed orders keeps record of all failed orders, the orders which could not be placed due to any reason. It also keeps the reason that why the order was not successfully placed. To know the reason why order is failed, click on the details button of each order.

Walmart Dashboard
Thank you for choosing MageDelight!