
Installation
Before installing the extension, please make sure to Backup your web directory and store database
- Unzip the extension package file into the root folder of your Magento 2 installation.
- Connect to SSH console of your server:
- Navigate to the root folder of your Magento 2 setup
Run command as per below sequence,
php -f bin/magento setup:upgrade
php -f bin/magento module:enable Magedelight_Authorizecim
php -f bin/magento setup:static-content:deploy
- Flush store cache
- log out from the backend and log in again
License Configuration
License activation is not required for extension purchased from Magento Marketplace.
After successful installation of Authorize.net CIM extension, you are now required to configure the license key in the admin configuration section. You can set it from:
Step 1: Go to, Admin Control Panel > Stores > Configuration > MageDelight > Authorize.net CIM > License Configuration.
You will find two text boxes asking for Serial Key and Activation Key, which you received on email upon the purchase of extension. See screenshot below:
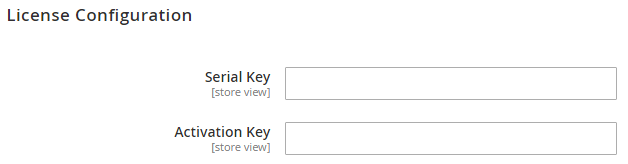
- Serial Key: Enter Serial Key
- Activation Key: Enter Activation Key
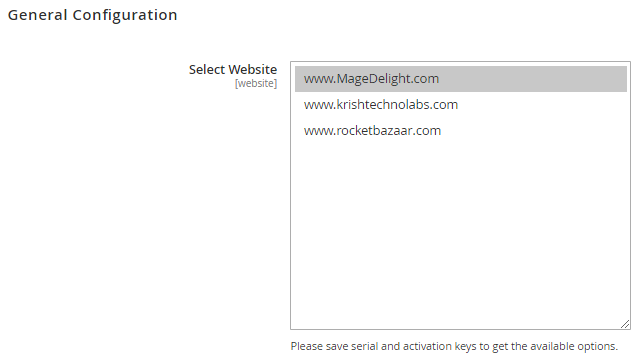
Step 2: Expand “General Configuration” tab, you will find a list of domains for which license is purchased and configured, now select the domain you are going to use, you can select multiple domains by clicking “Ctrl + Select”.
Step 3: Now, select “Yes” from “Enable Module” to enable extension and again click on “Save Config” button on the top right.

Backend Configuration (Admin side)

- Enabled: This can enable/disable the Authorize.net CIM Payment method.
- Title: Here you can define the label for Authorize.net CIM Payment method that will display in
- Payment section of one page checkout.
- Payment information of order, invoice, credit memo and shipment section.
- API Login ID: Merchant can define API Login Id that is associated with current Authorize.net merchant account.
- Transaction Key : Merchant can define Transaction Key that is associated with current Authorize.net merchant account.
Enable Accept.js: Admin can enable the Accept.js if he wants to transfer the payment data directly from client to authorize.net server. (If it is enabled the sensitive data of client would bypass the merchant server)
Make sure that the URL of your website is SSL certified. To use this feature it is mandatory to get the SSL certificate for your website.
- Client Key: Copy the key from merchant account of authorize.net and enter here.
- Test Mode:Admin can define the mode of Authorize.net CIM Payment method of web shop. Merchant can set either “Yes”/ “No” for this option depends on the environment of web shop (Production or Development).
- Payment Action: Admin can define the payment action that would take on successful order placed by user. Admin can choose,
- Authorize and Capture: This payment action will directly capture the requested amount from the customer credit card on placing an order from frontend or backend. Invoice will automatically create when user successfully place an order.
- Authorize Only: This payment action will only authorize the requested amount on the credit card of customer on placing an order from frontend or backend. In this payment action invoice will not be created after order creation successfully. Admin will have to manually create invoice from backend from order management section.
- Gateway WSDL: This options defines the WSDL URL of Authorize.net CIM Payment method API. Depending on the API Type option selected by admin, this option will have different value,
- API Type Selected “Xml” will have this value https://api.authorize.net/xml/v1/schema/AnetApiSchema.xsd
- API Type Selected “Soap” will have this value https://api.authorize.net/soap/v1/Service.asmx?WSDL
- Gateway URL: This option defines the Gateway URL for live mode of Authorize.net CIM payment method API. Depending on the API Type option selected by admin, this option will have different value
- API Type Selected “Xml” will have this value
https://api.authorize.net/xml/v1/request.api - API Type Selected “Soap” will have this value
https://api.authorize.net/soap/v1/Service.asmx
- API Type Selected “Xml” will have this value
- Test Gateway URL: This option defines the Gateway URL for Test mode of Authorize.net CIM payment method API. Depending on the API Type option selected by admin, this option will have different value
- API Type Selected “Xml” will have this value “https://apitest.authorize.net/xml/v1/request.api”.
- API Type Selected “Soap” will have this value “https://apitest.authorize.net/soap/v1/Service.asmx”.
- Accepted Currency: This option defines the currency that merchant want to accept with Authorize.net CIM payment method.
- Debug: This option defines the debugging mode of Authorize.net CIM payment method. Admin can choose “Yes / No” depending on the Production / Development environment if web site. Normally this option should only enabled for development environment.
- Email Customer: This option will define the email notification generated from authorize.net payment gateway when transaction will successfully completed from web site.
- Option value “Yes” of this field will send gateway generated transaction email to customer email address.
- Sort Order: This option defined the sort order of payment method on the payment step on checkout one page of frontend.
- Credit Card Types: This option defines the list of Credit Cards that customer can choose from card selection field on payment section of one page checkout page.
- Credit Card Verification: This field will allow admin to select whether Card Code Verification option should be display or not on payment section.
- Payment from Applicable Countries: This option allow admin to configure Authorize.net CIM Payment gateway for specific countries,
- By selecting “All Allowed Countries” from this option will make Authorize.net CIM Payment for customers from all the countries.
- By selecting “Specific Countries” from this option will make Authorize.net CIM Payment method for customers from specific countries.
- Payment from Specific Countries:
This option will only enabled if “Payment from Applicable Countries” option will set to “Specific Countries”.
This option will be multi select option so admin can choose one or more countries from this fields for which this payment method will be display on payment section. - Minimum Order Total: This option defines the minimum order total for which this payment method display on payment section of one-page checkout on frontend.
- Maximum Order Total: This option defines the maximum order total for which this payment method will display on payment section of one-page checkout page of frontend.
- Allow Partial Authorization: This option defines whether merchant would allow customers to place an order who have not balance on credit card for order processing.
Send Line Items: By configuring this field to “Yes” will display the order items to display in gateway generated emails and also in transaction details page in merchant panel.
- Delete Cards: Admin can edit the merchant details (though it is not a good practice to change). On edit, it is required to delete the saved credit cards manually from Stores->configuration->Sales->Payment Methods ->Authorize.net CIM
All saved credit cards details are associated with merchant details. Hence, if merchant edits the details it is required to delete the saved cards because for the authorization merchant details should be matched with saved credit cards.
Backend Functionality
Frontend Functionality
Demo
Click here to visit product detail page.
Click here to visit frontend.
Click here to visit backend admin panel.
Sample Data
Thank you for choosing MageDelight!