![]()
Installation
Before installing the extension, please make sure to Backup your web directory and store database
- Unzip the extension package file into the root folder of your Magento 2 installation.
- Connect to SSH console of your server:
- Navigate to the root folder of your Magento 2 setup
Run command as per below sequence,
php-f bin/magentomodule:enable Magedelight_Payfort
php-f bin/magentosetup:upgrade
php -f bin/magento setup:static-content:deploy
- Flush store cache
- log out from the backend and log in again
License Configuration
License activation is not required for extension purchased from Magento Marketplace.
After successful installation of Payfort Payment Gateway extension, you are now required to configure the license key in the admin configuration section. You can set it from:
Step 1: Go to, Admin Control Panel > Stores > Configuration > Magedelight > Payfort Payment Gateway > License Configuration.
You will find two text boxes asking for Serial Key and Activation Key, which you received on email upon the purchase of extension. See screenshot below:
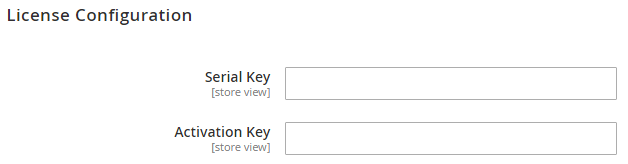
- Serial Key: Enter Serial Key
- Activation Key: Enter Activation Key
Step 2: Expand “General Configuration” tab, you will find a list of domains for which license is purchased and configured, now select the domain you are going to use, you can select multiple domains by clicking “Ctrl + Select”.
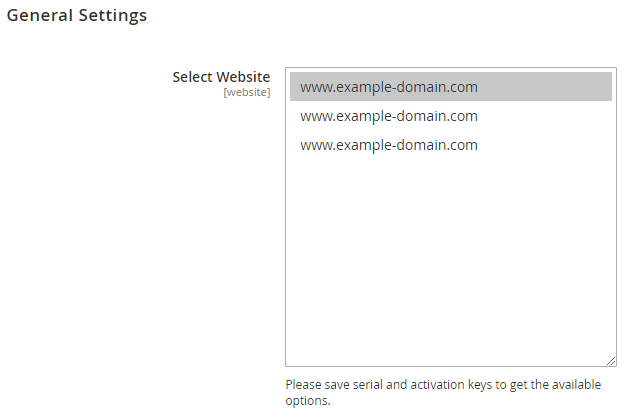
Step 3: Now, select “Yes” from “Enable Module” to enable extension and again click on “Save Config” button on the top right.

Backend Configuration (Admin side)
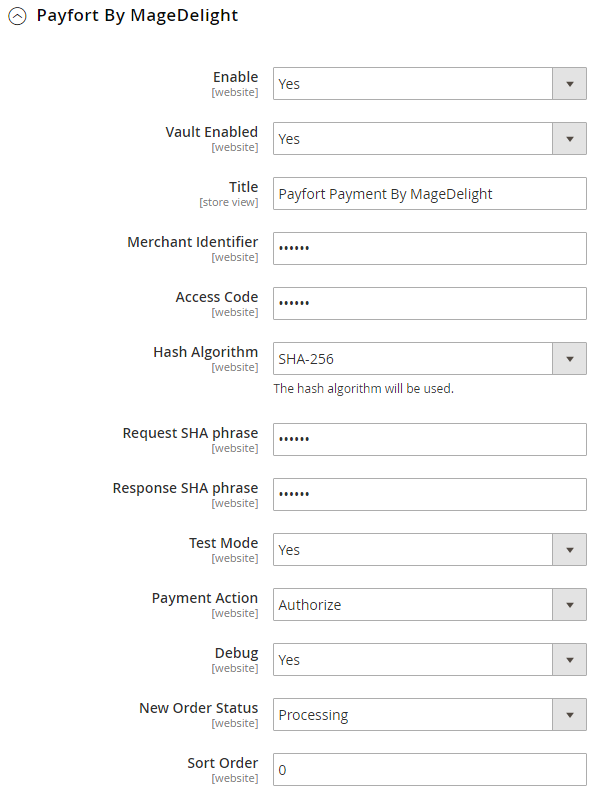
- Enable: Select "Yes", if you want to enable this extension, else set as "No"
- Valult Enabled: Select "Yes", if you want to allow to store card to Payfort's server
- Title: Specify title for the extension
- Merchant Identifier: Specify Merchant Identifier provided by Payfort
- Access Code: Specify access code provided by Payfort
- Hash Algorithm: Select algorithm for encryption
- Request SHA phrase: Specify SHA phrase for request
- Response SHA phrase: Specify SHA phrase for response
- Payment Action: Select payment action either "authorize" (if you not want to collect payment immediately on placing an order) or "authorize and capture" (if you want to collect payment immediately)
- Debug: Select debug mode "Yes" if you want to enable debug mode (for developers only)
- New Order Status: Select the status you want to set on placing of a new order
- Sort Order: Specify sort order to set position of payment gateway on checkout page
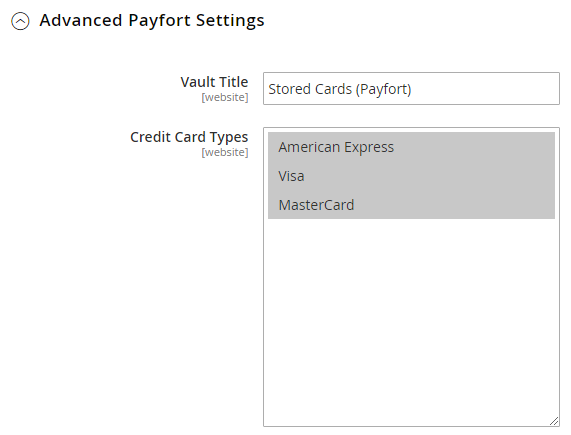
- Vault Title: Specify title for vault, it will be shown to customer for saved card page
- Credit Card Types: Select types of credit card you want to allow, you can allow multiple cards

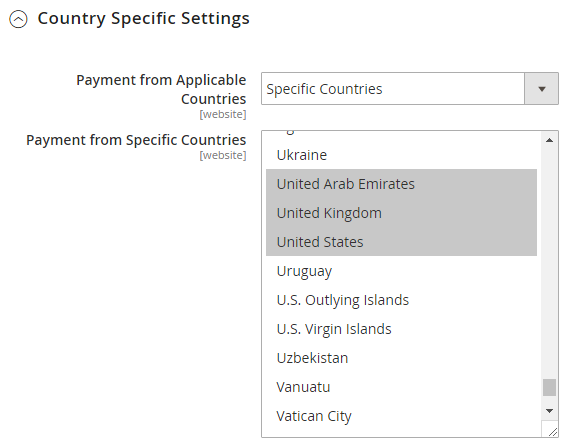
- Payment from Applicable Countries: You can allow all countries or specific county to make payment using Payfort Payment Gateway
- Payment from Specific Countries: Select countries you want to allow for Payfort Payment Gateway
Backend Functionality
Admin can place an order from admin panel using Payfort payment gateway. Admin can save card for customer, too.
Admin can place an order from admin panel using Payfort payment gateway using existing saved card.

Admin can check payment method used while placing an order on order details page.
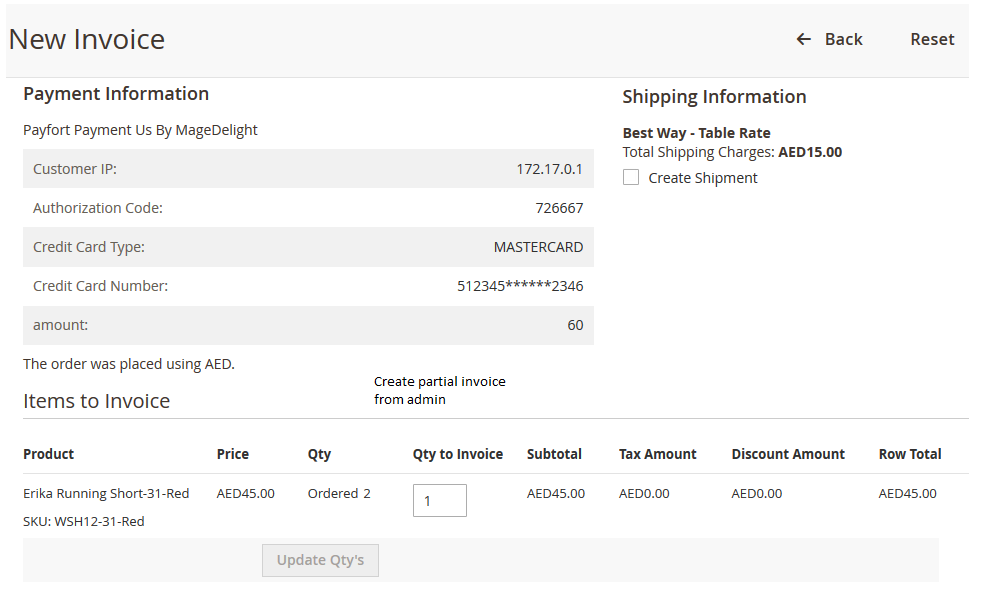
Admin can create full invoice or partial invoice for Payfort payment gateway.
Frontend Functionality
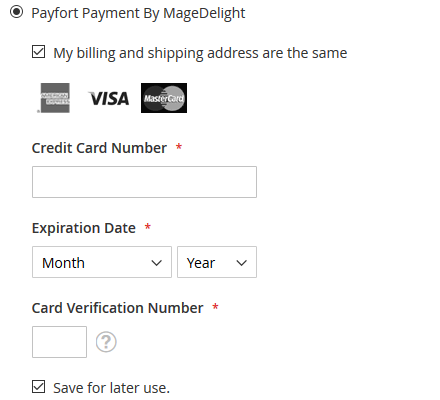
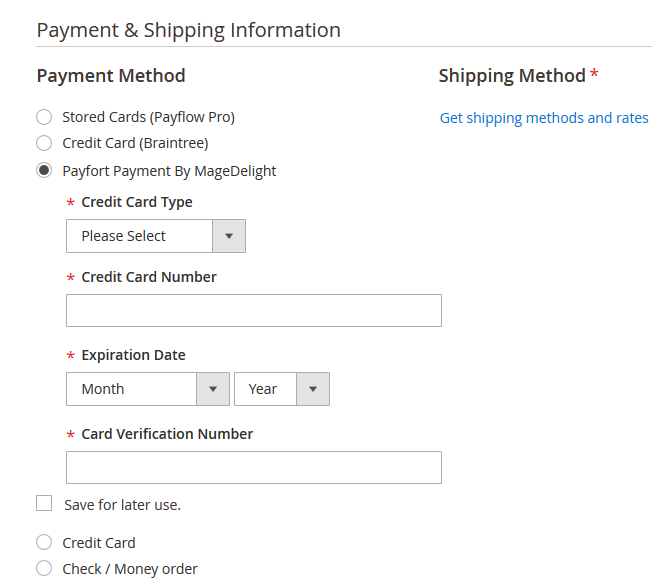
Customer will get option to pay using Payfort Payment Gateway as shown in above image. Customer can check "Save for later use" checkbox to save current card for future purchases. Card details will be stored on Payfort's server. While placing order for future, customer have to provide CVN/CVV number to validate the card.
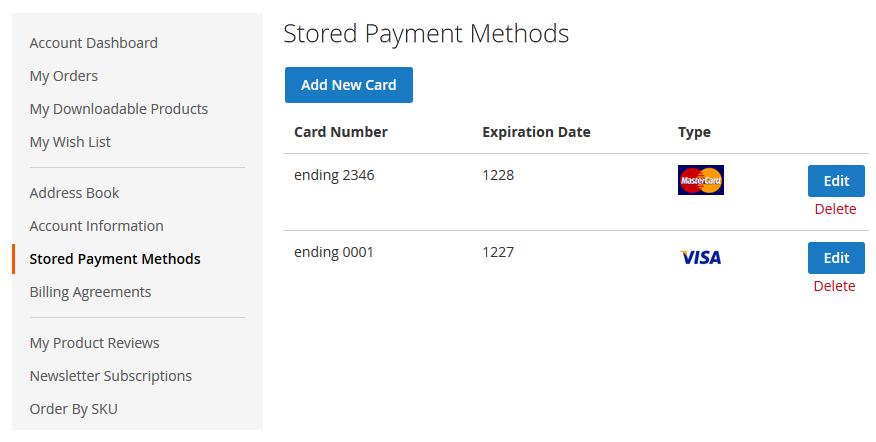
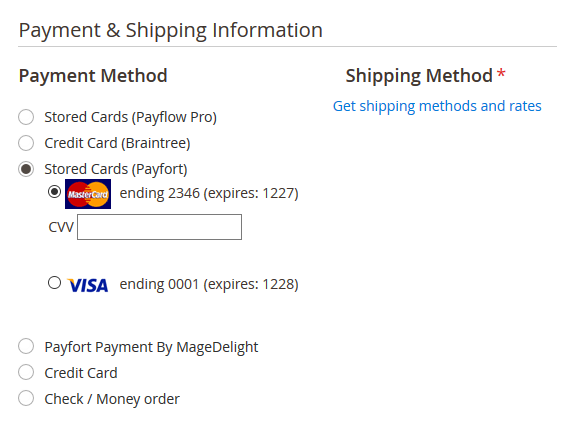
Customer can manage their save card from their "My Account" section. Customer is allowed to edit card details as well as delete the card details.
Demo
Click here to visit product detail page.
Click here to visit frontend.
Click here to visit backend admin panel.
FAQs
Thank you for choosing MageDelight!