
Installation
Before installing the extension, please make sure to Backup your web directory and store database
- Unzip the extension package file into the root folder of your Magento 2 installation.
- Connect to SSH console of your server:
- Navigate to the root folder of your Magento 2 setup
Run command as per below sequence,
php-f bin/magentomodule:enable Magedelight_GeoIp
php-f bin/magentosetup:upgrade
php -f bin/magento setup:static-content:deploy
- Flush store cache
- log out from the backend and log in again
License Configuration
License activation is not required for extension purchased from Magento Marketplace.
After successful installation of GeoIP Advance extension, you are now required to configure the license key in the admin configuration section. You can set it from:
Step 1: Go to, Admin Control Panel > Stores > Configuration > Magedelight > GeoIP Setting > License Configuration.
You will find two text boxes asking for Serial Key and Activation Key, which you received on email upon the purchase of extension. See screenshot below:
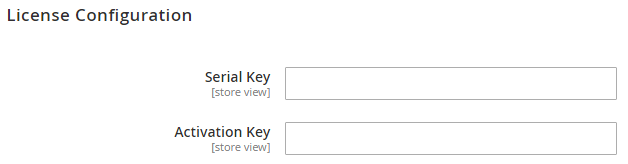
- Serial Key: Enter Serial Key
- Activation Key: Enter Activation Key
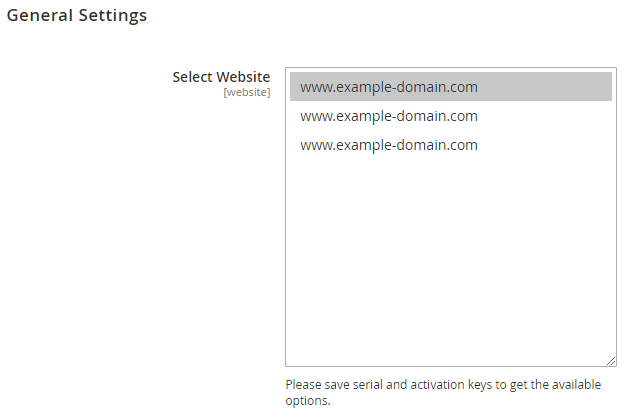
Step 2: Expand “General Configuration” tab, you will find a list of domains for which license is purchased and configured, now select the domain you are going to use, you can select multiple domains by clicking “Ctrl + Select”.
Step 3: Now, select “Yes” from “Enable Module” to enable extension and again click on “Save Config” button on the top right.

Backend Configuration (Admin side)

General
- Enable Module: You can enable or disable the module in here. Select Yes to enable the module
- First Visit Redirect Only – if set to yes, admin can provide option to customers to switch the currency and store view. For eg. By default it will open website of USA if user is opening store from USA. But with this option user will have the option to select the store view of other countries.
- Ask Before Auto Redirect – Manage First visit redirection by this option. Set this field to Yes to ask user whether they want to get redirected to different store view detected as per their IP location or not. And to prevent first visit redirection, select option "No" and keep customer on same store.
- Change Default Tax Country – Automatically change default tax country by setting this field value to “Yes”. Location of the user will be detected automatically and tax would be applied as per the current location of the user.
- Change Default Country - Automatically change default country by setting this field value to “Yes”. Location of the user will be detected automatically and location would be set as per the current location of the user.

- Title: You can add title for the pop-up box appear first time when user visits the store
- Description: You can add description for the pop-up box appear first time when user visits the store

- Restriction Logic: You can select the logic from which pages your customers should be redirected
- User Agents to Ignore: Avoid unwanted store switching for user agents and search engine spiders. You can specify which of them to ignore.
- Ignore IP: You can add list of IPs to let them bypass the redirection rules set.
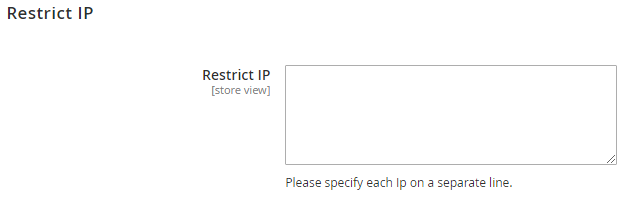
- Restrict IP: Ban user from accessing your site. You can add list of IPs of unwanted customers from accessing the site content. Those customers will be redirect to 404 not found page.
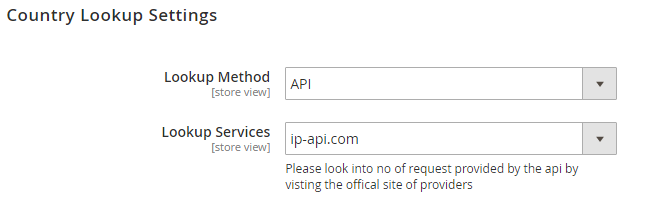
- Country Lookup Settings:
There are two lookup MethodsAPI: When you choose API you will see a list of lookup service provider option below. You can select the service you like to get the country location based on IP.
Please look into no of request provided by the API by visiting the official site of providers.
Database: In database Option we use MaxMind Country IP Database for GeoIP Information. MaxMind is very reliable and updates its database every month.
Make sure you have imported the database before selecting this option. Click here to check import instructions.

Log Settings: If you enable yes to this setting you will get all IP redirection information in - var/log/md_iplog.log
Backend Functionality
Importing Country List
The process may take around 10 to 20 minutes. Do not close or do any other process in any tabs till the process is completed. If there are any previous imported data, it will be replaced with the new one.

When you use lookup method as database. You need first to import GeoIp Information to your database.
We use MaxMind Country IP Database for GeoIP Information. MaxMind is very reliable and updates its database every month. You can download the latest database from below URL http://geolite.maxmind.com/download/geoip/database/
Download the file GeoIPCountryCSV.zip and extract it to the /var/ folder inside Magento. Make sure that the file is named as GeoIPCountryWhois.csv and 777 rights are given to the your Magento install dir/var folder. You can start import process by clicking the Import button.
Import Using Magento CLI: You can also start import process using Magneto CLI
Run command to get list of commands in magento CLI
php bin/magento list
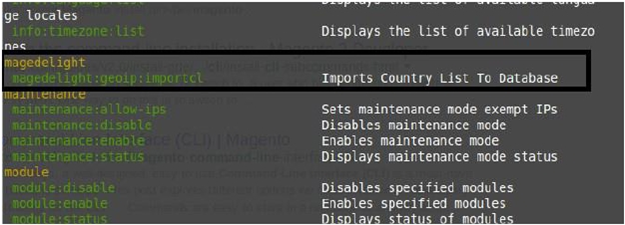
Run command to start import process from CLI
php bin/magento magedelight:geoip:importcl
Frontend Functionality
Demo
Click here to visit product detail page.
Click here to visit frontend.
Click here to visit backend admin panel.
Sample Data
FAQs
Thank you for choosing MageDelight!