License Configuration| Note |
|---|
License activation is not required for extension purchased from Magento Marketplace. |
After successful installation of Size Chart Popup extension, you are now required to configure the license key in the admin configuration section. You can set it from: Step 1: Go to, Admin Control Panel > Stores > Configuration > Magedelight > Size Chart Popup > License Configuration. You will find two text boxes asking for Serial Key and Activation Key, which you received on email upon the purchase of extension. See screenshot below: | Panel |
|---|
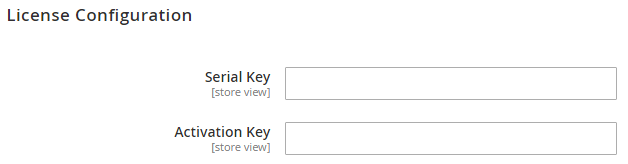 Image Removed Image Removed
|
- Serial Key: Enter Serial Key
- Activation Key: Enter Activation Key
Step 2: Expand “General Configuration” tab, you will find a list of domains for which license is purchased and configured, now select the domain you are going to use, you can select multiple domains by clicking “Ctrl + Select”. | Panel |
|---|
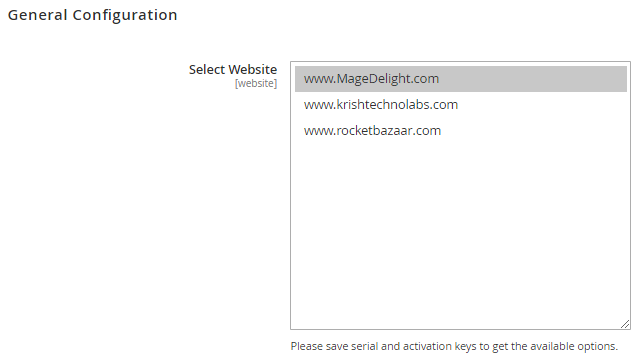 Image Removed Image Removed
|
Step 3: Now, select “Yes” from “Enable Module” to enable extension and click on “Save Config” button on the top right.| Panel |
|---|
 Image Removed Image Removed
|
|