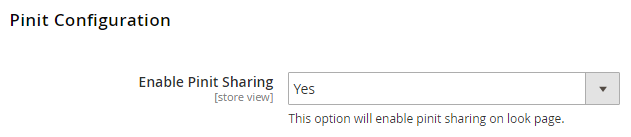
Backend Functionality
| Panel |
|---|
|
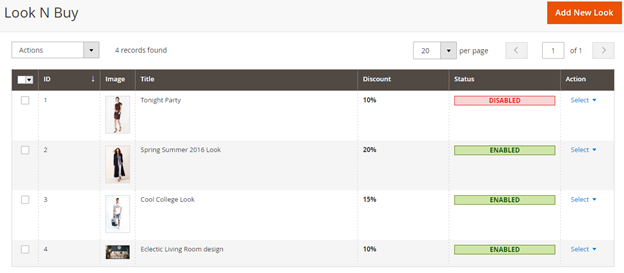
As shown with above screenshots, you will find list of created looks. It shows basic information with grid like ID, image, look name, discount if applied and status of look. | Panel |
|---|
|
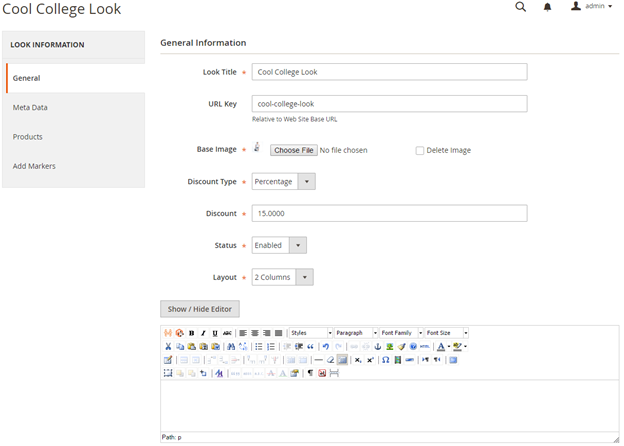
General - LookTitle: Set the title of look you are creating.
- URLkey: You can set SEO friendly URL of look page.
- BaseImage: Upload main image of look, based on which you will be creating a look.
- Discounttype: Here, you can define type of discount, if customer purchase whole look. This can be Fixed or Percentage.
- Discount: Discount amount based on discount type. If you have set discount type to percentage, discount will be applied on total cost of look else it will be fixed amount of discount.
- Status: You can disable a look here.
- Layout: It provides two type of layout for look, 1 column and 2 columns. You can select layout for your looks based on Base image of look.
- If your design is horizontally broader, you can select 1 column layout. With this, image will be displayed horizontally covering full page size, following with products of look.
- If you set to two-column, look image will listed on left side where as all products will be listed on right hand size of the page.
- Description: You can describe the look you are creating.
| Panel |
|---|
|
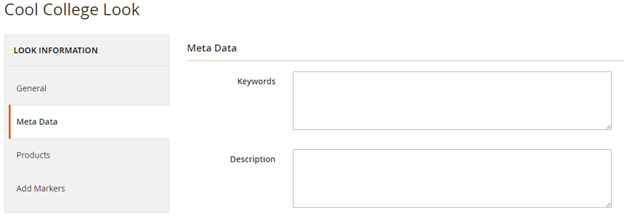
Meta Data - Keyword: Here you can set Meta keywords for particular look detail page.
- Description: Set Meta description for look detail page.
| Panel |
|---|
|
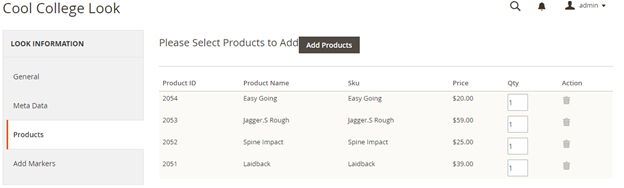
You can select products available/index to particular look. You can search product based and select to include with look. For selected product you can define product quantity to complete look. Once you done with product selection, you have to save the look. Once you salve save look you will have access to next tab called Add Markers. This one is main part and important to create look. Here you can define mark point and represent the products. | Panel |
|---|
|
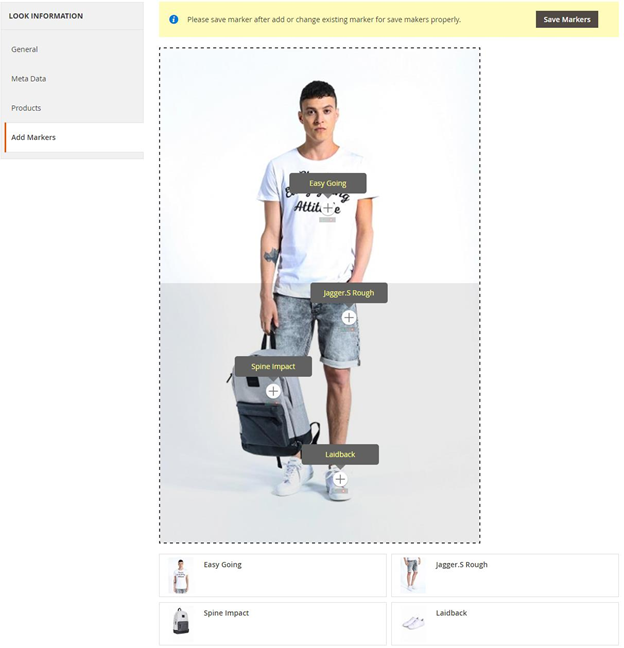
As you can see with above screenshot, the main image of look is on top and all assign/added products are listed below of images. The look image is covered with JS marker area. You only have to click the point where you need to add marker/tag product on look image. | Panel |
|---|
|
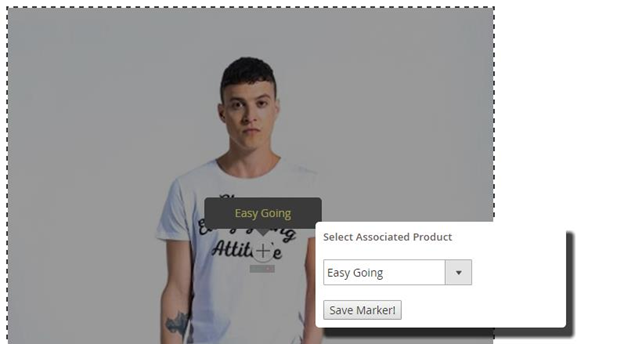
Once you add marked on look image, there would be two action buttons next to marker image. One is for selecting product for marker/tag and another is delete marker image. |