
Installation
To use this extension, you will require to install MageDelight Base Extension first. If it is not installed then please download it from https://www.magedelight.com/extensions/magedelight-base-extension.zip and unzip the package file into the root folder of your Magento 2 installation.
Before installing the extension, please make sure to Backup your web directory and store database
- Unzip the extension package file into the root folder of your Magento 2 installation.
- Connect to SSH console of your server:
- Navigate to the root folder of your Magento 2 setup
Run command as per below sequence,
php -f bin/magento setup:upgrade
php -f bin/magento module:enable Magedelight_SocialLogin
php -f bin/magento setup:static-content:deploy
- Flush store cache
- log out from the backend and log in again
Backend Configuration (Admin side)
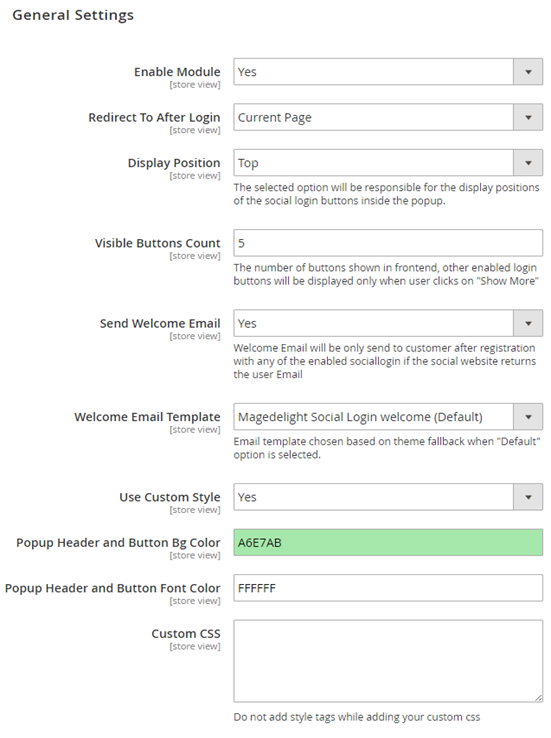
- Enable Module: Enable/Disable social media login extension at frontend .
- Redirect to After Login: You can set redirect option to login, where customer should be redirected. It has three options Current Page, My Account and Home page.
- Display Position: Set any of 4 positions of social login bar in Pop up.
- Top: Set social login bar above the registration/login form in popup
- Bottom: Set social login bar below the registration/login form in popup
- Left: Set social login bar on left side of the registration/login form in popup
- Right: Set social login bar on right side of the registration/login form in popup
- Visible Button Count: As it supports 15 Social Medias, you can manage top prioritized options to show on top and rest options would be hidden under show more button.
- Send Welcome Email: Select yes to send welcome email to customers on registration. This email would be sent only if customer is doing registration from enabled social media.
- Welcome Email Template: Select welcome email template.
- Use Custom Style: Select yes to customize popup header and button background color and popup header and button font color.
- Popup Header and button Bg Color: select background color of popup header and button.
- Popup Header and button Font Color: select font color of popup header and button.
- Custom CSS: Use custom CSS to change the style of registration/login popup.
- Enable: Defined Google map API key.
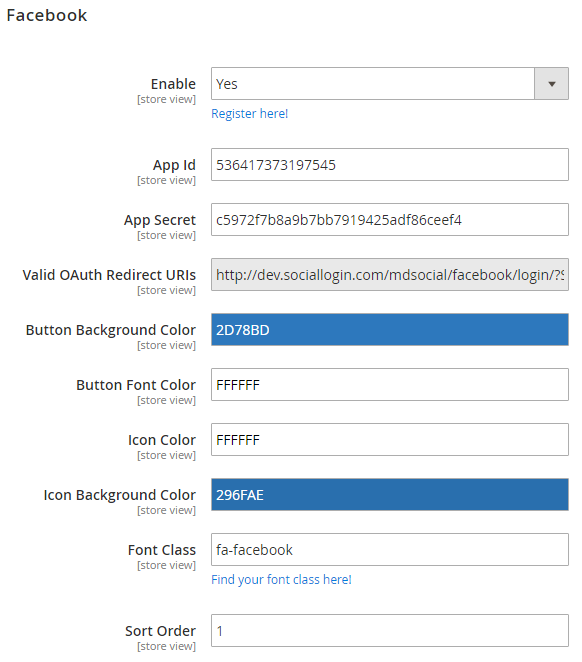
- App ID: Facebook app ID.
- App Secret: Facebook app secret ID.
- Valid OAuth Redirect URL: Valid OAuth redirect URL, to redirect after successfully authorized. It would static and not editable.
- Button Background Color: Select “Login by Facebook” button background color.
- Button Font Color: Select “Login by Facebook” button font color.
- Icon Color: Select icon color (Facebook icon gets displayed on button).
- Icon Background Color: Select background color of icon.
- Font Class: Select font class to select the icon to get displayed on Facebook login button.
- Sort Order: You can manage order number to show particular social login option on priority among 15 available social media login option.
Same as Facebook you can manage other social media options listed below,
- Windows Live
- Amazon
Apple Login Config.
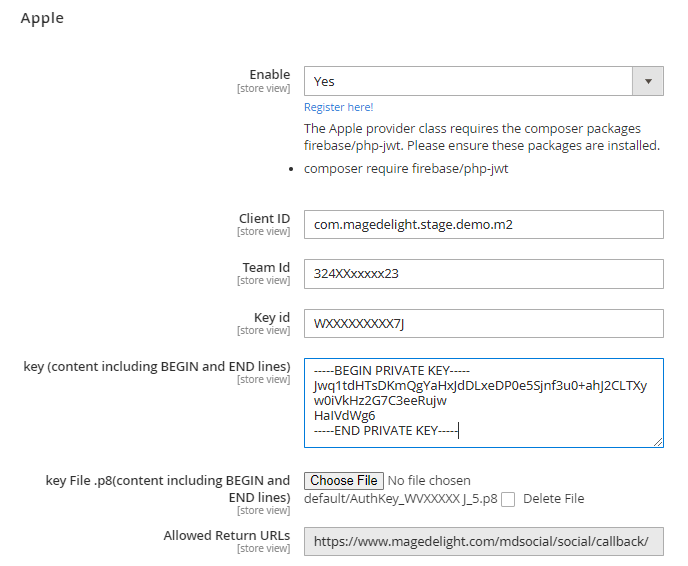
- Enable: Select Yes to enable Apple Login.
- Client ID: Provide Client ID from Apple Portal.
- Team ID: Provide Team ID from Apple Portal.
- Key ID: Provide Key ID from Apple Portal.
- Private Key (content including BEGIN and END lines): Provide Private Key with Begin and End lines.
- Key File .p8(content including BEGIN and END lines): Provide Key file with .p8 extension found from Apple Portal.
- Allowed Return URL: Allowed Return URL will be used to set at Apple Web Authentication Configuration.
Your Apple Team ID can be found in the Membership section of your Apple Developer Account.
Apple Portal Configurations
Create an App ID
- After logging in to the Apple Developer Portal, navigate to the Certificates, Identifiers, and Profiles section of the menu.
- To get started, you will have to make an App ID for yourself. To add identifiers to your Apple Developer Account, go to the Certificates, Identifiers, and Profiles menu and then select Identifiers. After that, you should click the blue + icon. On the following screen, you will be prompted to input the AppID's Bundle ID and description. The description is for internal use, so you can name it whatever you like. For easy identification, use descriptive names.
- In this particular illustration, the name of the Description field is Social Login for #DomainName#.store Bundle ID. It is preferable for the Bundle ID to have the format of a reverse DNS string. E.g. Social Login for magedelight.store
- Find the checkbox for "Sign In with Apple" by scrolling down the "Capabilities" section. To make it work, you have to check the box. After that, you'll need to click the Proceed button that's located in the top right corner. Keep the App ID safe.
Create a Services ID
- Log in to your Apple Developer Account and head to the Certificates, Identifiers & Profiles menu option. From there, select Identifiers. After that, you'll need to create a new identifier by clicking the blue plus icon. Choose the Services IDs option when prompted this time. The Services ID will identify the specific instance of your app, and it will also serve as the OAuth client_id for that instance.
- On the following stage, you will be asked to input the Description that the user will see during the login process as well as the Identifier, which will become the OAuth client_id. In a similar manner, select the box labelled Sign In with Apple.
- To configure your account, select the Sign In with Apple checkbox and then click the Configure button.. At this point in the process, you will be able to define the domain that your app is operating on as well as the redirect URLs that will be used throughout the OAuth procedure.
- The pop-up window for configuring settings will look like this when it appears. Make certain that the App ID that you created in the step before this one is selected as the Primary App ID. If this is the first time you've ever created an App ID that uses the Sign In with Apple feature, it's probable that the option is already selected for you.
- Apple requests that you take into consideration that localhost URLs and IP Addresses are not permitted in this phase. Kindly use a valid domain name here. In order to finish configuring the Services ID, you need to first save the data you entered by selecting the buttons labelled Next, Save, Continue, and Register.
Create a Private Key for Client Authentication
- It will be necessary for you to generate a Key ID. To access the Keys, navigate to the Certificates, Identifiers & Profiles and Keys section of your Apple Developer Account. After that, select the blue + icon from the toolbar.
- Enter the name of the key. It is important to remember to choose the box labelled Sign In with Apple and specify all of the necessary options.
- After that, click the Continue button. In the following step, you will link the Primary App ID that is displayed in the menu to the App ID that you initially generated.
- In order to move forward with the successful configuration, you will need to press the Save and Register buttons.
- Apple will produce a brand new private key for you after the key configuration has been completed successfully. You will be given the option to save the Key file using the '*.p8' format to your computer.
Last but not least, look through the key information to locate your Key ID, which you will use in order to configure the extension in the Magento 2 backend. Download the Key file, and then save it. The configurations for your Apple ID should then be uploaded into it.
Please take into consideration that you will only be able to download the Key file once. Please check that the file has been saved in a safe location so that you will be able to access it again if it is required in the future.
Backend Functionality
Social Media Login Report
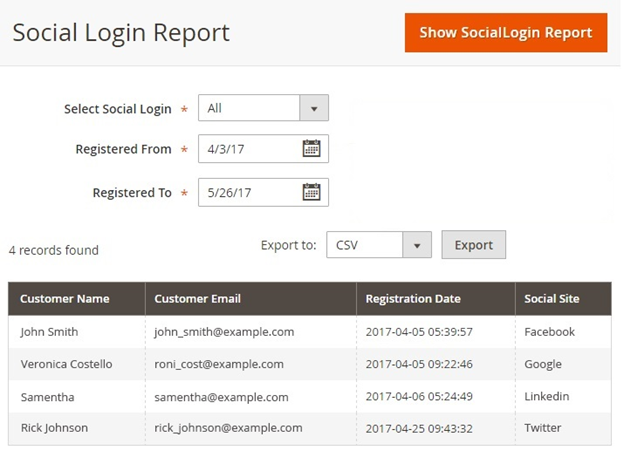
- Select Social Login: Select the type of social media for which you want to see the report. This would display users logged in using selected social media.
- Registered From and Registered To: Select the time period for which you want to see the report.
- Show SocialLogin Report: Click on Show SocialLogin Report button to generate the report.
- Export to: Select the file type (CSV or Excel XML) to export the report to.
Frontend Functionality
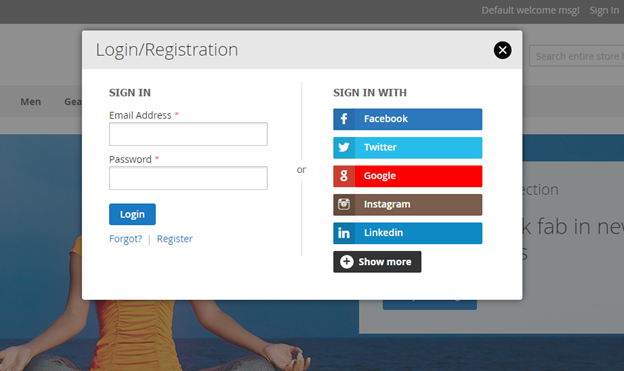
- Login option with limited text.
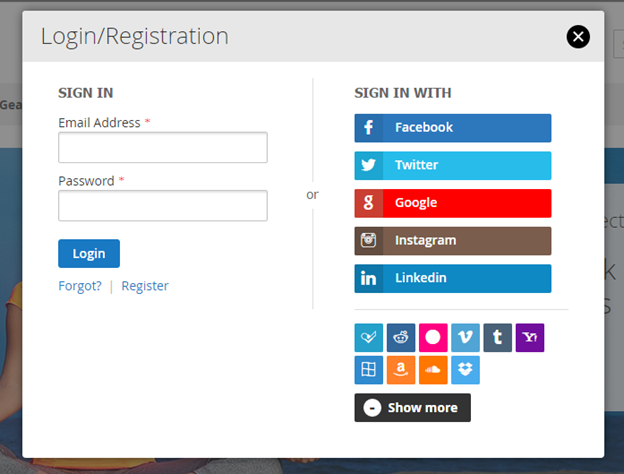
- Login option with all available login options
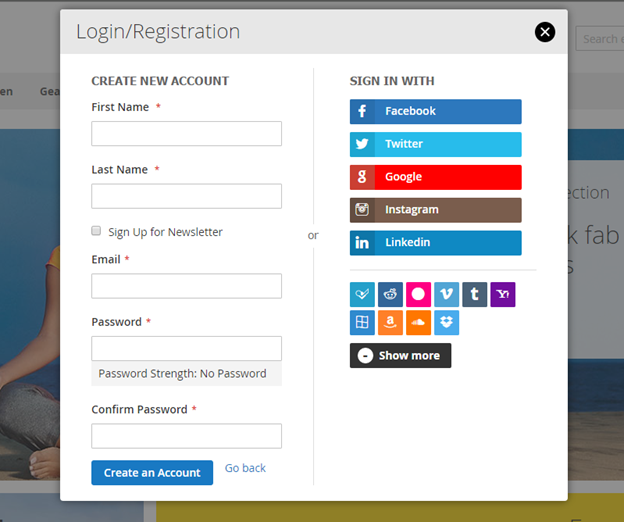
- Registration form
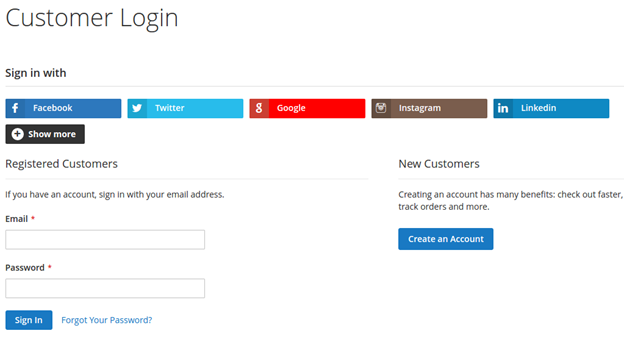
- Social media login option on customer login page
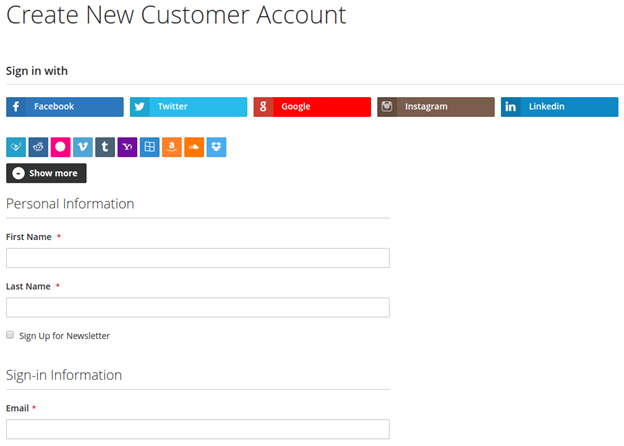
- Social media login option on customer registration page
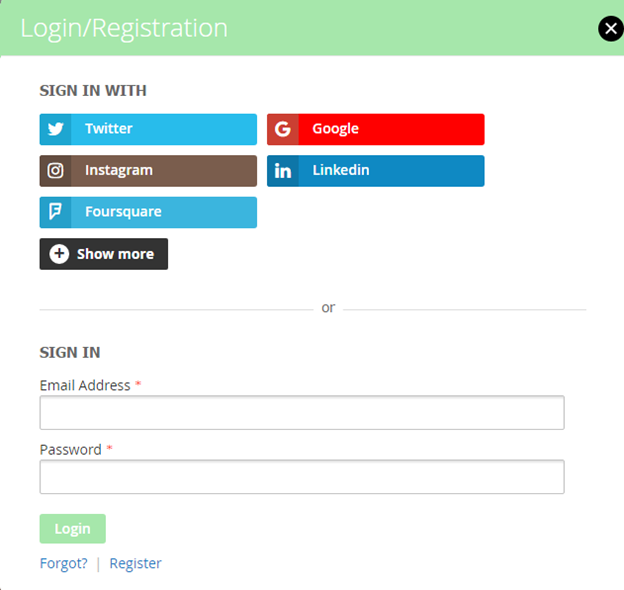
- Social login bar on top of login/registration popup with header and login button style change
API
Please use SWAGGER to get detailed information of parameters.
https://socialmedialogin.m2.demo.magedelight.com/swagger#/magedelightSocialLoginSocialLoginApiServicesV1
Login with Social Media (via Google) : rest/V1/authenticateCustomerWithSocialLoginWithApi
SocialLogin/ Login with Social Media (via Google)
Sample Data
Login with Social Media (via Facebook): rest/V1/authenticateCustomerWithSocialLoginWithApi
SocialLogin/Login with Social Media (via Facebook)
Sample Data
Demo
Click here to visit product detail page.
Click here to visit frontend.
Click here to visit backend admin panel.
Thank you for choosing MageDelight!