![]()
Installation
Before installing the extension, please make sure to Backup your web directory and store database
You will require to install MageDelight Base Extension first. If it is not installed then please download it from https://www.magedelight.com/pub/extensions/magedelight-base.zip and unzip the package file into the root folder of your Magento 2 installation.
Root Directory is - "app/code/magedelight/#YourExtensionName#"
- Unzip the extension package file into the root folder of your Magento 2 installation.
- Connect to SSH console of your server:
- Navigate to the root folder of your Magento 2 setup
Run command as per below sequence,
php bin/magento setup:upgrade
php bin/magento setup:di:compile
php bin/magento setup:static-content:deploy
php bin/magento cache:clean
- log out from the backend and log in again
If you are using Magento 2.3 or later then you do not need to activate license. Extension will be activated with silent activation mechanism and does not require activation keys to be entered manually.
Backend Configuration (Admin side)
Go to Admin Control Panel > Stores > Configuration > Magedelight > SMS Notification > General Configuration.
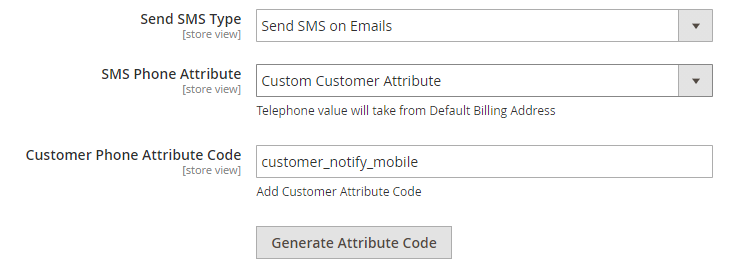
- Send SMS Type: Select SMS sending types from below as per need. You can select any one from below,
- Send SMS on Events: Select events to send SMS notifications. (From main menu you will be redirected to SMS Template page to map event based templates)
- Send SMS on Emails: Select Emails template to send SMS notifications. You can map SMS template with email templates so when email will be sent at the same time SMS also will be sent to customer. (From main menu you will be redirected to SMS Template page to map email based templates)
- Send SMS on Events: Select events to send SMS notifications. (From main menu you will be redirected to SMS Template page to map event based templates)
- SMS Phone Attribute: Select Phone number to send SMS
- Custom Customer Attribute: You can set any custom customer attribute to map phone number or you can generate customer attribute from below given button.
- Customer Phone Attribute Code: Provide custom customer attribute code to identify phone number attribute.
- Telephone Address Attribute: If this option selected then it will take phone number to send SMS from your default billing address.
- Custom Customer Attribute: You can set any custom customer attribute to map phone number or you can generate customer attribute from below given button.
Note: Please flush cache to get proper configuration settings and redirection after saving configurations.
Twilio Configuration Settings
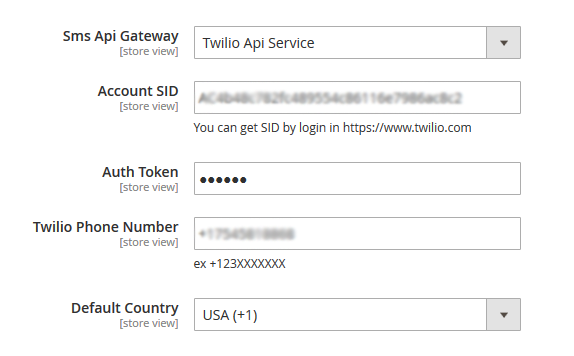
- Sms Api Gateway: Select which service provider you want to integrate (Above settings are for Twilio Api Service).
- Account SID: Enter account SID given in Twilio account.
- Auth Token: Enter auth token from Twilio account.
- Twilio Phone Number: Enter phone number which you have purchase in Twilio account.
- Default Country: Select country within which SMS notifications should be sent.
- To use Twilio service provide, Twilio SDK is required. Run Command for twilio sdk : composer require twilio/sdk.
- For each message the extension updates delivery status at 5 minutes using cron job. First status will always be "Queued" and then depending on delivery success/failure the status will be updated in SMS log.
- Click here to know how to search and buy Twilio phone number.
BulkSMS Configurations Settings
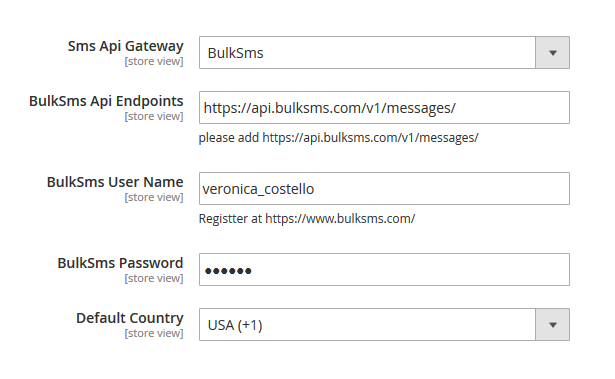
- Sms Api Gateway: Select which service provider you want to integrate (Above settings are for BulkSms).
- BulkSms Api Endpoints: Add URL given as example for the setting.
- BulkSms User Name: Enter BulkSms user name.
- BulkSms Password: Enter password of BulkSms account.
- Default Country: Select country within which SMS notifications should be sent.
- For multi-language support please check which languages are being supported by service provider. The extension will support all languages supported by provider.
- For each message the extension updates delivery status at 5 minutes using cron job. First status will always be "Sent" and then depending on delivery success/failure the status will be updated in SMS log.
Other SMS Service Provider Configuration
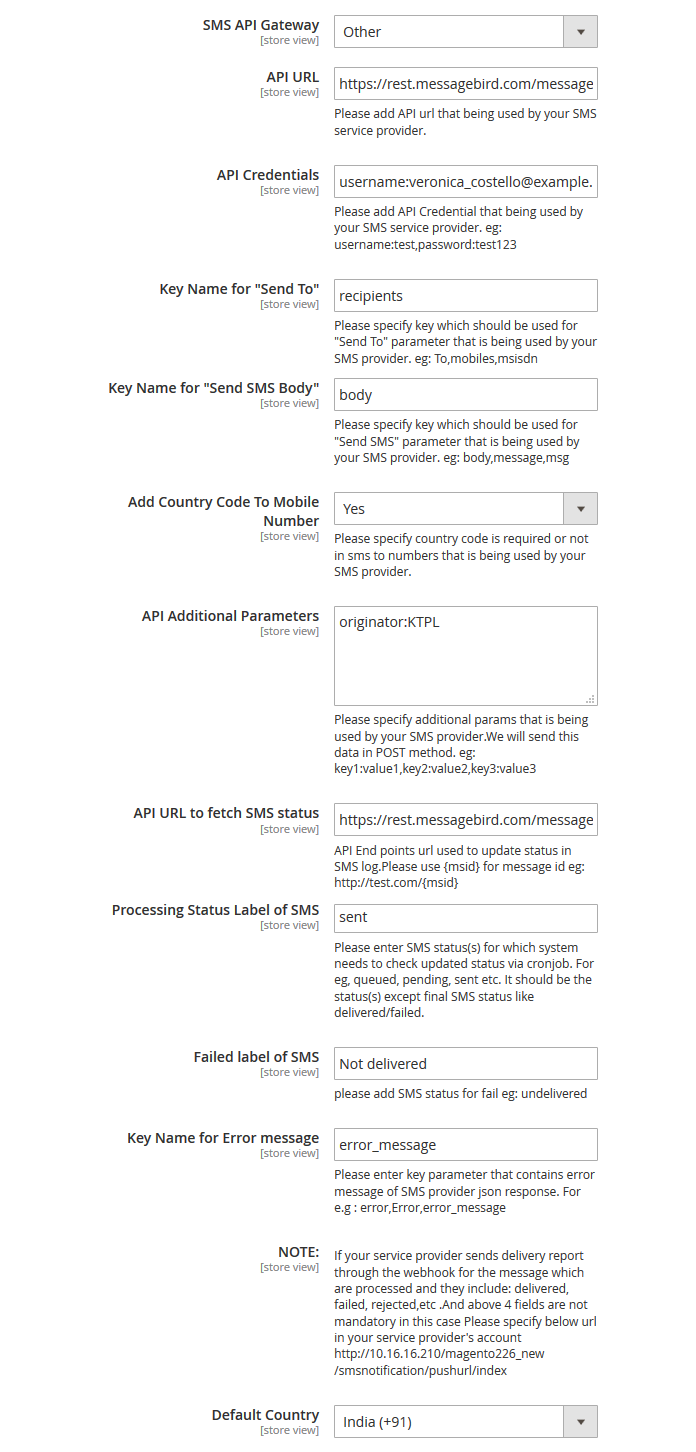
- API URL: Enter API URL of the service provider to be used.
- API Credentials: Enter API credentials which is being used by service provider.
- Key Name for "Send To": Set key which should be used for receiver (Send To) parameter that is being used by your SMS provider. eg: To,mobiles,msisdn
- Key Name for "Send SMS Body": Set key which should be used for message body part (Send SMS) parameter that is being used by your SMS provider. eg: body,message,msg
- Add Country Code to Mobile Number: Set Yes if service provider requires mobile number to be sent with country code otherwise set No.
- API Additional Parameters: Set all additional parameters as required by API with its value. Mention parameters with comma separated for example, Key1:value1, Key2:value2 etc.
- API URL to fetch SMS Status: This field is used to get various status of SMS sent. Use API End points url to update status in SMS log. For example, use {msid} for message id and URL will be http://test.com/{msid}
- Processing Status Label of SMS: Please enter SMS status(es) which system needs to get updated status via cronjob. For eg, queued, pending, sent etc. enter them depending upon which are being used by service provider. There should be the status(es) except final SMS status like delivered/failed.
- Failed label of SMS: Set SMS status for failed message which service provider is using. For example: undelivered. This varies for each service provider.
- Key Name for Error Message: Set key parameter that contains error message of SMS provider's json response. For e.g : error,Error,error_message.
If your service provider sends delivery report through the webhook for the message which are processed and they include: delivered, failed, rejected,etc. And above 4 fields are not mandatory in this case Please specify below url in your service provider's account http://test.com/smsnotification/pushurl/index
- Default Country: Set default country to send SMS. Notification messages will be sent only within country.
Admin SMS Configuration
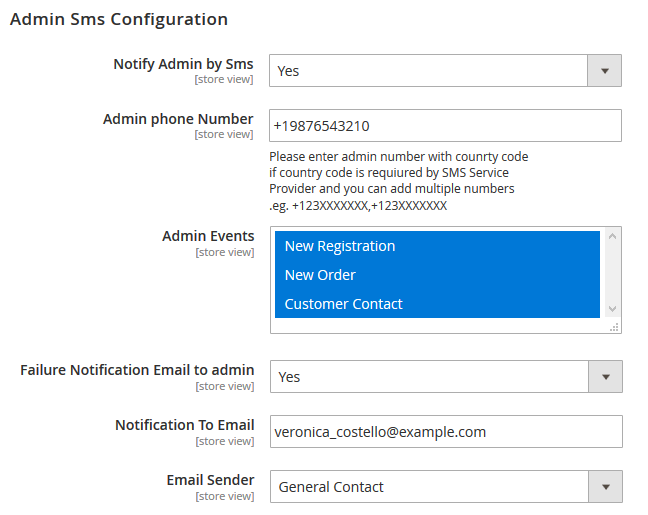
- Notify Admin by Sms: Select Yes to send SMS notification to admin.
- Admin phone Number: Enter admin phone number. Add multiple numbers comma separated.
- Admin Events: Select events from given options on which admin should be notified by SMS.
- Failure Notification Email to admin: Select Yes to notify admin via email if any message delivery failed.
- Notification To Email: Enter admin email id to get notification via email as well. Add multiple email id comma separated.
- Email Sender: Select email sender from given options. Dropdown values are coming from default magento email template settings.
Customer SMS Configuration
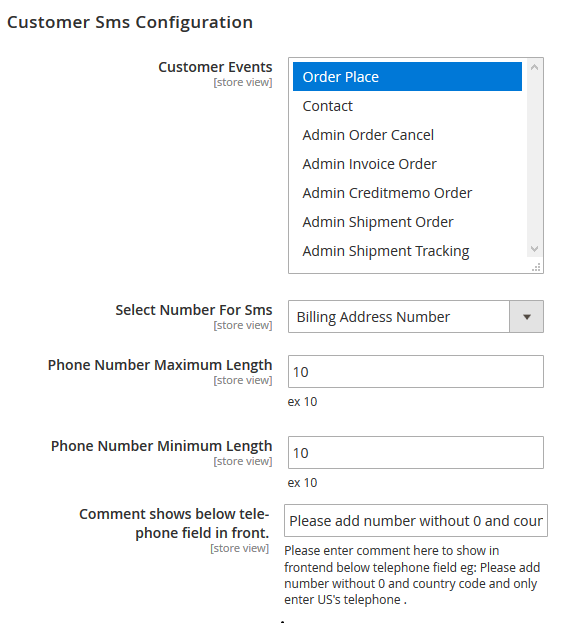
- Customer Events: Select events from given options on which customers should be notified by SMS.
- Select Number For Sms: Select phone number either from customer's billing address or shipping address or both.
- Phone Number Maximum Length: Enter maximum length of phone number. This setting will not allow customer to enter phone number more than specified length.
- Phone Number Maximum Length: Enter minimum length of phone number. This setting will not allow customer to enter phone number less than specified length.
- Comment shows below telephone field in front: Add comment to let customer know about phone number format. If you have multiple stores across the globe then it will help you mention about the country name whose phone number can be accepted.
SMS Log Settings
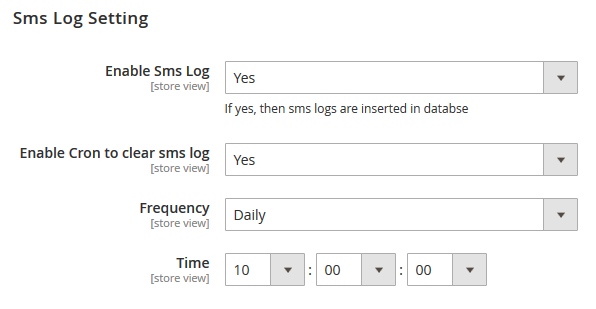
- Enable Sms Log: Select Yes to keep log of all SMS.
- Enable Cron to clear sms log: Enable cron job to clear SMS log.
- Frequency: Select for the cron job to clear the SMS log. You can select frequency Daily/Weekly/Monthly.
- Time: Set time to run the cron job. It is 24 hours format.
Backend Functionality
SMS Templates
Go to Magedelight SMS Notification > SMS Templates to view list of SMS templates available and add new template. Below image shows grid of SMS templates.
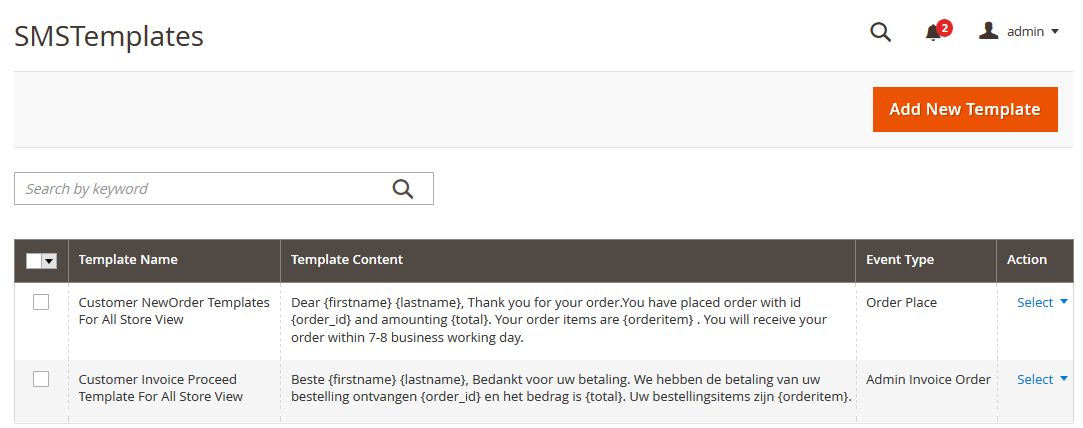
- Add New Template: Click on "Add New Template" button to create new one.
- Edit/Delete: Click on "Select" link from Action column to edit/delete the existing SMS template.
Add New template
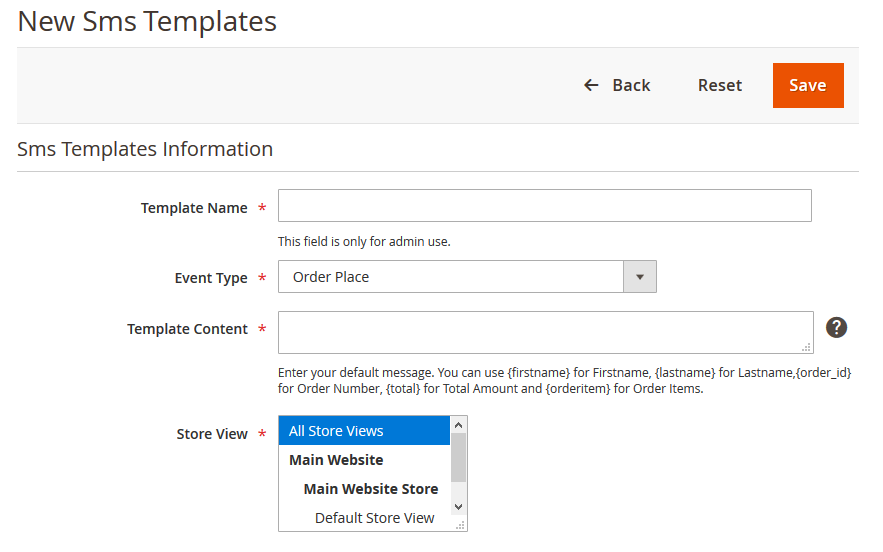
- Template Name: Write template name. This is for internal use for admin only.
- Event Type: Select the event type from give options on which this SMS template should be used to format the SMS.
- Template Content: Write message content. Use customer's first name, last name, order id, order total and order item to properly form the message. How to use the variable is give below the field.
- Store View: Select store view(s) for which the SMS template should be used while sending message on selected event.

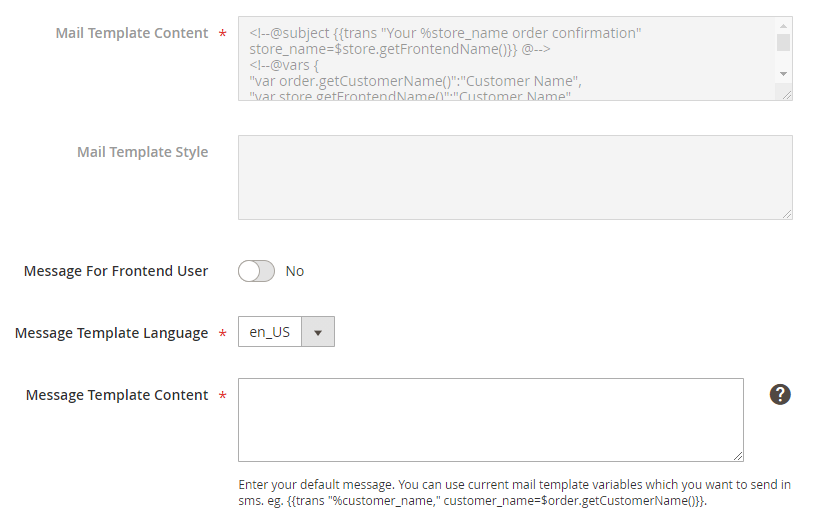
You can load email template as well as design a new SMS template with dynamic values used in email templates.
SMS Log
Go to Admin Control Panel > Magedelight SMS Notification > SMS Log to view history of each SMS.
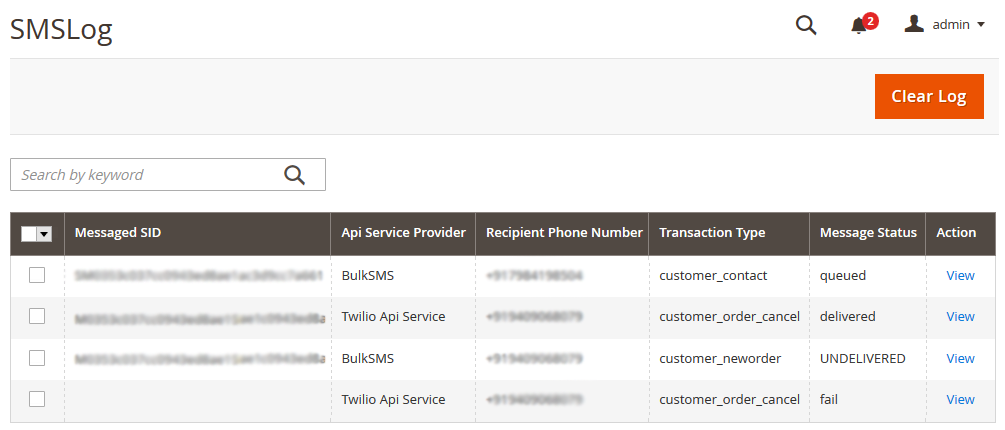
- If SMS log is enabled then extension will save the log as display in above image.
- Clear Log: Click on "Clear Log" button to manually clear the SMS log.
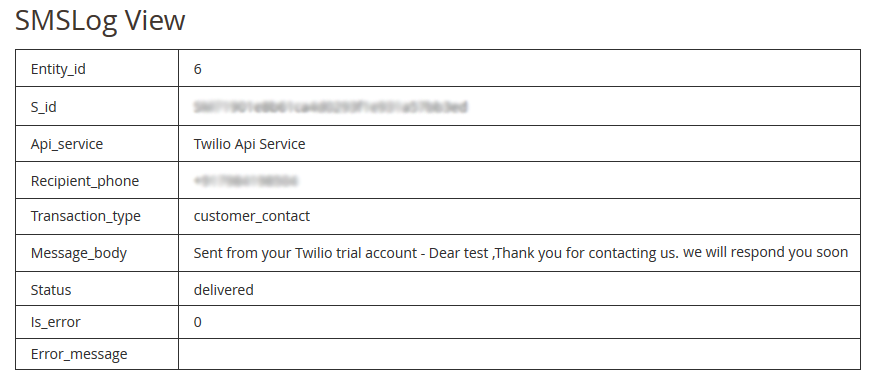
View: Click on "View" link to check the details of particular SMS log. Below image shows how SMS log details will be displayed.
Frontend Functionality
Phone number on Checkout page - Take customers' phone number from checkout page.
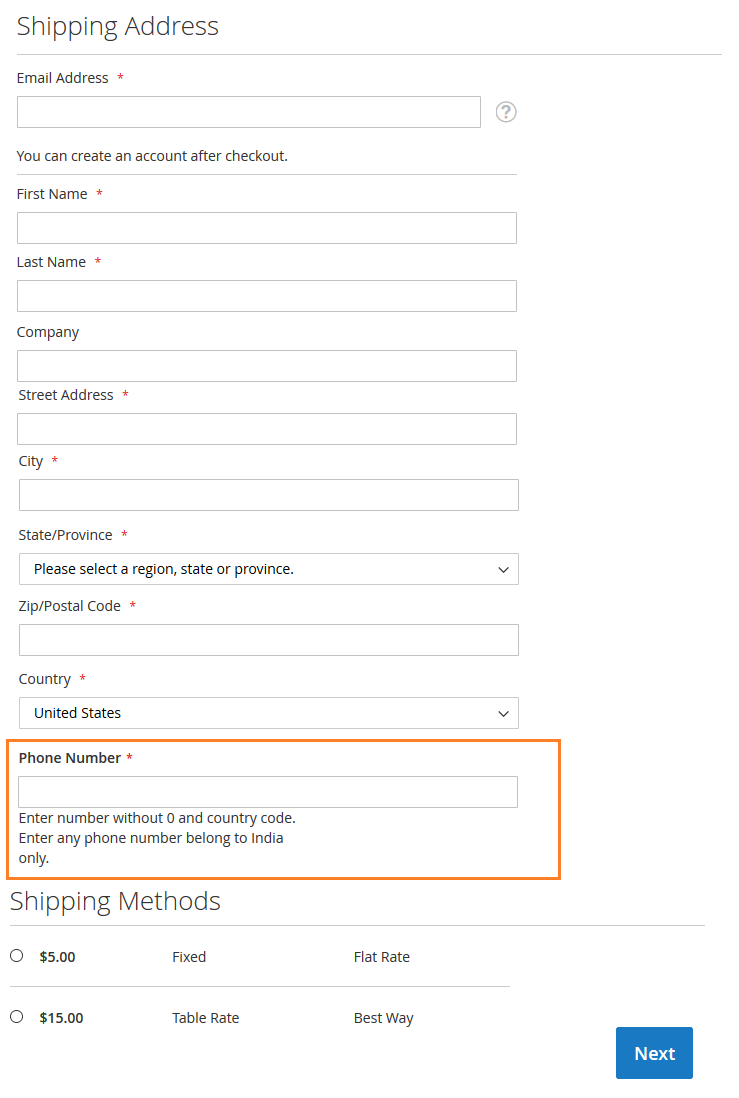
- Phone Number: This is a required field for customers. They will get notifications on the mobile number they entered for the events selected by admin.
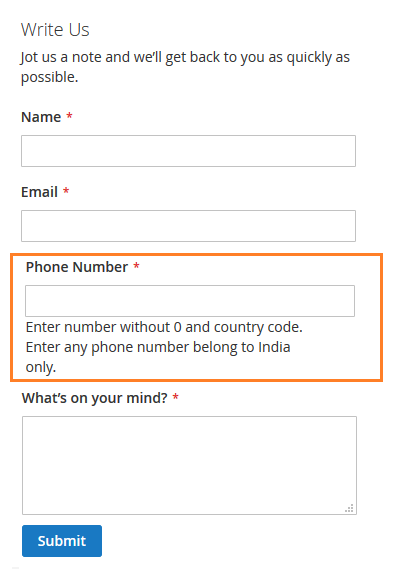
Phone number on Contact us page - Also customer needs to provide phone number while filling up contact us form as shown in below image.
To setup any other service provider than Twilio or BulkSMS, please contact Magedelight. Drop us email on [email protected], we will contact you back and help you setup the SMS notification service for you ecommerce store.
Thank you for choosing MageDelight!