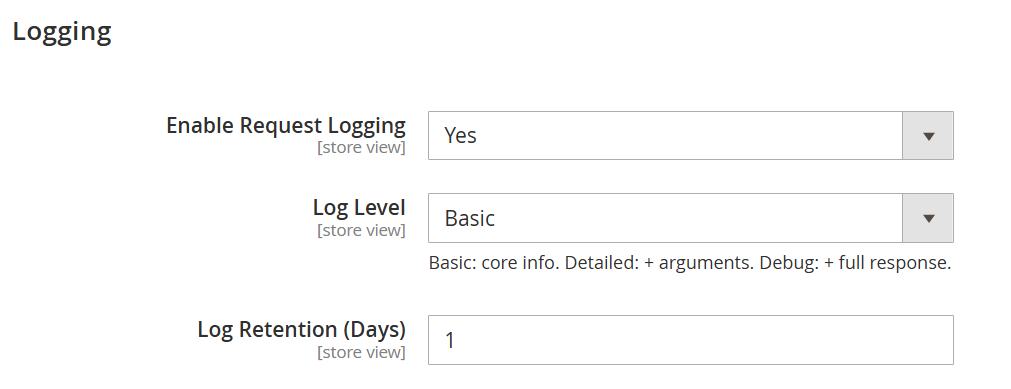
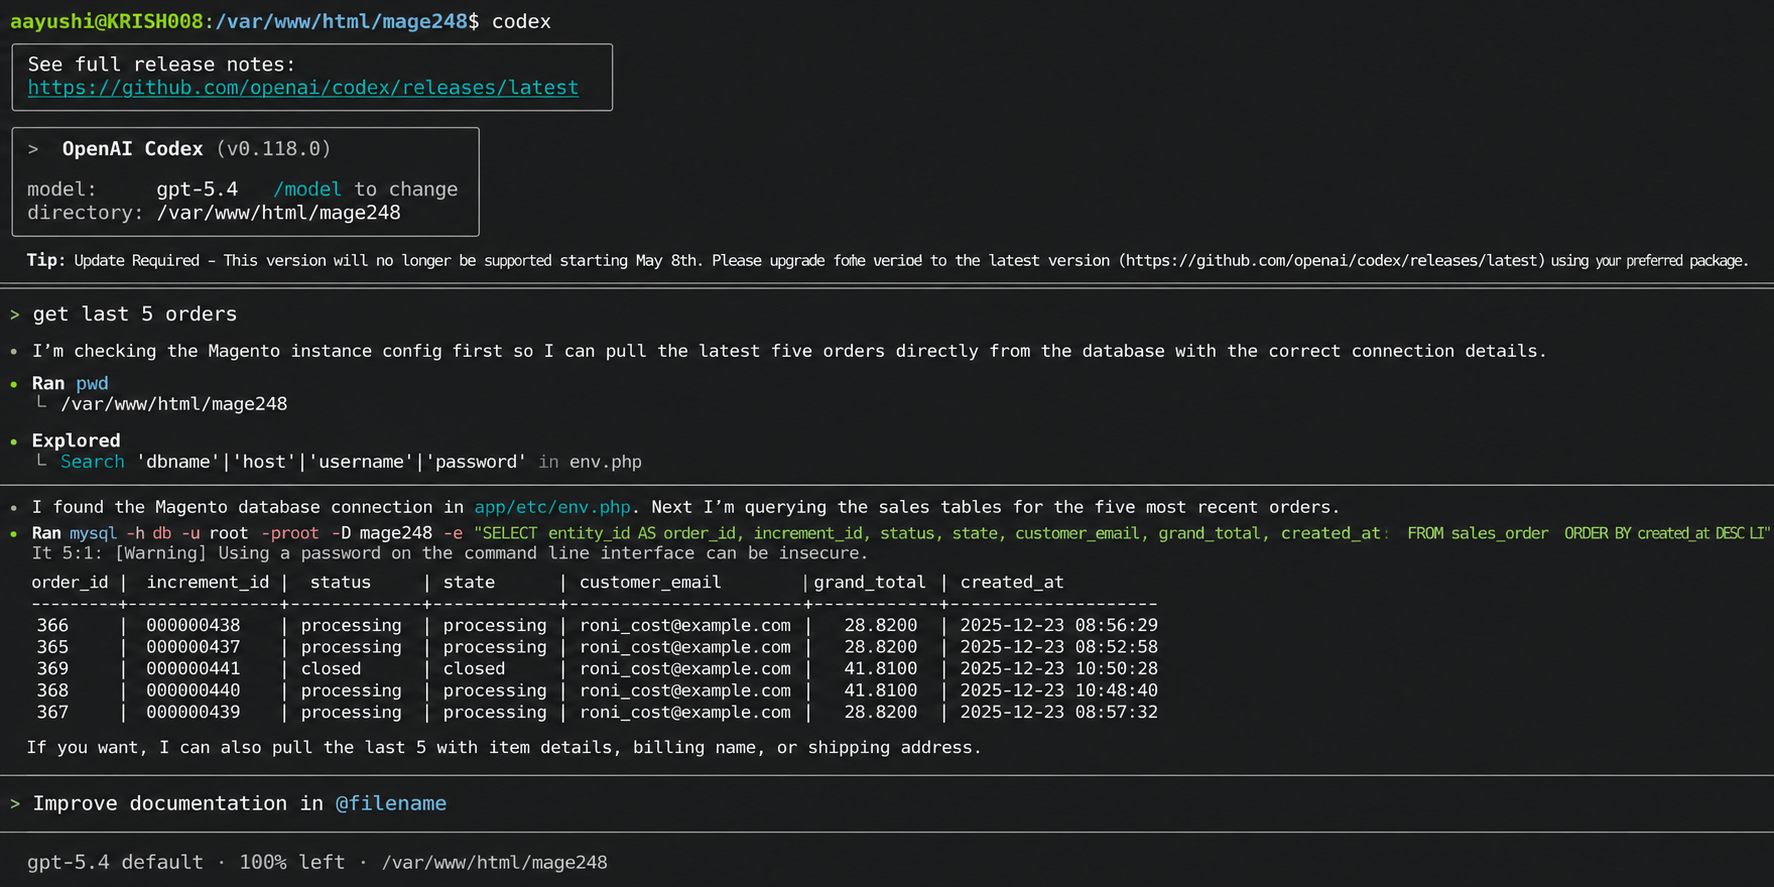
Backend Functionality
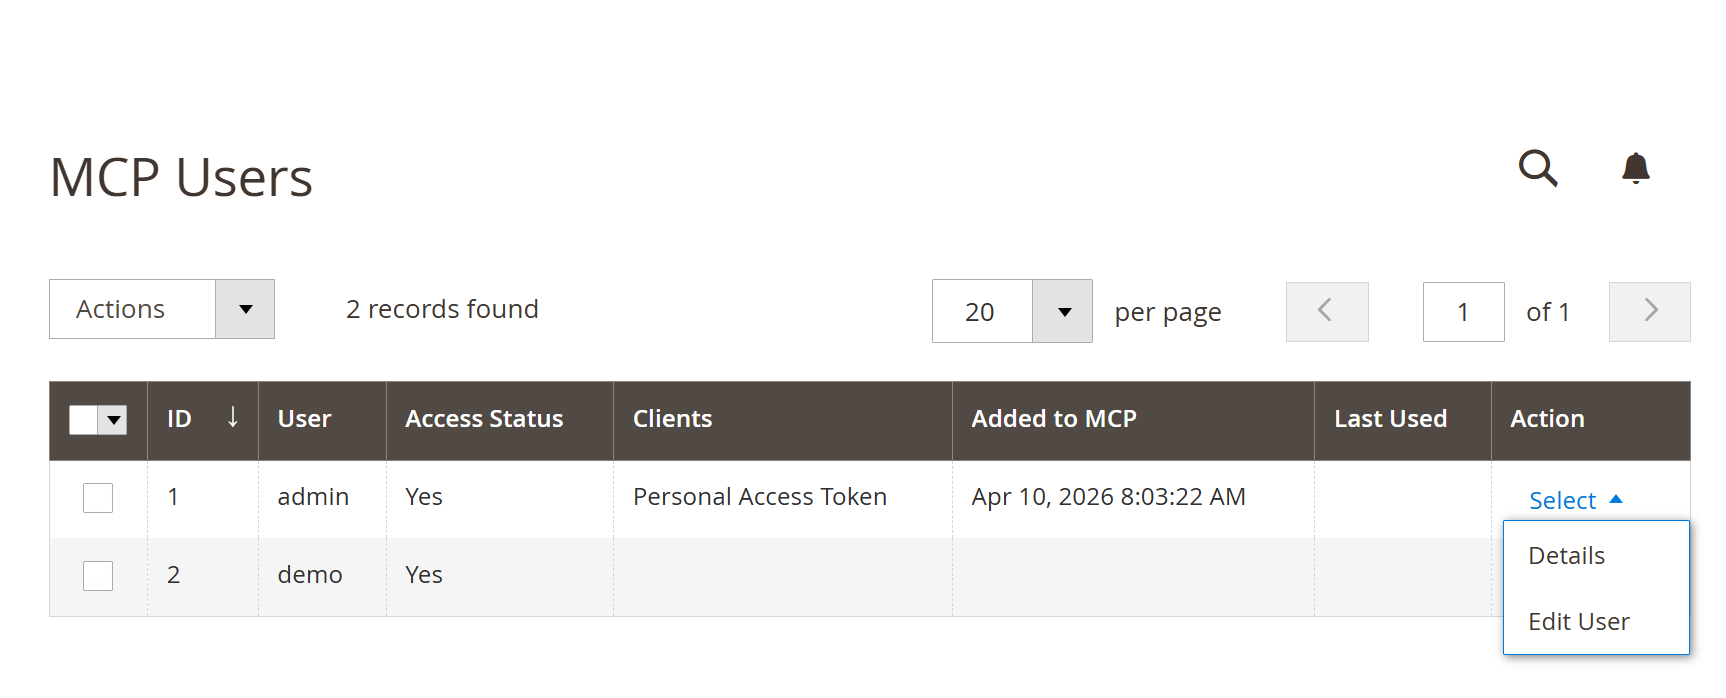
MCP Users- The MCP Users grid is the central admin section for viewing and managing users who have access to the MCP Server. It gives administrators a quick overview of user access status, connected client types, and usage activity in one place. From this grid, admins can also take direct actions to review user connection details or open the user profile for further management.
| Field | Description |
|---|
| ID | Displays the unique record identifier for each MCP user entry. | | User | Shows the admin username associated with the MCP access record. | | Access Status | Indicates whether MCP access is currently enabled or disabled for the user. This helps administrators quickly identify which users are allowed to connect. | | Clients | Displays the connected client type associated with the user, such as a Personal Access Token or other authorized client connection. | | Added to MCP | Shows the date and time when the user was first added to the MCP system. | | Last Used | Displays the most recent date and time the user or connected client interacted with the MCP Server. | | Action | Provides row-level management options for the selected user, such as viewing connection details or opening the related user record for further changes. | | Actions | The top-left mass action control allows administrators to apply bulk operations to selected user records. | | Records Found | Displays the total number of MCP user records currently available in the grid. | | Per Page | Lets administrators control how many records are shown in the grid at one time. | | Pagination | Allows navigation across multiple pages when the number of MCP users exceeds the selected per-page limit. |
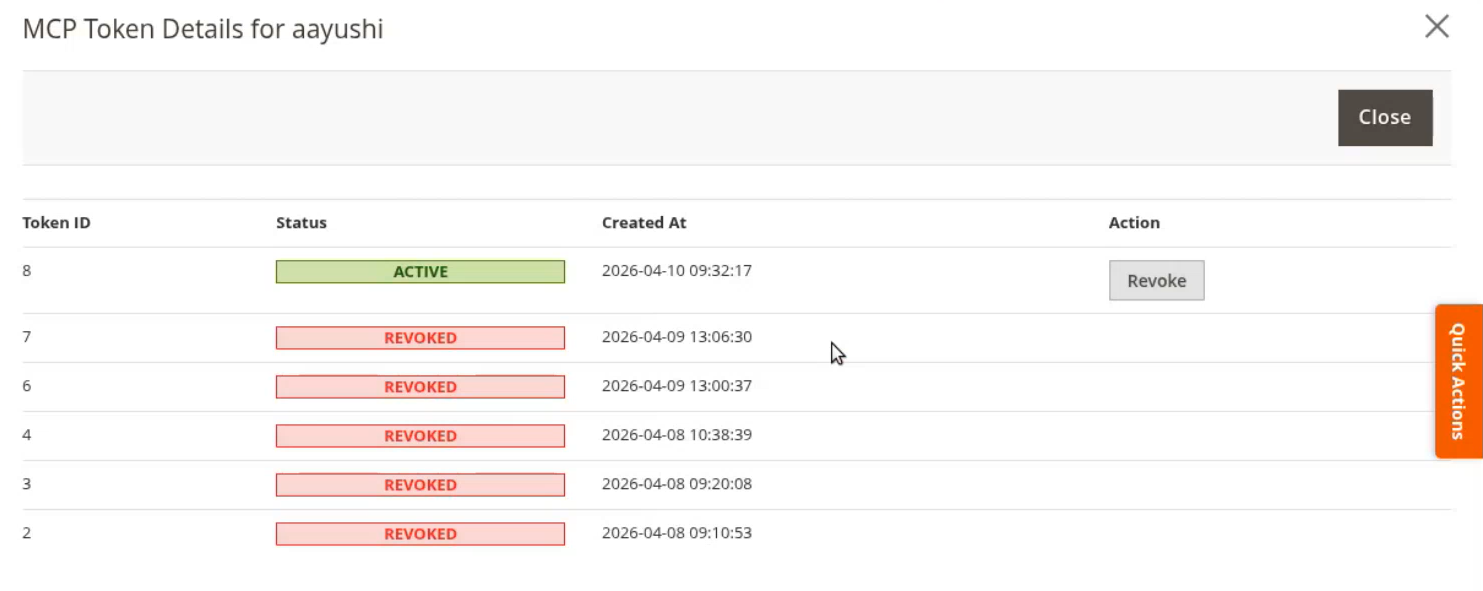
User Details- When the Details option is selected from the Action column in the MCP Users grid, a token details popup is opened for the selected user. This popup allows administrators to review all token records linked to that user, including their current status and creation date. It also provides a direct option to revoke an active token when required.
| Field | Description |
|---|
| MCP Token Details | Displays a popup window containing the token history and status details for the selected MCP user. | | Token ID | Shows the unique identifier assigned to each token record. | | Status | Indicates the current state of the token, such as Active or Revoked. | | Created At | Displays the date and time when the token was generated. | | Action | Provides token-level management actions for the selected record. | | Revoke | Allows administrators to manually revoke an active token to immediately disable its usage. | | Close | Closes the popup window and returns to the MCP Users grid. |
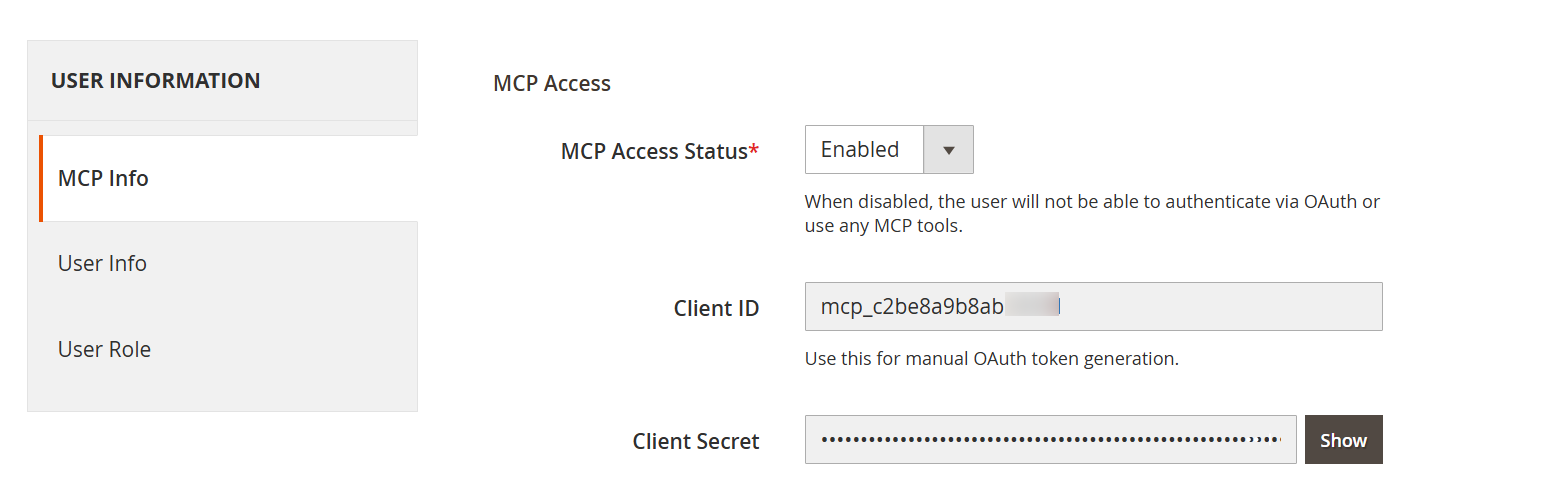
Edit User- The Edit User screen opens when the administrator selects Edit User from the Action column in the MCP Users grid. This section is used to manage MCP access for a specific admin user and review authentication-related details linked to that user. It also allows the administrator to update the access status, view client credentials, and save changes directly from the user profile.
| Field | Description |
|---|
| MCP Access | Displays the MCP-related settings section for the selected admin user. | | MCP Access Status | Allows the administrator to enable or disable MCP access for the user. When disabled, the user will not be able to authenticate through OAuth or use MCP tools. | | Client ID | Shows the unique client identifier assigned to the selected user for MCP authentication. This value can be used for manual OAuth token generation. | | Client Secret | Displays the secret key linked to the selected MCP client. It is masked by default for security purposes. | | Show | Reveals the hidden client secret so the administrator can review it when needed. | | Save User | Saves all changes made to the selected user profile. | | Back | Returns to the previous screen without making further changes. | | Delete User | Removes the selected admin user from the system. | | Reset | Discards unsaved changes and restores the current form values. | | Force Sign-In | Forces the selected user to sign in again for security or session control purposes. | | MCP Info | Opens the MCP-specific configuration tab for the selected admin user. | | User Info | Opens the general account information section for the selected user. | | User Role | Opens the role assignment section where the administrator can manage permissions for the selected user. |
|
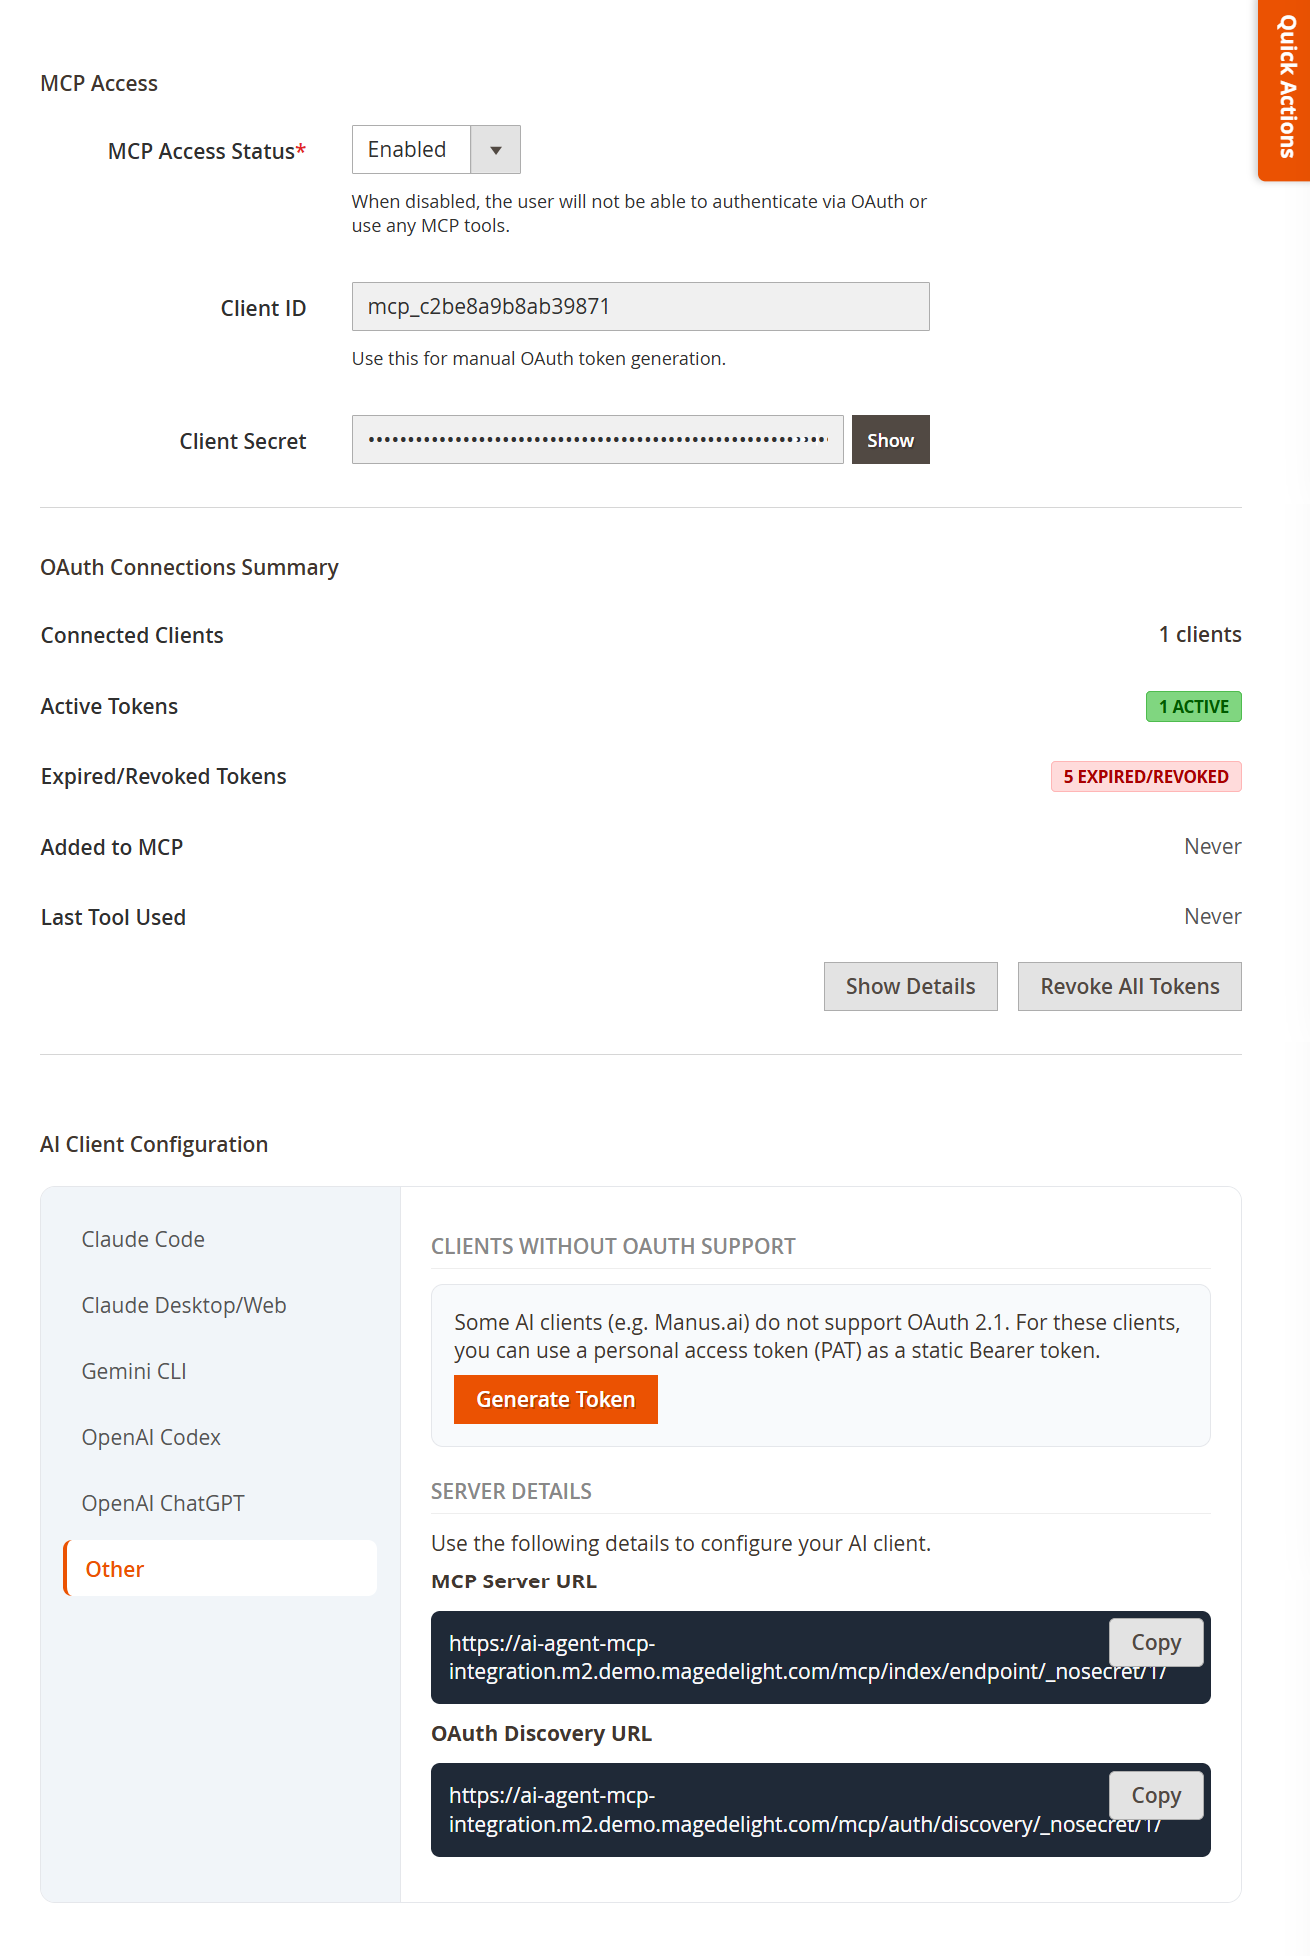
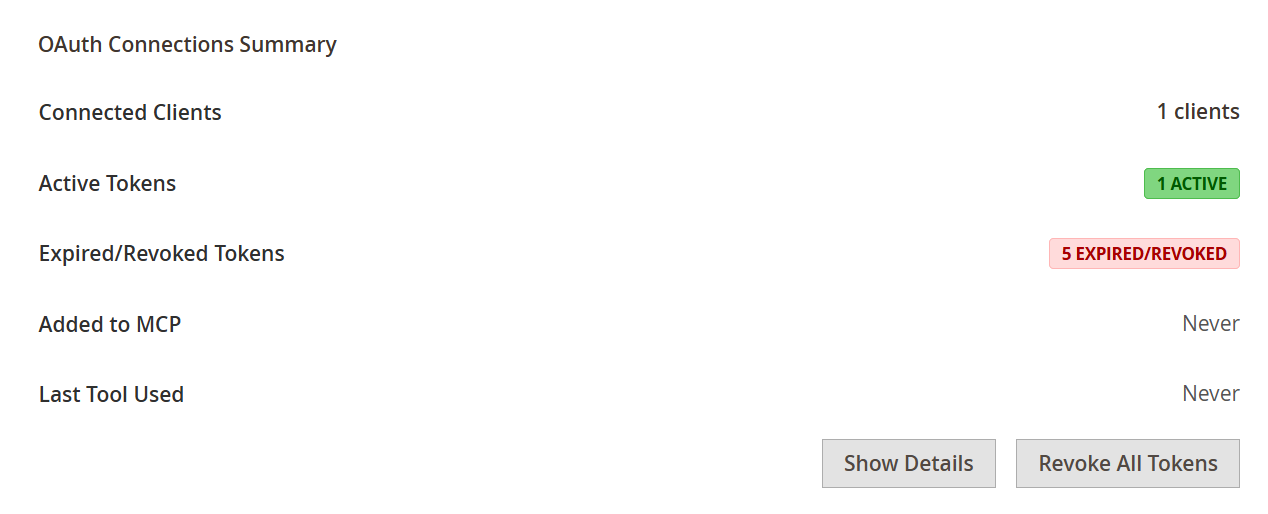
- The OAuth Connections Summary section under MCP Info gives administrators a quick overview of the selected user’s MCP connection activity. It shows how many clients are connected, the current token status, when the user was added to MCP, and the latest usage activity. This section also provides direct actions to review token details or revoke all active tokens for that user.
| Field | Description |
|---|
| Connected Clients | Displays the total number of AI clients currently connected for the selected user. | | Active Tokens | Shows the number of currently valid and usable tokens linked to the user. | | Expired/Revoked Tokens | Displays the total number of tokens that are no longer active due to expiration or manual revocation. | | Added to MCP | Shows the date and time when the user was first added to the MCP system. | | Last Tool Used | Displays the most recent MCP tool usage activity for the selected user. If no action has been performed yet, it shows Never. | | Show Details | Opens the detailed token view for the selected user, where token-level records can be reviewed. | | Revoke All Tokens | Revokes all active tokens associated with the selected user to immediately disable existing MCP connections. |
|
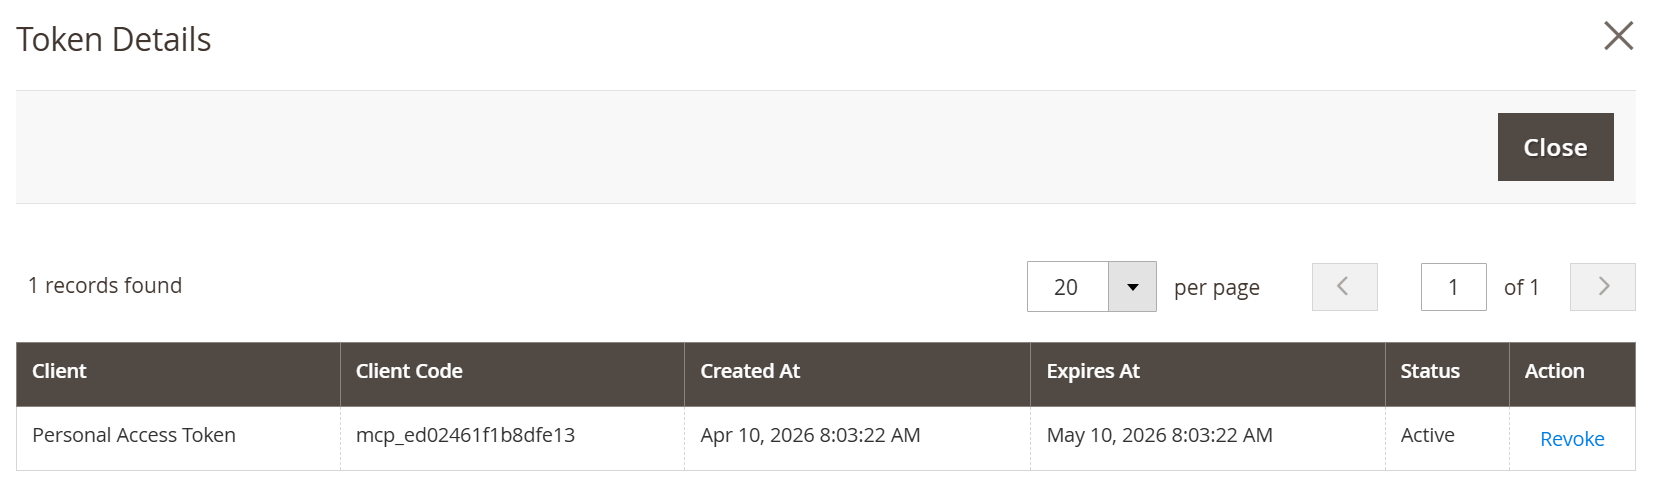
- When the Show Details button is clicked in the OAuth Connections Summary section, a Token Details popup opens for the selected user. This popup provides a record-wise view of all connected MCP clients and their token information, helping administrators review token validity, expiry, and status from one place. It also allows direct revocation of an active token when required.
| Field | Description |
|---|
| Client | Displays the type or name of the connected client associated with the token, such as a Personal Access Token. | | Client Code | Shows the unique code assigned to the connected client for identification purposes. | | Created At | Displays the date and time when the token was created. | | Expires At | Shows the date and time when the token will expire and become unusable. | | Status | Indicates the current condition of the token, such as Active or Revoked. | | Action | Provides token-level actions for the selected client record. | | Revoke | Allows administrators to immediately deactivate the selected active token. | | Close | Closes the popup window and returns to the previous screen. | | Records Found | Displays the total number of token records shown in the popup. | | Per Page | Allows administrators to choose how many token records are displayed per page. | | Pagination | Helps navigate between multiple pages if more token records are available. |
|
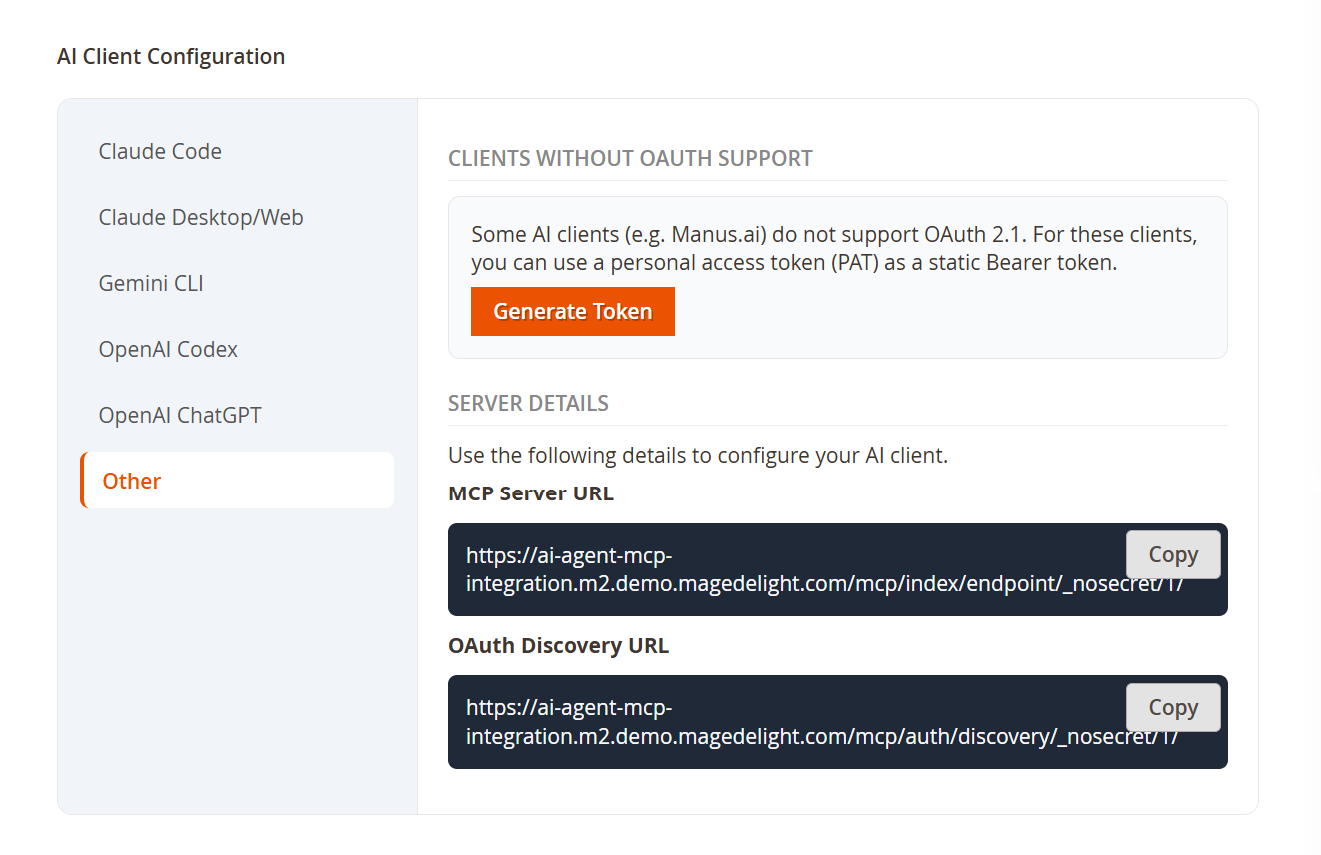
- The AI Client Configuration section under MCP Info provides ready-to-use connection instructions for supported AI clients in a tab-based layout. It helps administrators quickly connect an AI client by using prefilled server details, one-step setup commands, and manual configuration snippets. This makes the client onboarding process simpler and reduces the chance of configuration errors.
| Field | Description |
|---|
| AI Client Configuration | Displays client-specific connection instructions for integrating supported AI tools with the MCP Server. | | Claude Code | Shows setup instructions for connecting the store with Claude Code using command-line configuration. | | Claude Desktop/Web | Provides guided connection details for Claude Desktop and Claude Web clients. | | Gemini CLI | Displays setup instructions for connecting the store with the Gemini command-line client. | | OpenAI Codex | Provides connection details for configuring the OpenAI Codex client with the MCP Server. | | OpenAI ChatGPT | Shows setup instructions for connecting ChatGPT through the supported app-based MCP flow. | | Other | Provides generic MCP connection details for other compatible AI clients. It can also be used for clients that require alternative connection handling. | | Prerequisites | Lists any required tools, packages, or conditions that must be completed before configuring the selected AI client. | | MCP Server URL | Displays the prefilled MCP endpoint URL for the current store, which is used during client setup. | | OAuth Authorization URL | Shows the authorization endpoint required for authenticated client connection. | | Quick Setup Command | Provides a ready-to-copy command that allows the selected client to be configured in a single step. | | Manual Setup Configuration | Displays the configuration snippet or structured setup block that can be added manually to the client configuration file. | | Copy | Copies the related command, URL, or configuration block for faster setup. | | Documentation Link | Opens the related client documentation for additional reference or advanced setup guidance. |
|
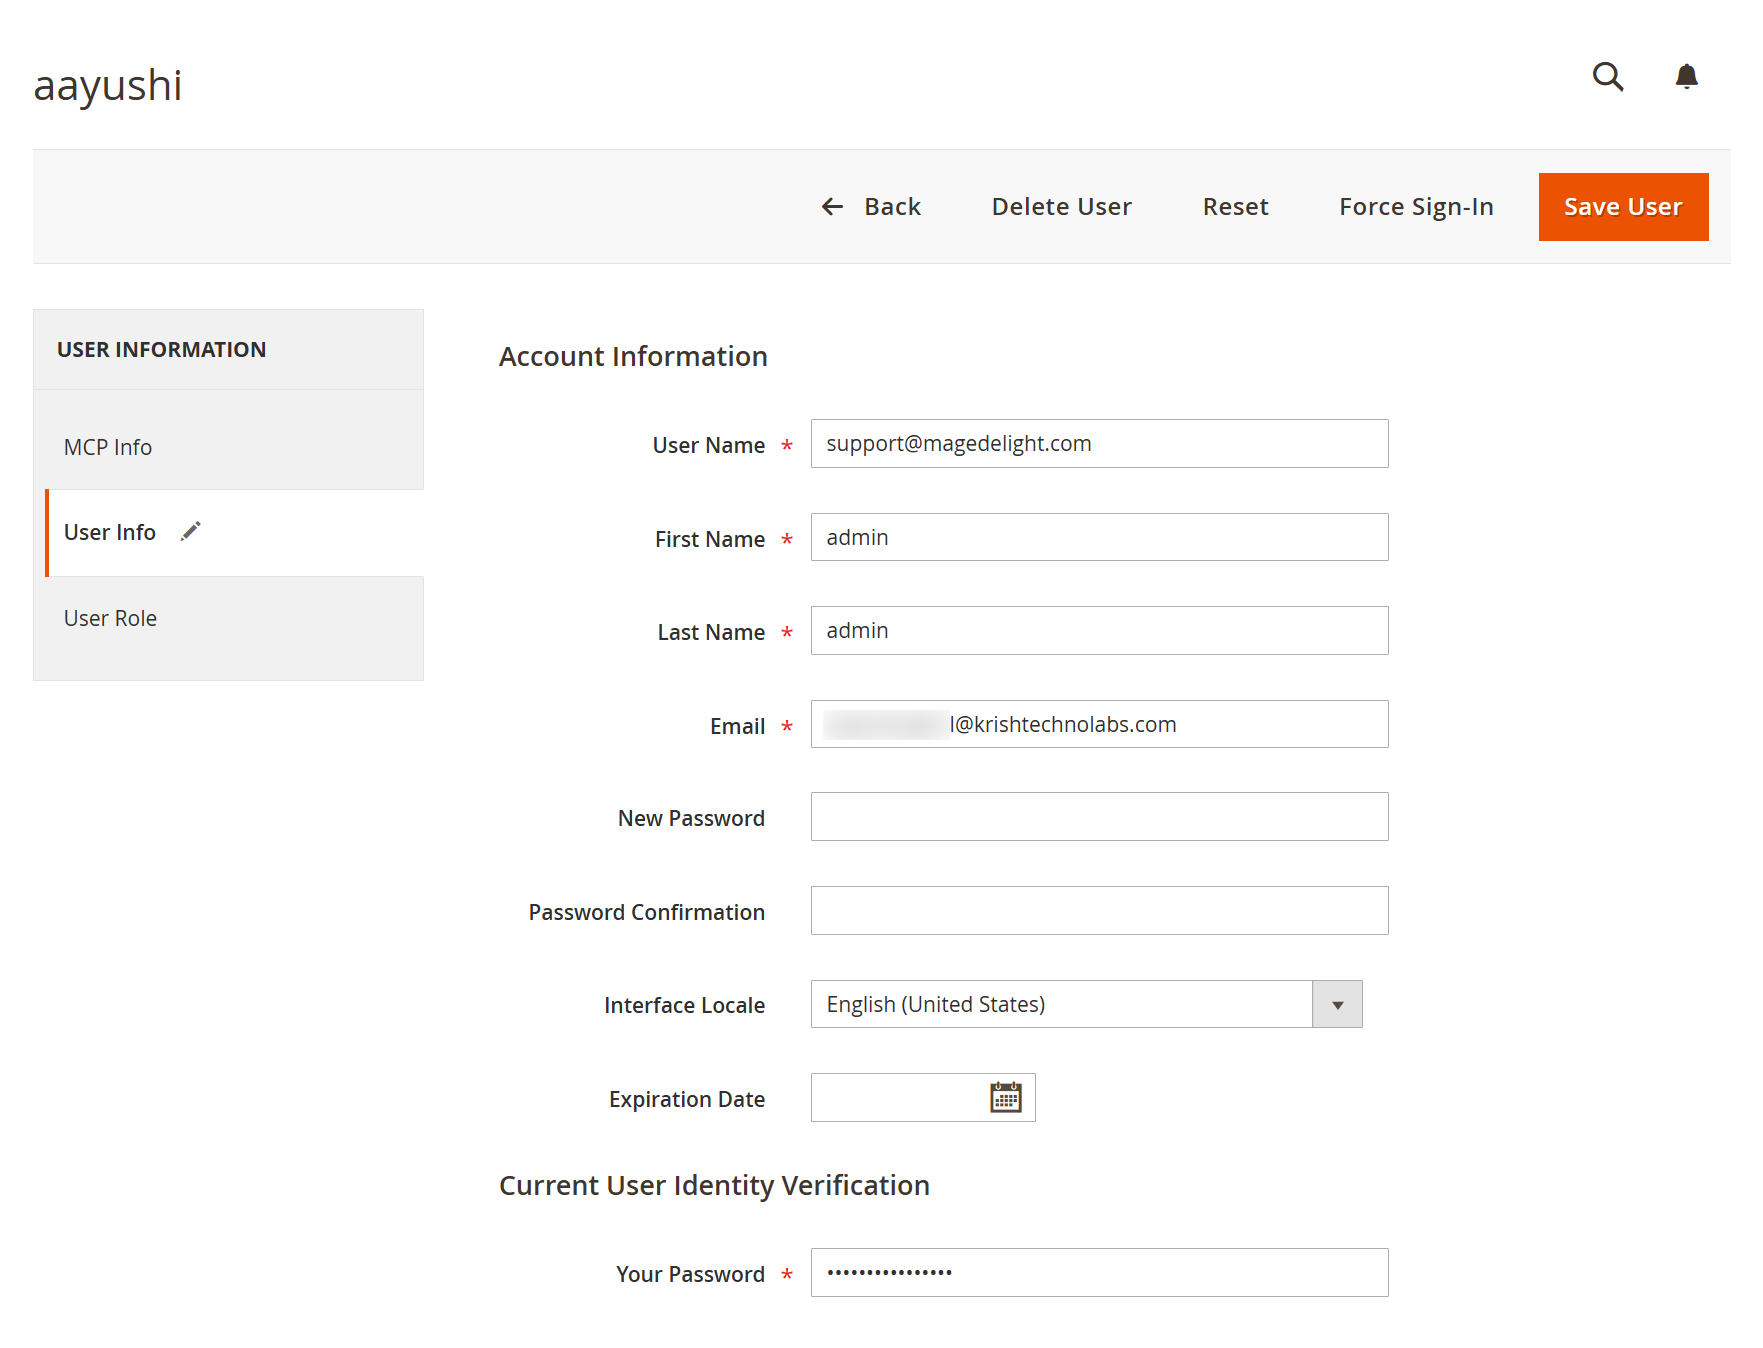
- The User Info tab is part of the admin user edit screen and is used to manage the selected user’s general account details. Unlike the MCP Info tab, which focuses on MCP access and connection settings, this section is intended for standard user profile management such as login details, contact information, password updates, locale preference, and account validity.
| Field | Description |
|---|
| User Name | Specifies the login username for the admin user account. This value is used when the user signs in to the admin panel. | | First Name | Defines the first name of the admin user for identification within the system. | | Last Name | Defines the last name of the admin user for profile and record display purposes. | | Email | Stores the email address associated with the admin user account. This is used for account-related communication and identification. | | New Password | Allows the administrator to assign a new password for the selected user account. | | Password Confirmation | Confirms the new password entry to avoid accidental password mismatches. | | Interface Locale | Lets the administrator choose the language or locale used in the admin interface for the selected user. | | Expiration Date | Sets the date until which the admin user account remains active. After this date, the account can be restricted based on system behavior. | | Your Password | Requires the current administrator password to verify identity before saving sensitive account changes. | | Save User | Saves all updates made in the User Info tab. | | Back | Returns to the previous screen without continuing further actions. | | Delete User | Removes the selected admin user account from the system. | | Reset | Discards unsaved changes and restores the current form values. | | Force Sign-In | Forces the selected user to sign in again, which is useful for session control or security purposes. | | MCP Info | Opens the MCP-specific settings tab for the selected user. | | User Info | Opens the general account information tab for the selected user. | | User Role | Opens the role assignment tab where permissions and access levels can be managed for the selected user. |
|
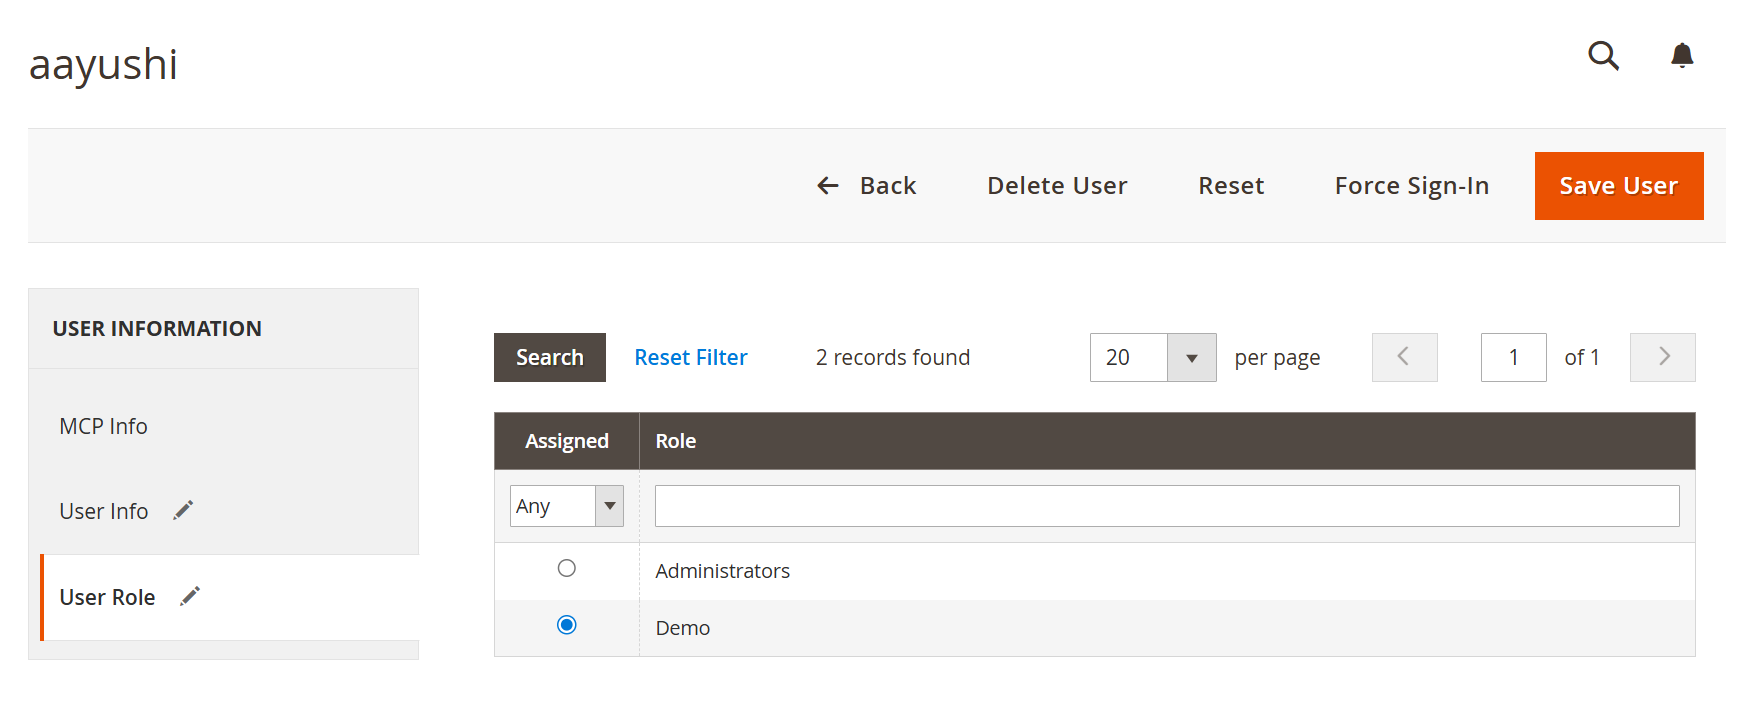
- The User Role tab in the Edit User section is used to assign or change the admin role for the selected user. It helps control what areas, tools, and permissions the user can access in the admin panel, including MCP-related capabilities based on the assigned role. This tab also includes basic grid controls to search and filter available roles before selecting one.
| Field | Description |
|---|
| Assigned | Lets the administrator choose whether a role is assigned to the selected user. The radio option is used to select one role from the available list. | | Role | Displays the list of available admin roles that can be assigned to the user. | | Search | Applies the selected filters and updates the role list accordingly. | | Reset Filter | Clears the applied filters and restores the default role listing. | | Records Found | Shows the total number of role records currently available in the grid. | | Per Page | Lets the administrator define how many role records should be displayed per page. | | Pagination | Enables navigation between pages when more role records are available than the selected page limit. | | Save User | Saves the selected role assignment and any related changes made for the user. | | Back | Returns to the previous screen. | | Delete User | Deletes the selected admin user account. | | Reset | Discards unsaved changes made on the current edit screen. | | Force Sign-In | Forces the selected user to sign in again for security or session control purposes. | | MCP Info | Opens the MCP-specific settings tab for the selected user. | | User Info | Opens the general account information tab for the selected user. | | User Role | Opens the role assignment tab where the user’s admin role can be selected or updated. |
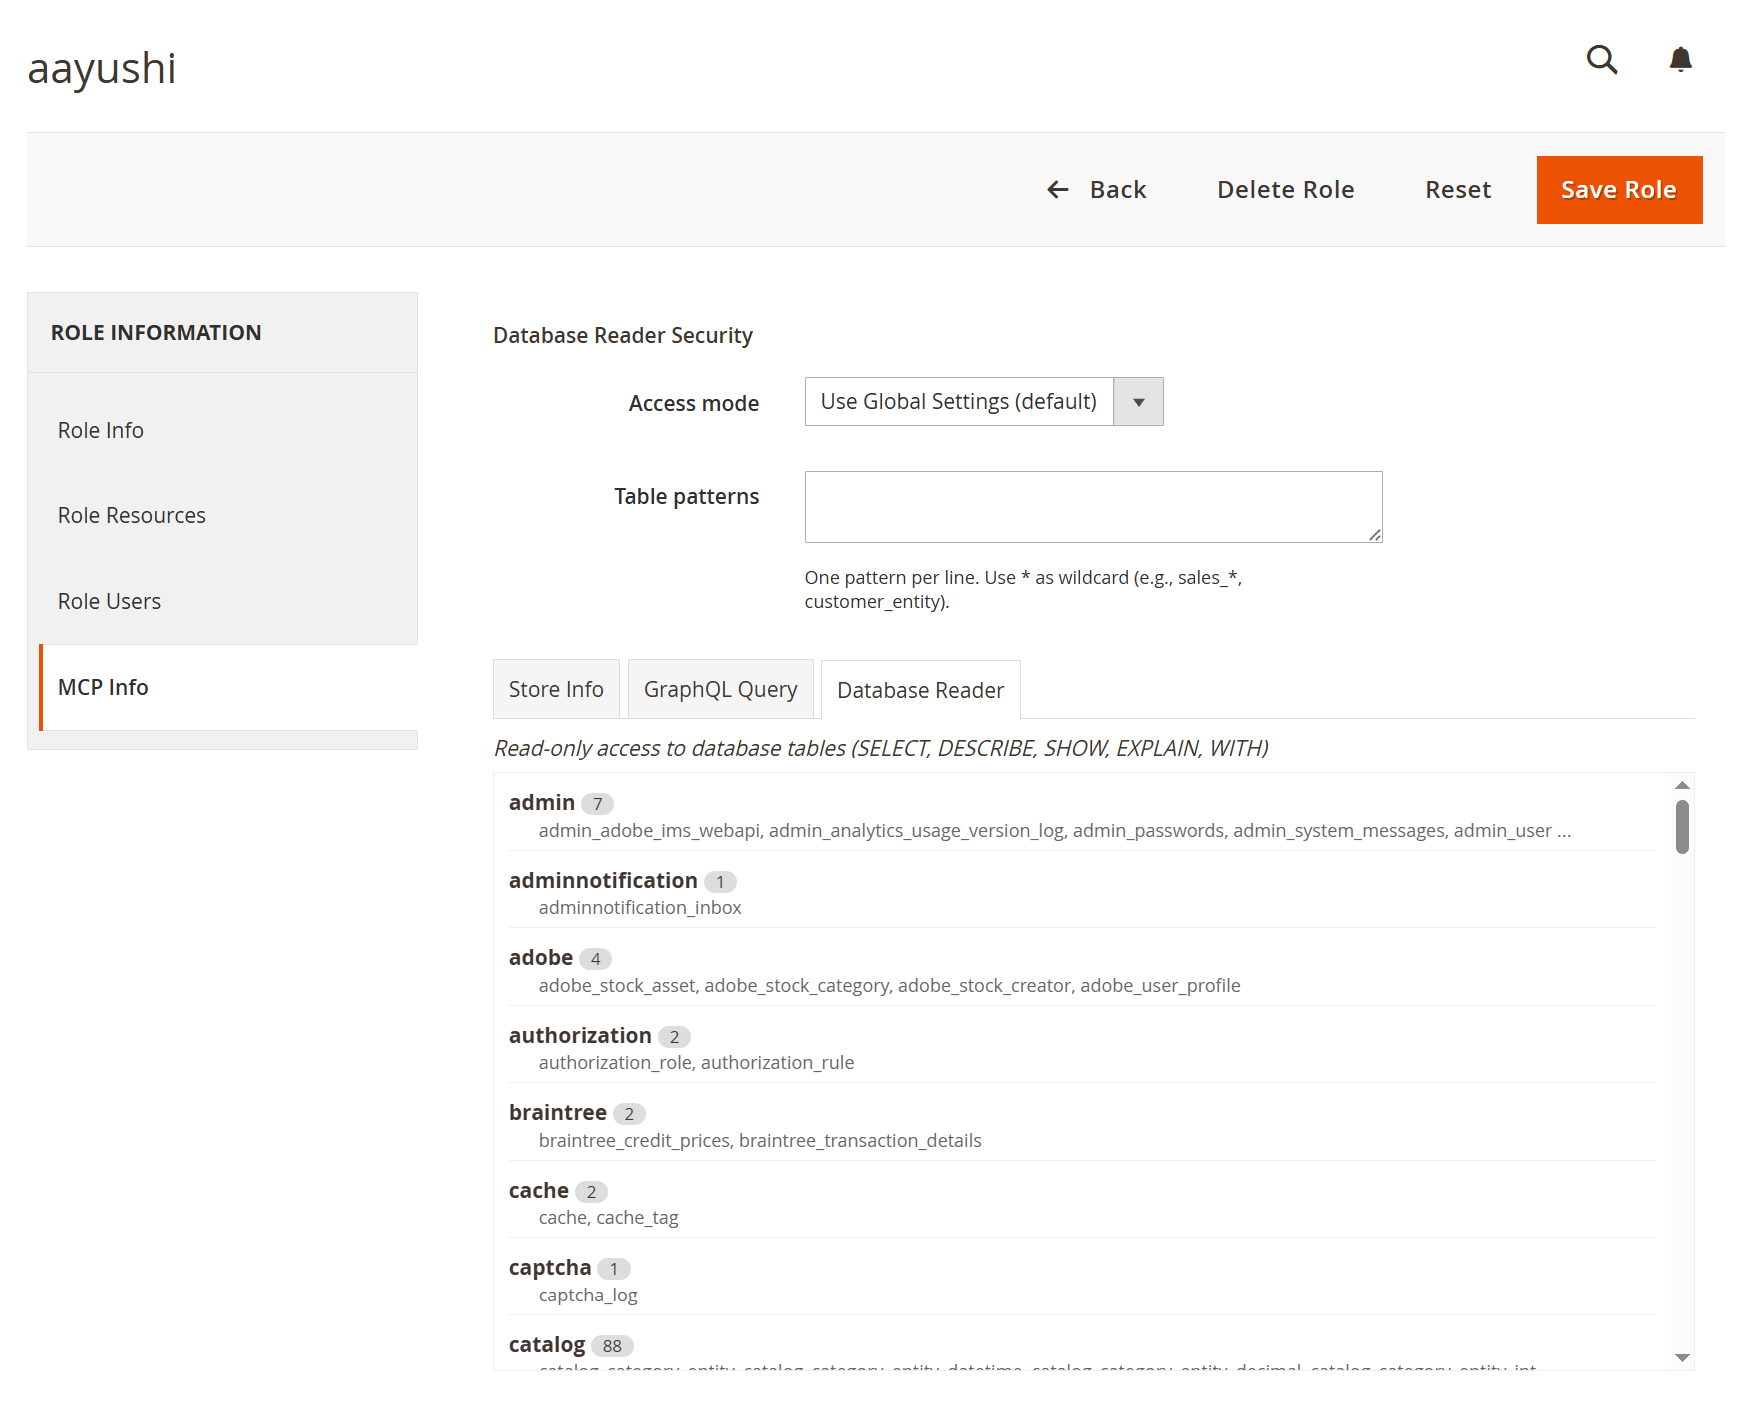
Role-Based MCP Access Configuration- The MCP Info tab under System → Permissions → User Roles is used to manage MCP-related access rules at the role level. It lets administrators define how the Database Reader should behave for users assigned to that role and also provides a quick view of the MCP tools available to the role. This helps apply tighter access control without changing the global MCP configuration for all users.
| Field | Description |
|---|
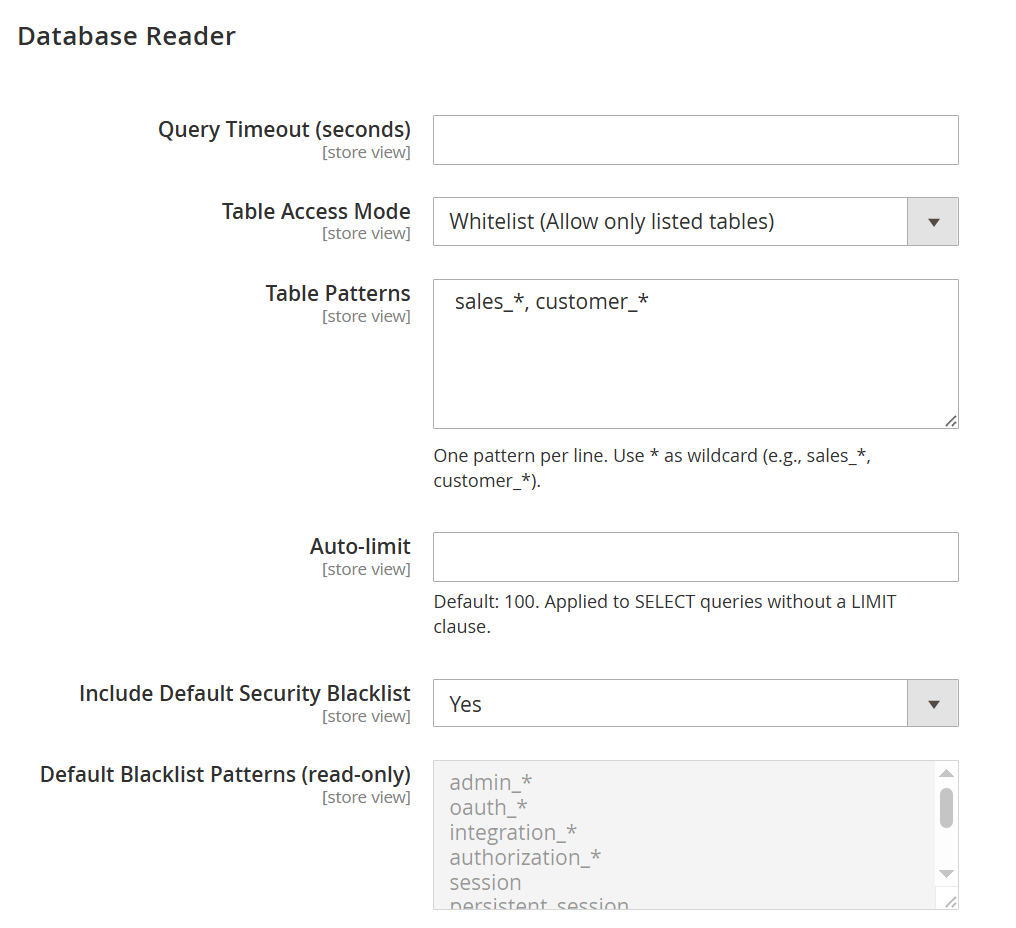
| MCP Info | Opens the role-level MCP configuration section for the selected admin role. | | Database Reader Security | Displays role-specific security controls for database access through MCP. | | Access Mode | Defines how database table restrictions are applied for the selected role. - Use Global Settings follows the system-wide configuration,
- Blacklist blocks only the listed table patterns,
- Whitelist allows access only to the listed table patterns.
| | Table Patterns | Lets administrators enter table name patterns to control database access for the role. Add one pattern per line and use * as a wildcard, such as sales_* or customer_entity. | | Store Info | Shows the MCP tool access view for store configuration and store structure information available to this role. | | GraphQL Query | Shows the MCP tool access view for GraphQL query capability available to this role. | | Database Reader | Shows the MCP tool access view for database query access available to this role. | | MCP Tools View | Displays the MCP tools assigned to the role, helping administrators quickly review what functionality is available under that role. | | Save Role | Saves the MCP role settings and any other updates made to the selected role. | | Back | Returns to the previous role management screen. | | Delete Role | Removes the selected role from the system. | | Reset | Discards unsaved changes and restores the current form values. | | Role Info | Opens the general role information tab. | | Role Resources | Opens the permissions tree where Magento and MCP resources can be assigned to the role. | | Role Users | Opens the section showing users assigned to the selected role. |
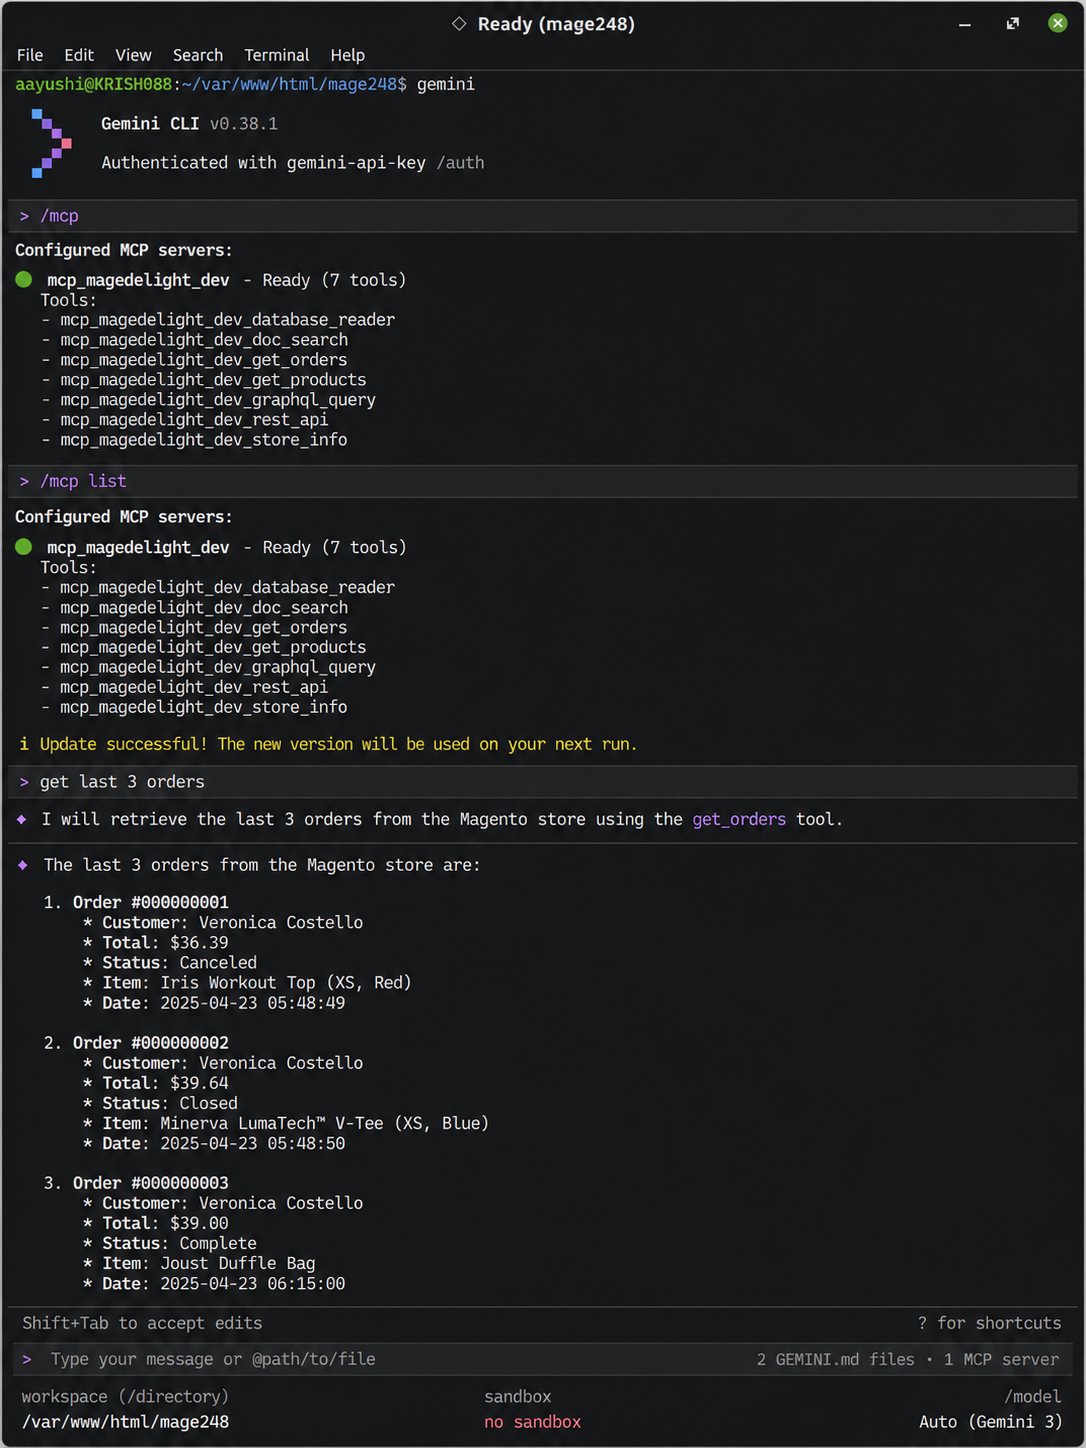
MCP Configuration in My Account- The My Account section also includes the same MCP-related settings and configuration options available for the logged-in admin user. From this screen, users can manage their MCP access status, review OAuth connection details, view token activity, and access AI client configuration instructions for supported clients such as Claude, Gemini, Codex, and ChatGPT. This provides a convenient self-service area where users can view and manage their own MCP setup without navigating to the broader user management section.
- Path: Admin Panel → My Account
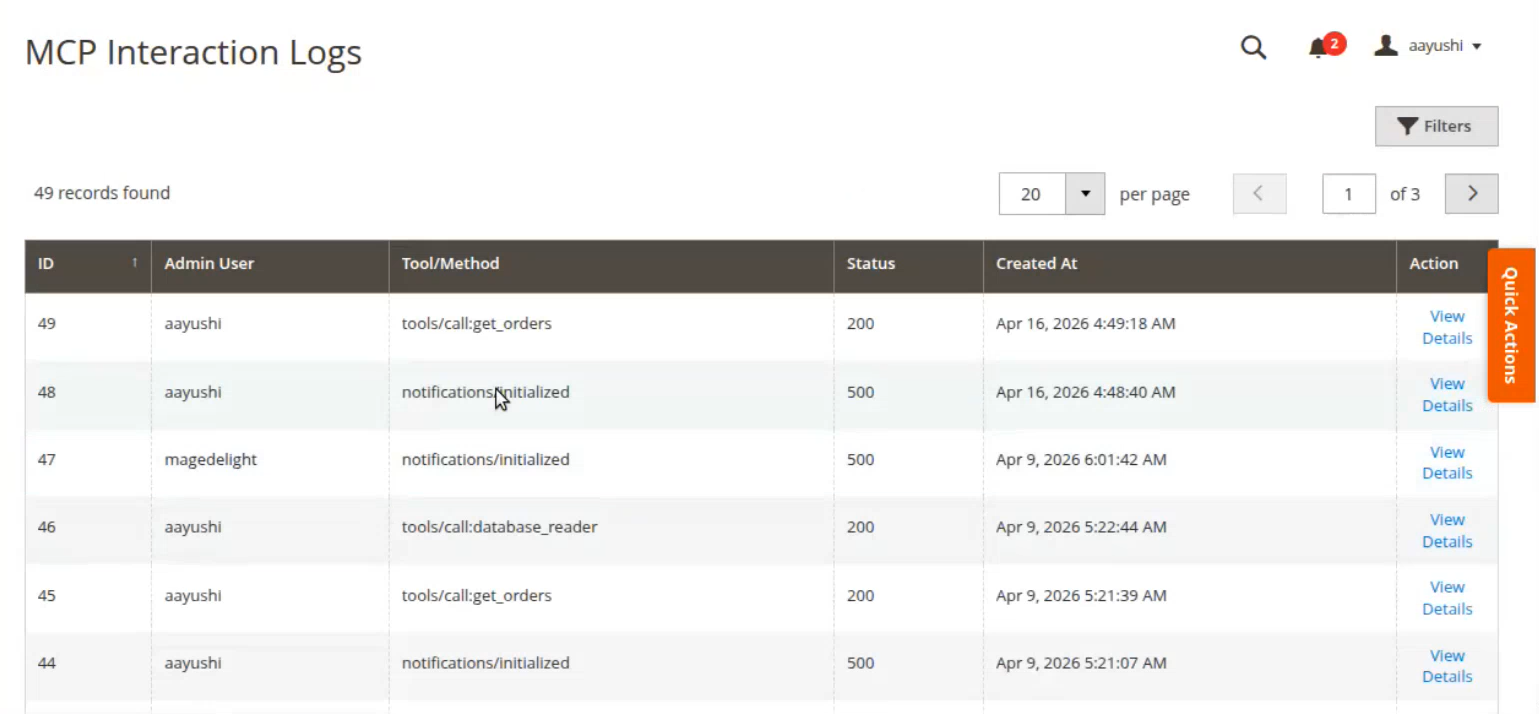
MCP Interaction Logs- The MCP Interaction Logs section provides a centralized view of activity performed through the MCP integration. It helps administrators monitor which user triggered a request, which tool or method was used, the response status, and when the interaction occurred. This section is useful for audit tracking, debugging failed requests, and reviewing overall MCP usage history.
| Field | Description |
|---|
| ID | Displays the unique identifier for each interaction log record. | | Admin User | Shows the admin user who initiated the MCP request. | | Tool/Method | Displays the MCP tool, endpoint, or method used during the interaction. | | Status | Shows the response status code returned for the request, helping identify successful and failed interactions. | | Created At | Displays the date and time when the interaction log was created. | | Action | Provides the available action for the selected log record. | | View Details | Opens the detailed view of the selected interaction log entry for further inspection. | | Filters | Allows administrators to apply filter criteria to narrow down the displayed log records. | | Records Found | Shows the total number of interaction log records available in the grid. | | Per Page | Lets administrators choose how many log records are displayed on each page. | | Pagination | Enables navigation through multiple pages of interaction logs. |
|
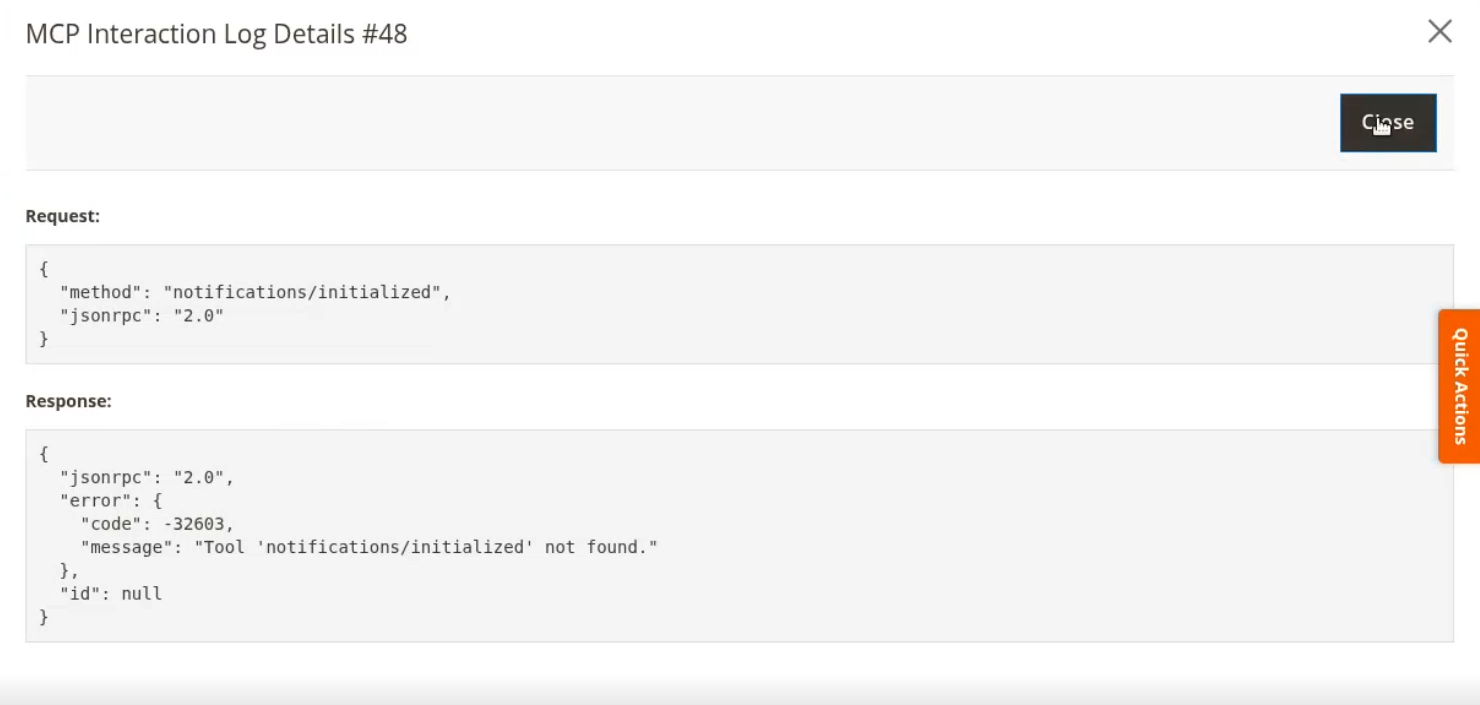
- When the View Details option is selected from the Action column in the MCP Interaction Logs grid, a detailed popup is opened for the selected log entry. This popup allows administrators to inspect both the request payload and the response returned for that interaction. It is especially useful for troubleshooting failed requests, reviewing API behavior, and validating MCP communication details.
| Field | Description |
|---|
| MCP Interaction Log Details | Displays the detailed popup view for the selected interaction log record. | | Request | Shows the request payload that was sent during the selected MCP interaction. | | Response | Displays the response payload returned for the selected MCP interaction, including success or error details. | | Close | Closes the popup window and returns to the interaction logs grid. |
|