Versions Compared

Key

  • This line was added.
  • This line was removed.
  • Formatting was changed.

...

Section

Installation


Include Page
Base Module NotesBase Module Notes
Include Page
Installation Steps
Installation Steps


Section

License Configuration

Note

License activation is not required for extension purchased from Magento Marketplace.

After successful installation of Store Locator extension, you are now required to configure the license key in the admin configuration section. You can set it from:

Step 1: Go to, Admin Control Panel > Stores Configuration > Magedelight > Store Locator > License Configuration. 

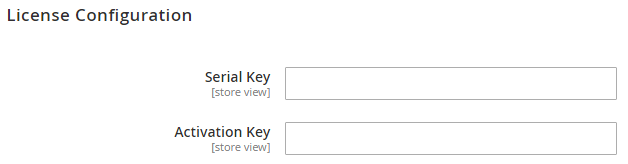
You will find two text boxes asking for Serial Key and Activation Key, which you received on email upon the purchase of extension. See screenshot below:

Panel

Image Removed

  • Serial Key: Enter Serial Key
  • Activation Key: Enter Activation Key

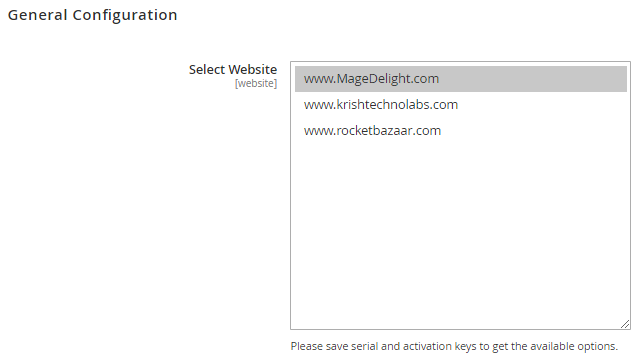
Step 2: Expand “General Configuration” tab, you will find a list of domains for which license is purchased and configured, now select the domain you are going to use, you can select multiple domains by clicking “Ctrl + Select”.

Panel

Image Removed

Step 3: Now, select “Yes” from “Enable Module” to enable extension and again click on “Save Config” button on the top right.

Panel

Image Removed

Installation with Composer


Composer repository using this command:

composer config repositories.magedelight-repo composer https://packages.magedelight.com/


Replace repo public key and private key with your public and private key

composer config http-basic.gitlab.magedelight.com $PUBLIC_KEY $PRIVATE_KEY


composer require mage_delight/storelocator_module:*

composer require mage_delight/storelocatorgraphql:*

Note

To obtain your public and private keys, please navigate to the "My Account" section. In the "Download Extension Packages" tab, you will find the keys available for your access.


Section

Backend Configuration (Admin side)


Section


Panel

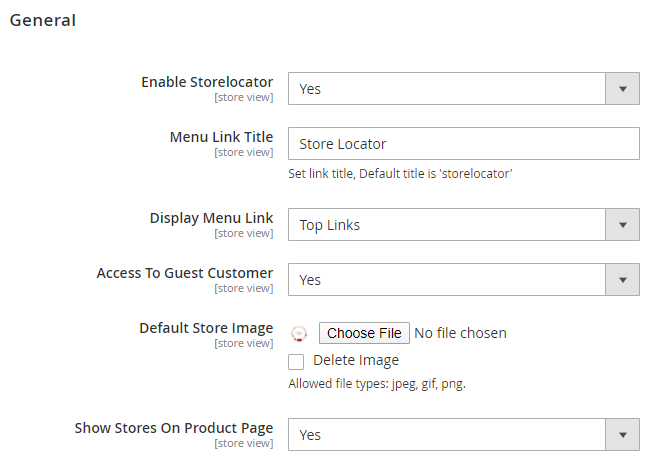
  • Enable Store locator: Enable/Disable the store Locator extension
  • Menu Link Title: Store locator page link title
  • Display Menu Link: To show store locator link on Top Link or Top Navigation menu
  • Access to Guest Customer: Set access limit to allows store locator to guest customer or not
  • Default Store Image: You can upload default image to be shown, if particular store don’t have uploaded store image
  • Show Stores on Product Page: Select "Yes" to to display list of stores on product details page.


Section


Panel

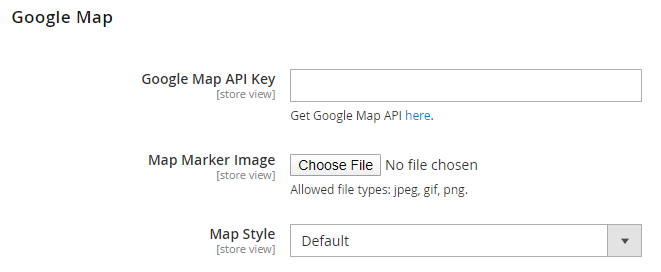
  • Google Map API Key: Defined Google map API key.

  • Map Marker Image: To upload Google map marker image if needs to show specific image. Else default Google map marker image would be used.

  • Map Style: Select Google Map Style/Theme to display map on store front.


Section


Panel

  • Default Radius for Search: To define default radius of distance to be cover while searching store on Google Map.

  • Maximum Radius for Search: Set maximum radius limit user can search store from his current location

  • Distance Unit: Distance unit while search on Google map. Options can be Kilometers or Miles.


Section


Panel

  • Page Title: Define Store locator page title

  • Page URL: Define Store locator page URL

  • Page URL suffix: Store locator page URL suffix
  • Meta Description: To define Meta description for store locator page
  • Meta data: To define Meta data for store locator page


Section


Panel


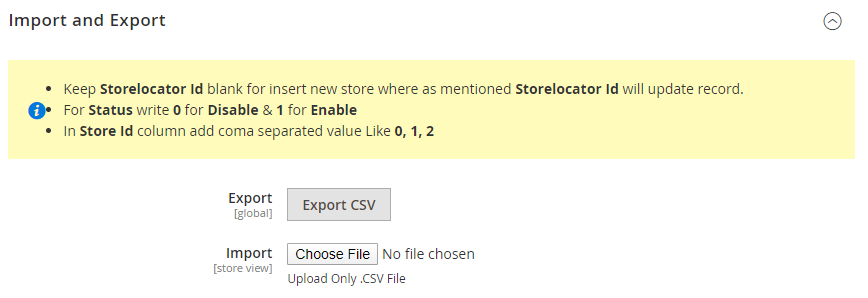
  • Export: Click on "Export CSV" button to export existing stores data to CSV file. You can use same file to import store.
  • Import: Upload CSV file to import stores from CSV file. You can get sample CSV file by exporting CSV file.

...

Section

Backend Functionality


Store Management

Section


Panel


Section


Panel

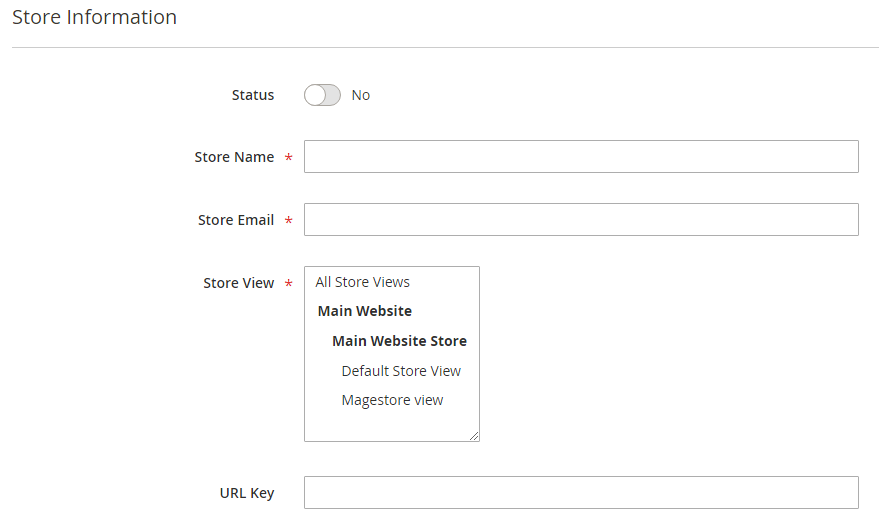
  • Status: To Enable/Disable the store
  • Store Name: Define store name
  • Store Email: Specify store email
  • Store View: Select store view, you can select multiple store views for same store.
  • URL Key: Define SEO friendly URL key for store details page. If not defined, it would be auto generated from store name


Section


Panel

  • Website URL: Store website URL if have any
  • Facebook URL: Facebook page to show link on store details page
  • Twitter URL: Twitter URL to show link on store details page
  • Store Description: Describe store details to be shown on store detail page


Section


Panel

  • Address: Define store address details with city, state, country, zip code. Based on given address, store will be located on Google map
  • Telephone: You can add multiple phone number for store
  • Longitude & latitude: Its value will be automatically set based on the store locate on Google map. However you can edit if needed
  • Store Image: upload store image/icon


Section


Panel

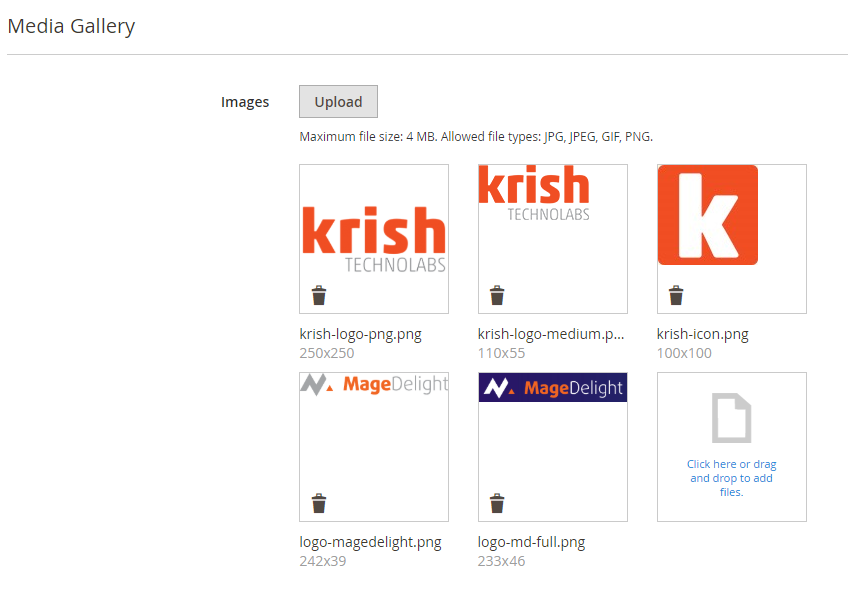
  • Upload images for store galerry. You can upload multiple images at same time.


Section


Panel

  • Select products available at store. You can select multiple products.


Section


Panel

  • Meta data: You can define Meta title, Meta keywords and Meta description for SEO purpose for each store detail page at frontend.


Section


Panel

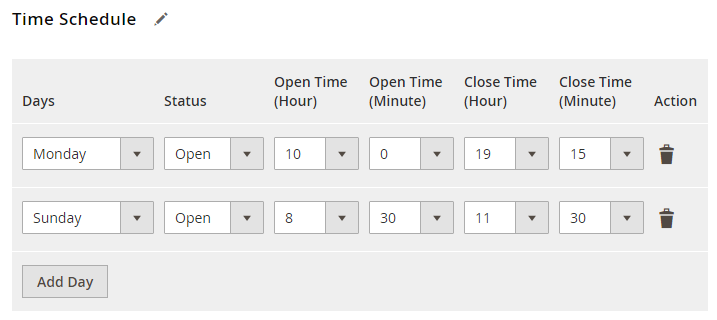
  • Time Schedule: Here you can define the stores working days and working time of the store. You can define working time for each week day or even set close time too. As shown with below image


Section


Panel

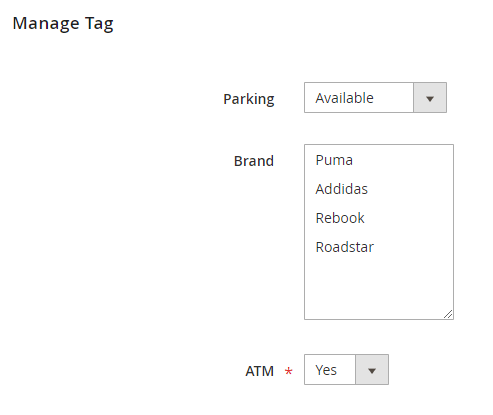
  • Select tags and its value to be displayed on store front.


Section

Holiday Management

Panel

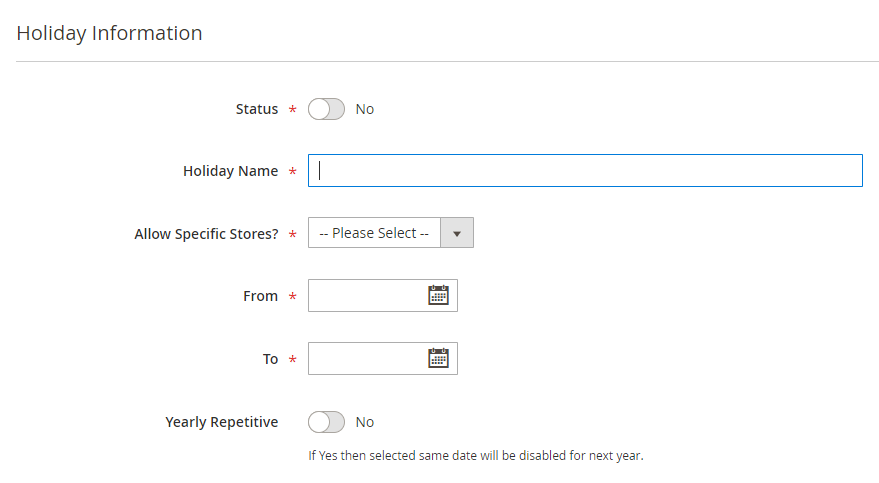
  • Manage Holiday: You can manage holidays for each individual store or all stores. You can create holiday for one day or vacation period for multiple days. Refer below image,


Section


Panel

  • Status: Enable/Disabled holiday.
  • Holiday Name: Define as per your need.
  • Store: All Stores/Selected stores. You can have holiday for all store or select multiple stores.
  • From Date: Select holiday start date.
  • To Date: Select holiday end date.
  • Repeat Yearly: If you check this check box, particular holiday will repeat every year on same date. For example you can define 1st Jan New Year holiday, and mark this day to repeat every year.


Section

Tag Management

Panel

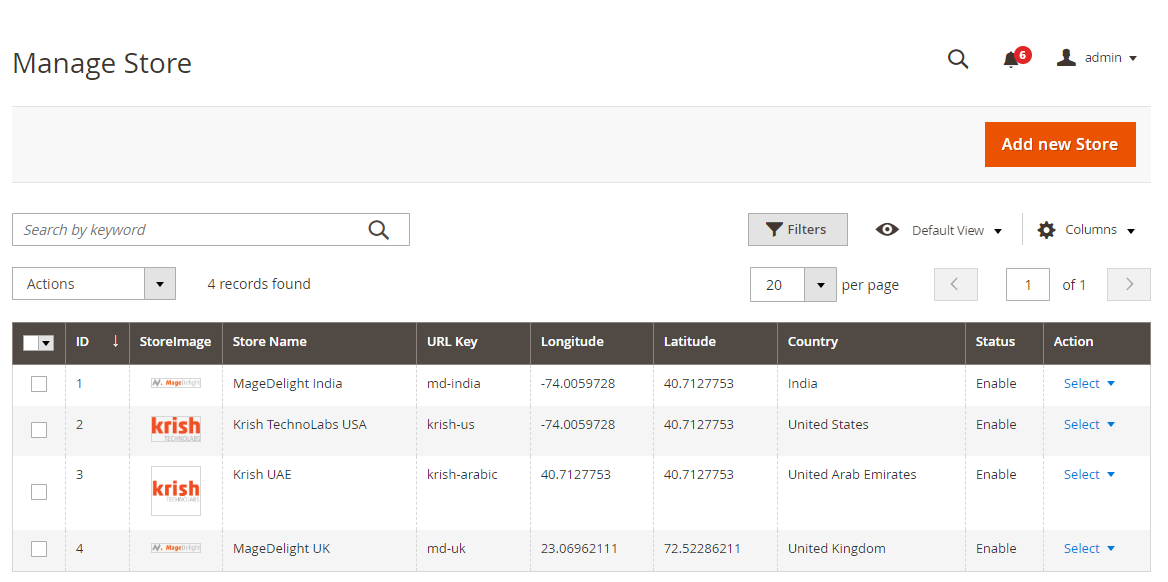
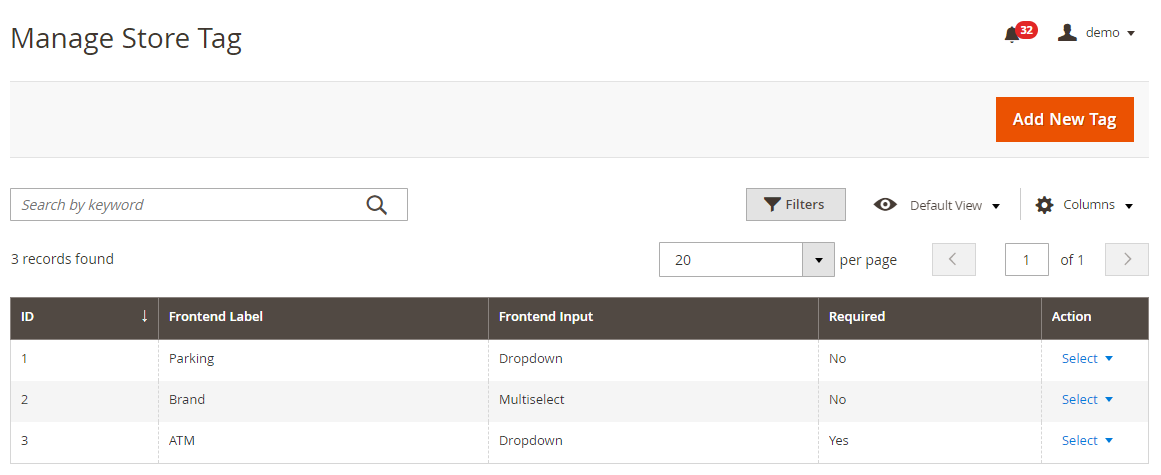
  • Grid to manage all tags with filter options.


Section


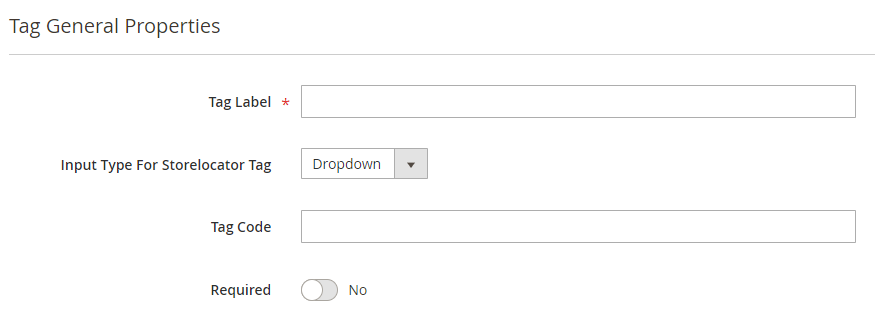
Panel

  • Tag Label: Provide label for the tag.
  • Input Type for Tag: Select input tue for the tag, it can be dropdown, multiselect or text.
  • Tag Code: Provide code for tag to identify it.
  • Required: Select "Yes" to make this tag value mandetory.


Section


Panel

  • Provide values for the tag.


Section


Panel

  • Provide tag label for stores.


...

Section

Frontend Functionality


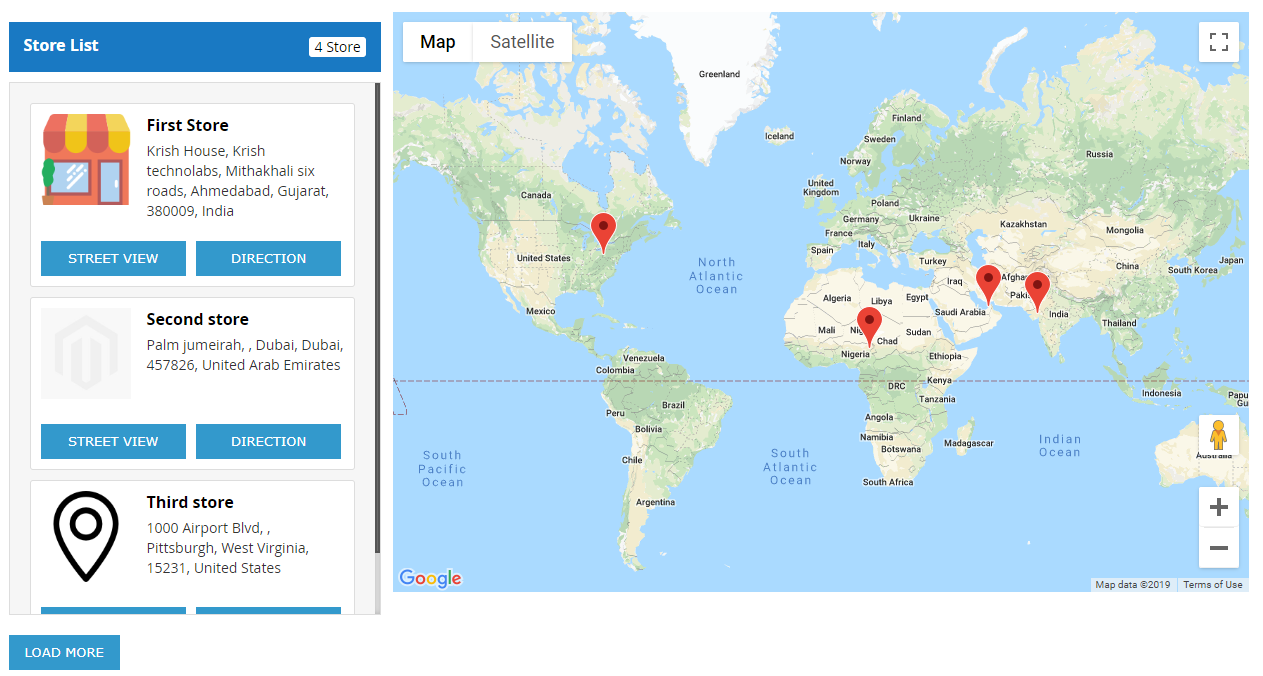
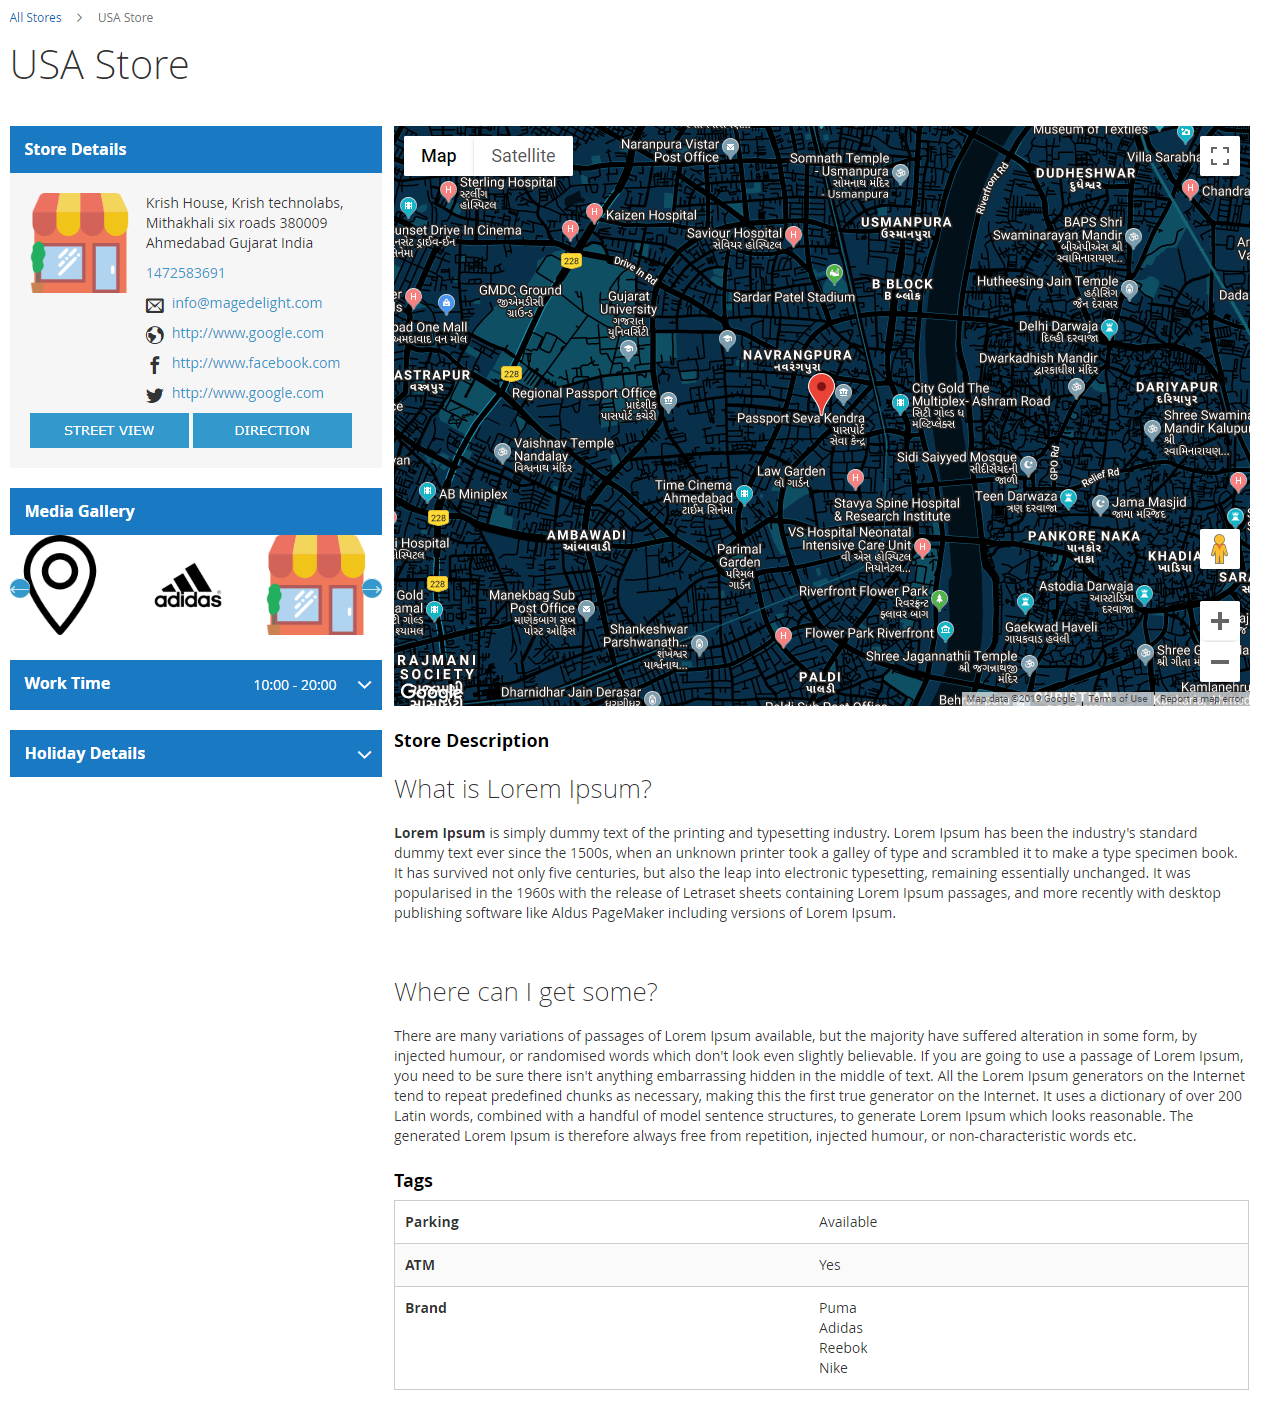
Once you configured the extension and create stores, the store will be listed on store locator page. The store locator link will be displayed on top links or with top menu, based on how it configured. Store locator page will be look like,

Panel

Search Store

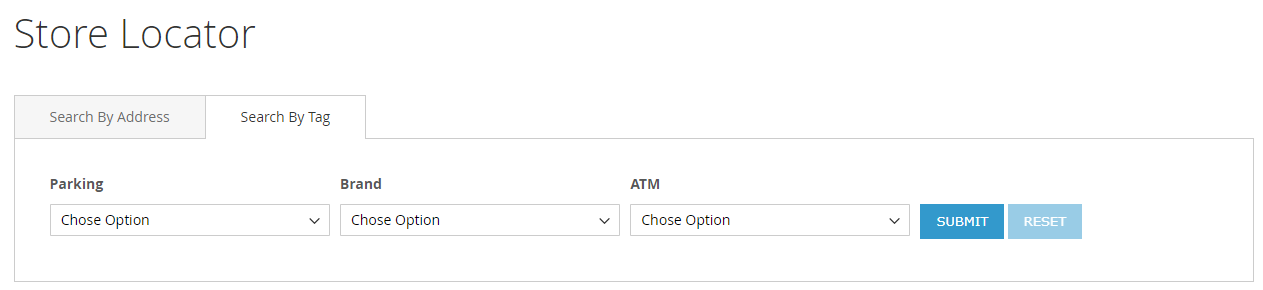
You can search nearest store with store search feature, user can use radius from to find nearest store from his current location. As shown with below location. You can search store using tags, too.

Panel

It also helps to find direction from your current location or from particular location to particular store. Refer below image,

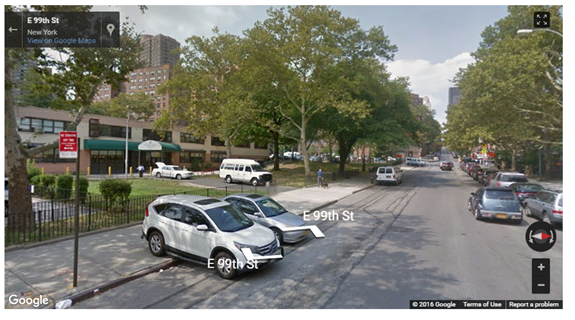
That also supports street view of store, as show with below image

Street view

Panel

Store page

Store page will contain details of particular store with store description, address. You can also have the direction finder supported by map. It also includes working days, time details and upcoming holiday list

Demo

Click here to visit product detail page.
Panel

Image Removed

Section

Image Added


Section

Developer Account


The three API's you have to enable in Google API Key for the correct work of the extension,

  1. Maps JavaScript API
  2. Places API
  3. Direction API

To configure these settings, please follow the link, https://console.cloud.google.com/apis/library/places-backend.googleapis.com


Section

API


Note

Please use SWAGGER to get detailed information of parameters.

https://storelocator.m2.demo.magedelight.com/swagger

rest/V1/magedelight-storelocator/

Get store locator view: storelocator/search

Panel


Sample Data

Expand

{
searchCriteria[filter_groups][0][filters][0][field]:storename
searchCriteria[filter_groups][0][filters][0][value]:"Bob Store"
}


Get store locator view by id: storelocator/:storelocatorId

Panel

Sample Data

Expand

{
storelocatorId:1
}


Save store locator: storelocator

Panel

Sample Data

Expand

{
"storelocator":{
"storelocator_id":"10",
"storename":"Roni's Store",
"url_key":"roni-store",
"storeemail":"roni@gmail.com",
"address":"Via Goffredo Mameli 34",
"city":"Roma",
"region":"Roma",
"region_id":767,
"country_id":"IT",
"zipcode":16345,
"longitude":12.467860,
"latitude":41.887540,
"telephone":3387819740
}
}


Delete store locator: storelocator/:storelocatorId

Panel

Sample Data

Expand

{
storelocatorId:2
}


Section

Demo


Click here to visit frontend.

Click here to visit backend admin panel.

...