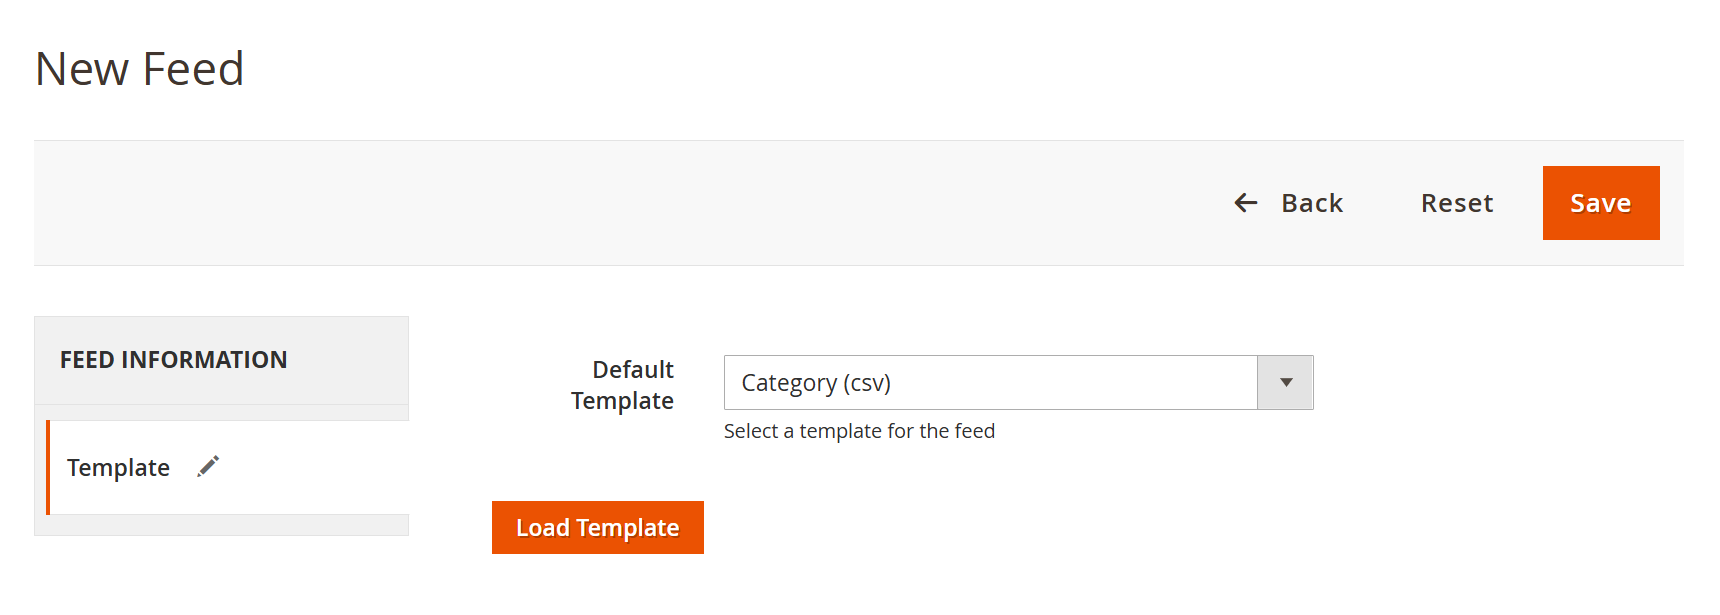
DemoClick here to visit frontend. Click here to visit backend admin panel- and click the "Load Template" button.
CSV and TXT Configuration Feeds
| Panel |
|---|
 Image Added Image Added
|
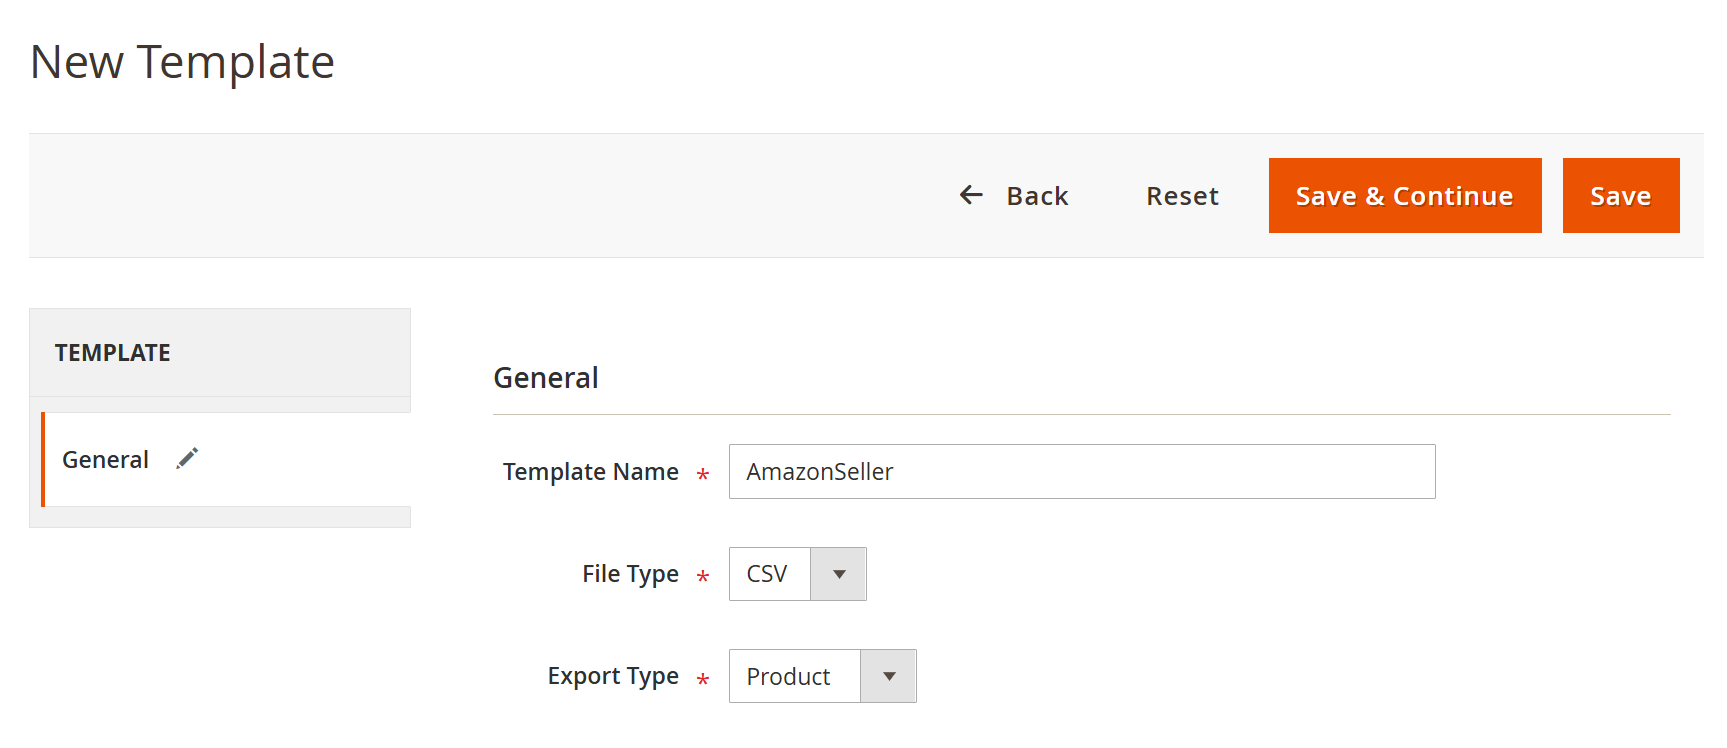
When you select either the CSV or TXT file type under the Information tab, you gain the ability to create or edit the attribute schema for your feed. - Enabled: Select "Yes" to enable the data feed.
- Feed Name:Enter the desired name for the data feed.
- Feed File Export Name: Specify the export name for the data feed.
- File Format: The file format will be automatically determined based on the template you have selected.
- Export Type: The export type will be automatically populated according to the selected template.
- Store View: Choose the store view for which the data feed will be generated.
| Panel |
|---|
 Image Added Image Added
|
- Fields Delimiter: This delimiter is used to split text into columns within your feed file. The supported delimiters are as follows:
- Comma (",")
- Tab ("\t")
- Colon (":")
- Space (" ")
- Vertical Pipe ("|")
- Semi-colon (";")
- Fields Enclosure: This option allows you to enclose data within your feed file.
| Panel |
|---|
 Image Added Image Added
|
- Include Header: Set to "Yes" to include a header row (attribute names) in the first line of your feed file.
- Append Additional Header: Enter a piece of additional information, include an additional header row above the first attributes row ( header) in the first line of your feed file.
| Panel |
|---|
 Image Added Image Added
|
In the Manage Content field mapping table, you can add or remove rows, reorder them, set the output type, and define the symbols limit. Each row in the mapping table corresponds to a column in the data feed file. To add a new column, click on "Add Column" to your CSV feed, create a new row and fill in the following parameters: - Source Key Name: The name of the header column.
- Value Type: The following value types are available:
- Pattern: Allows you to enter a static value or use patterns from the XML template.
- Attribute: Enables you to select any store attribute from the drop-down list.
- Parent Product: Allows you to export configurable products. In this case, simple associated products will have an attribute. For configurable or bundle products, it is recommended to use this value type with fields such as "Product URL" and "Grouped ID."
- Magento Value: Allows you to select the attribute or input a pattern for the column output.
- Value Required: Select this option to define whether the field is "Required" or "Optional" for the data feed.
| Panel |
|---|
 Image Added Image Added
|
- The option to select a filter created for the template will be displayed here. You can choose any filters associated with the selected template by selecting the corresponding checkbox (optional).
| Panel |
|---|
 Image Added Image Added
|
- UTM Source: Specifies the source of traffic, such as a search engine, newsletter name, or other origin (e.g., Google, Citysearch, Newsletter).
- UTM Medium: Identifies the medium through which the traffic is generated, such as email or cost-per-click (e.g., CPC, banner, email).
- UTM Name: Denotes a specific product promotion or strategic campaign (e.g., product, promo code, slogan).
- UTM Term: Identifies the paid keywords associated with the campaign
- UTM Content: Helps distinguish between different ads or links that direct to the same URL.
| Panel |
|---|
 Image Added Image Added
|
| Panel |
|---|
 Image Added Image Added
|
- Enabled: Select "Yes" to enable the FTP upload.
- Protocol: Select either FTP or SFTP as the connection protocol.
- Host Name: Enter the server address where the feed will be sent. The format should be: example.com:port.
- User Name: Provide the username for accessing the FTP server.
- Password: Enter the password associated with the FTP server.
- Path: This is an optional field. Enter the path to your merchant folder as provided by the Shopping Engine Service.
- Passive Mode: Select "Yes" to enable Passive mode, which is commonly used when a firewall is present. Select "No" if not needed.
| Panel |
|---|
 Image Added Image Added
|
| Panel |
|---|
 Image Added Image Added
|
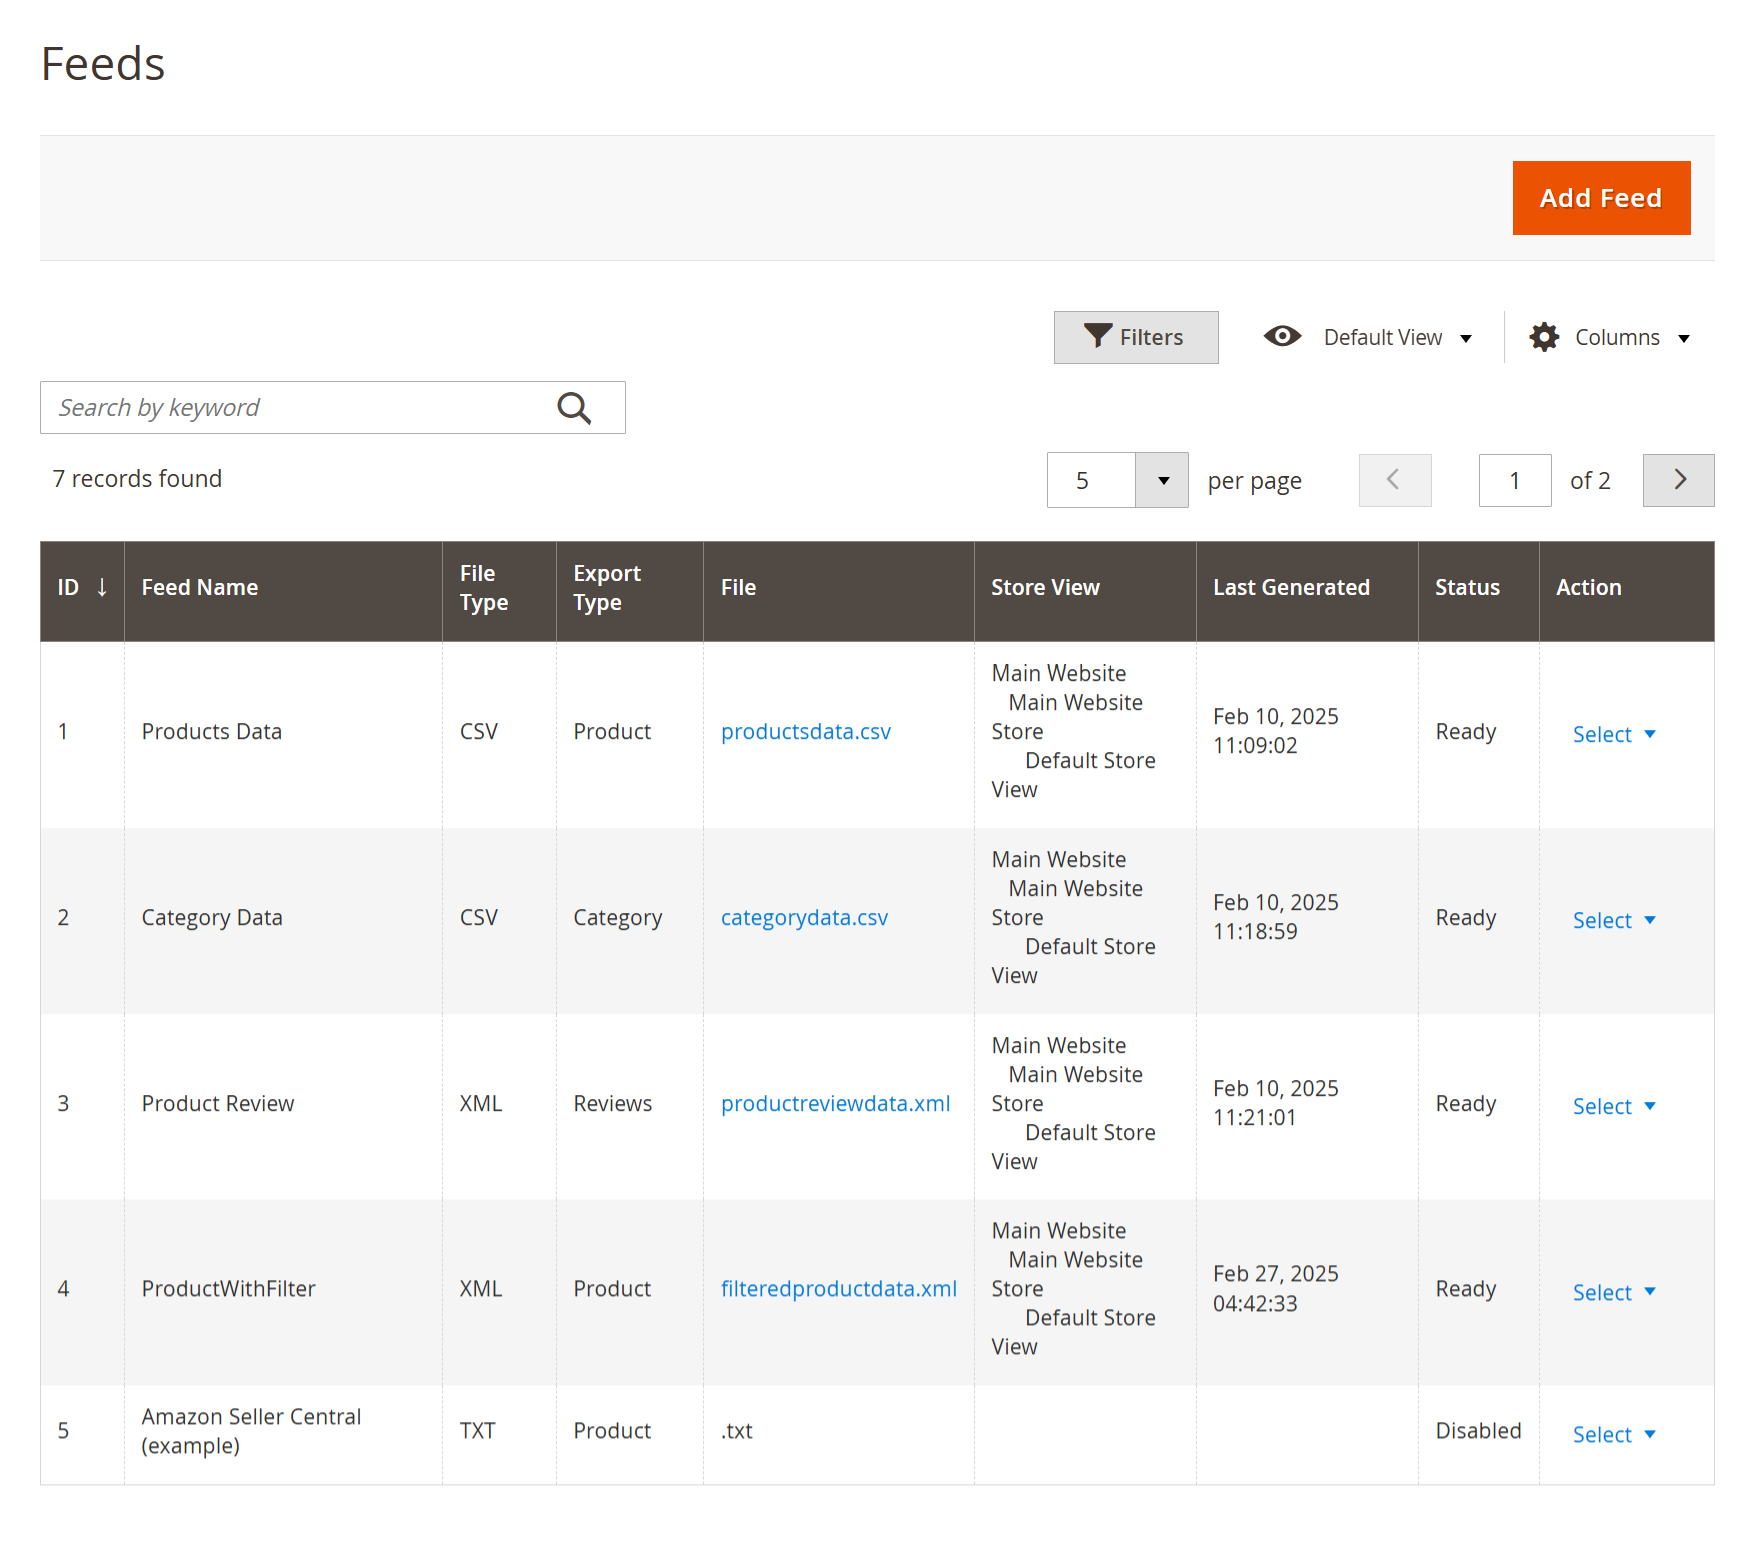
- You will see all the details for the exported feeds, including execution mode, title, message, status, and creation date. Additionally, you can search for and filter the exported feeds.
XML Configuration Feeds
| Panel |
|---|
 Image Added Image Added
|
- Adding an XML feed follows the same process as CSV and TXT feeds, with one key difference: you will need to select the XML Template while adding the template. The Manage Content tab will also be different for XML, while all other functionality tabs will remain the same for the XML feed.
- The following value types are available to select:
- Pattern: Allows you to enter a static value or use patterns from the XML template.
- Attribute: Enables you to select any store attribute from the drop-down list.
- Parent Product: Allows you to export configurable products. In this case, simple associated products will have an attribute. For configurable or bundle products, it is recommended to use this value type with fields such as "Product URL" and "Grouped ID."
Filters| Panel |
|---|
 Image Added Image Added
|
- You can manage all the filters you create through the Manage Filters grid. To view existing filters and add new ones, navigate to Magedelight → Product Feeds → Manage Filters. To create a new filter, click on Add New Filter, where you can select feeds and apply filters.
| Panel |
|---|
 Image Added Image Added
|
- Enable: Select "Yes" to enable the filters.
- Rule Name: Enter a name for the filter.
- Choose Feeds: Select the feeds to which the filter will be applied. You can also apply filters directly on the feed edit page.
- Rule Conditions: In the Rules tab, you can specify the conditions required for the filter. Select an attribute from the list and apply the desired filter conditions. The extension allows you to set a combination of conditions using if ALL, if ANY, TRUE, or FALSE rules.
|