| Section |
|---|
| Column |
|---|
| 
|
|
| Section |
|---|
Installation
| Warning |
|---|
Before installing the extension, please make sure to Backup your web directory and store database |
- Unzip the extension package file into the root folder of your Magento 2 installation.
- Connect to SSH console of your server:
- Flush store cache
- log out from the backend and log in again
|
| Section |
|---|
License Configuration
| Note |
|---|
License activation is not required for extension purchased from Magento Marketplace. |
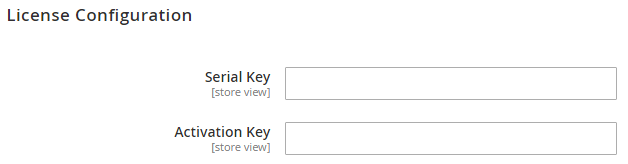
After successful installation of Store Locator extension, you are now required to configure the license key in the admin configuration section. You can set it from: Step 1: Go to, Admin Control Panel > Stores > Configuration > Magedelight > Store Locator > License Configuration. You will find two text boxes asking for Serial Key and Activation Key, which you received on email upon the purchase of extension. See screenshot below: | Panel |
|---|
|
- Serial Key: Enter Serial Key
- Activation Key: Enter Activation Key
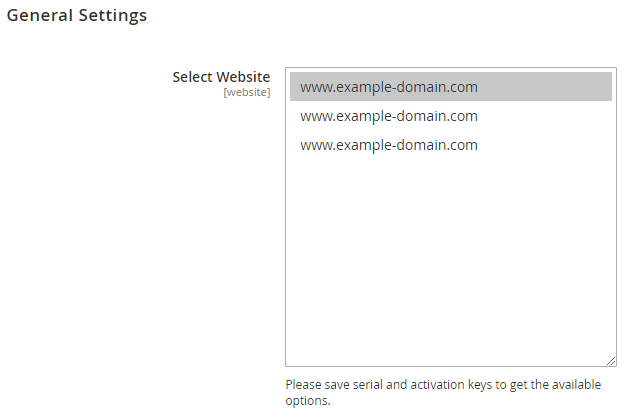
Step 2: Expand “General Configuration” tab, you will find a list of domains for which license is purchased and configured, now select the domain you are going to use, you can select multiple domains by clicking “Ctrl + Select”. | Panel |
|---|
|
Step 3: Now, select “Yes” from “Enable Module” to enable extension and again click on “Save Config” button on the top right. | Panel |
|---|

|
|
| Section |
|---|
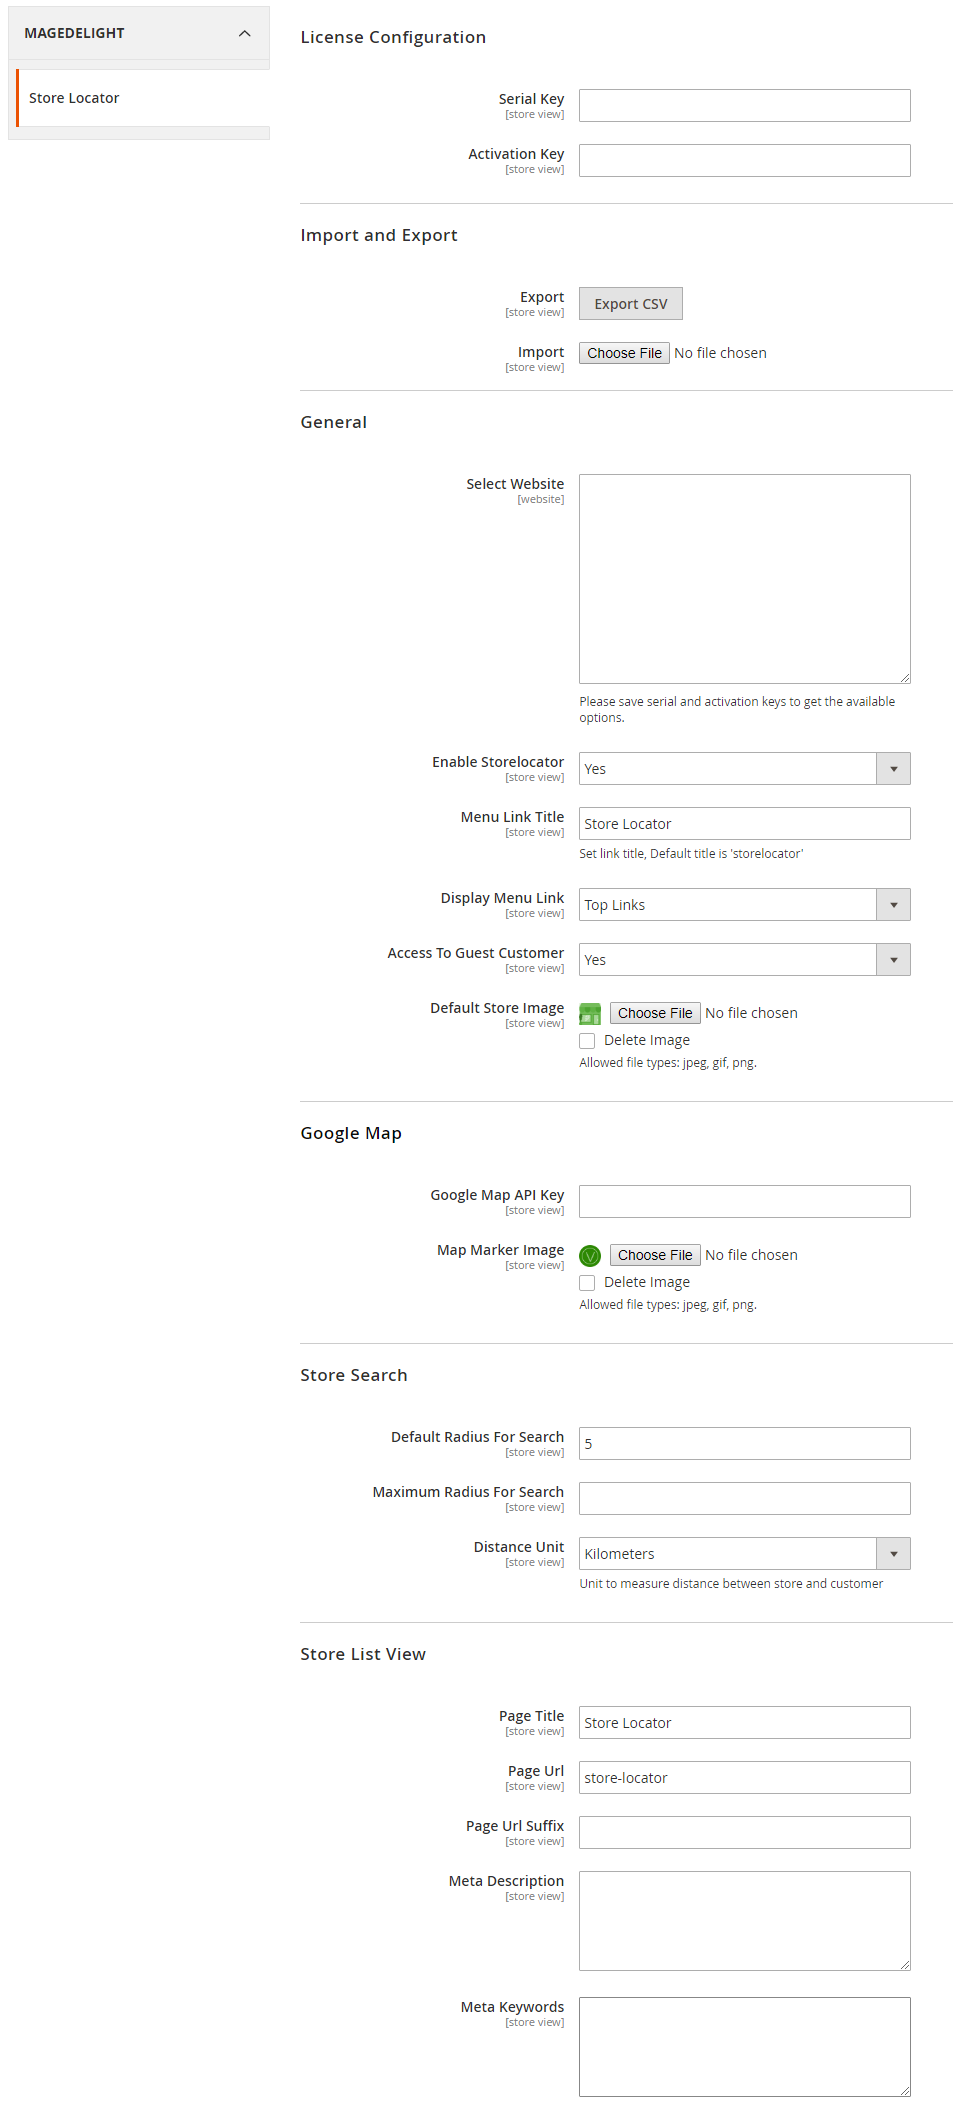
Backend Configuration (Admin side)
| Panel |
|---|
|
- General
- Enable Store locator: Disable store locator extension
- Menu Link Title: Store locater page link title
- Display Menu Link: Where to show store locater link? Options can be Top Link or Top Navigation menu
- Access to Guest Customer: Set access limit to allows store locator to guest customer or not
- Default Store Image: You can upload default image to be shown, if particular store don’t have uploaded store image
- Google Map
Store Search Default Radius for Search: You can define default radius of distance to be cover while searching store on Google map Maximum Radius for Search: Set maximum radius limit user can search store from his current location Distance Unit: Distance unit while search on Google map. Options can be Kilometers or Miles
Store List View Page Title: Store locator page title Page URL: Store locater page URL - Page URL suffix: Store locator page URL suffix
- Meta Description: You can define Meta description for store locator page
Meta data: You can define Meta data for store locator page
|
| Section |
|---|
Backend Functionality
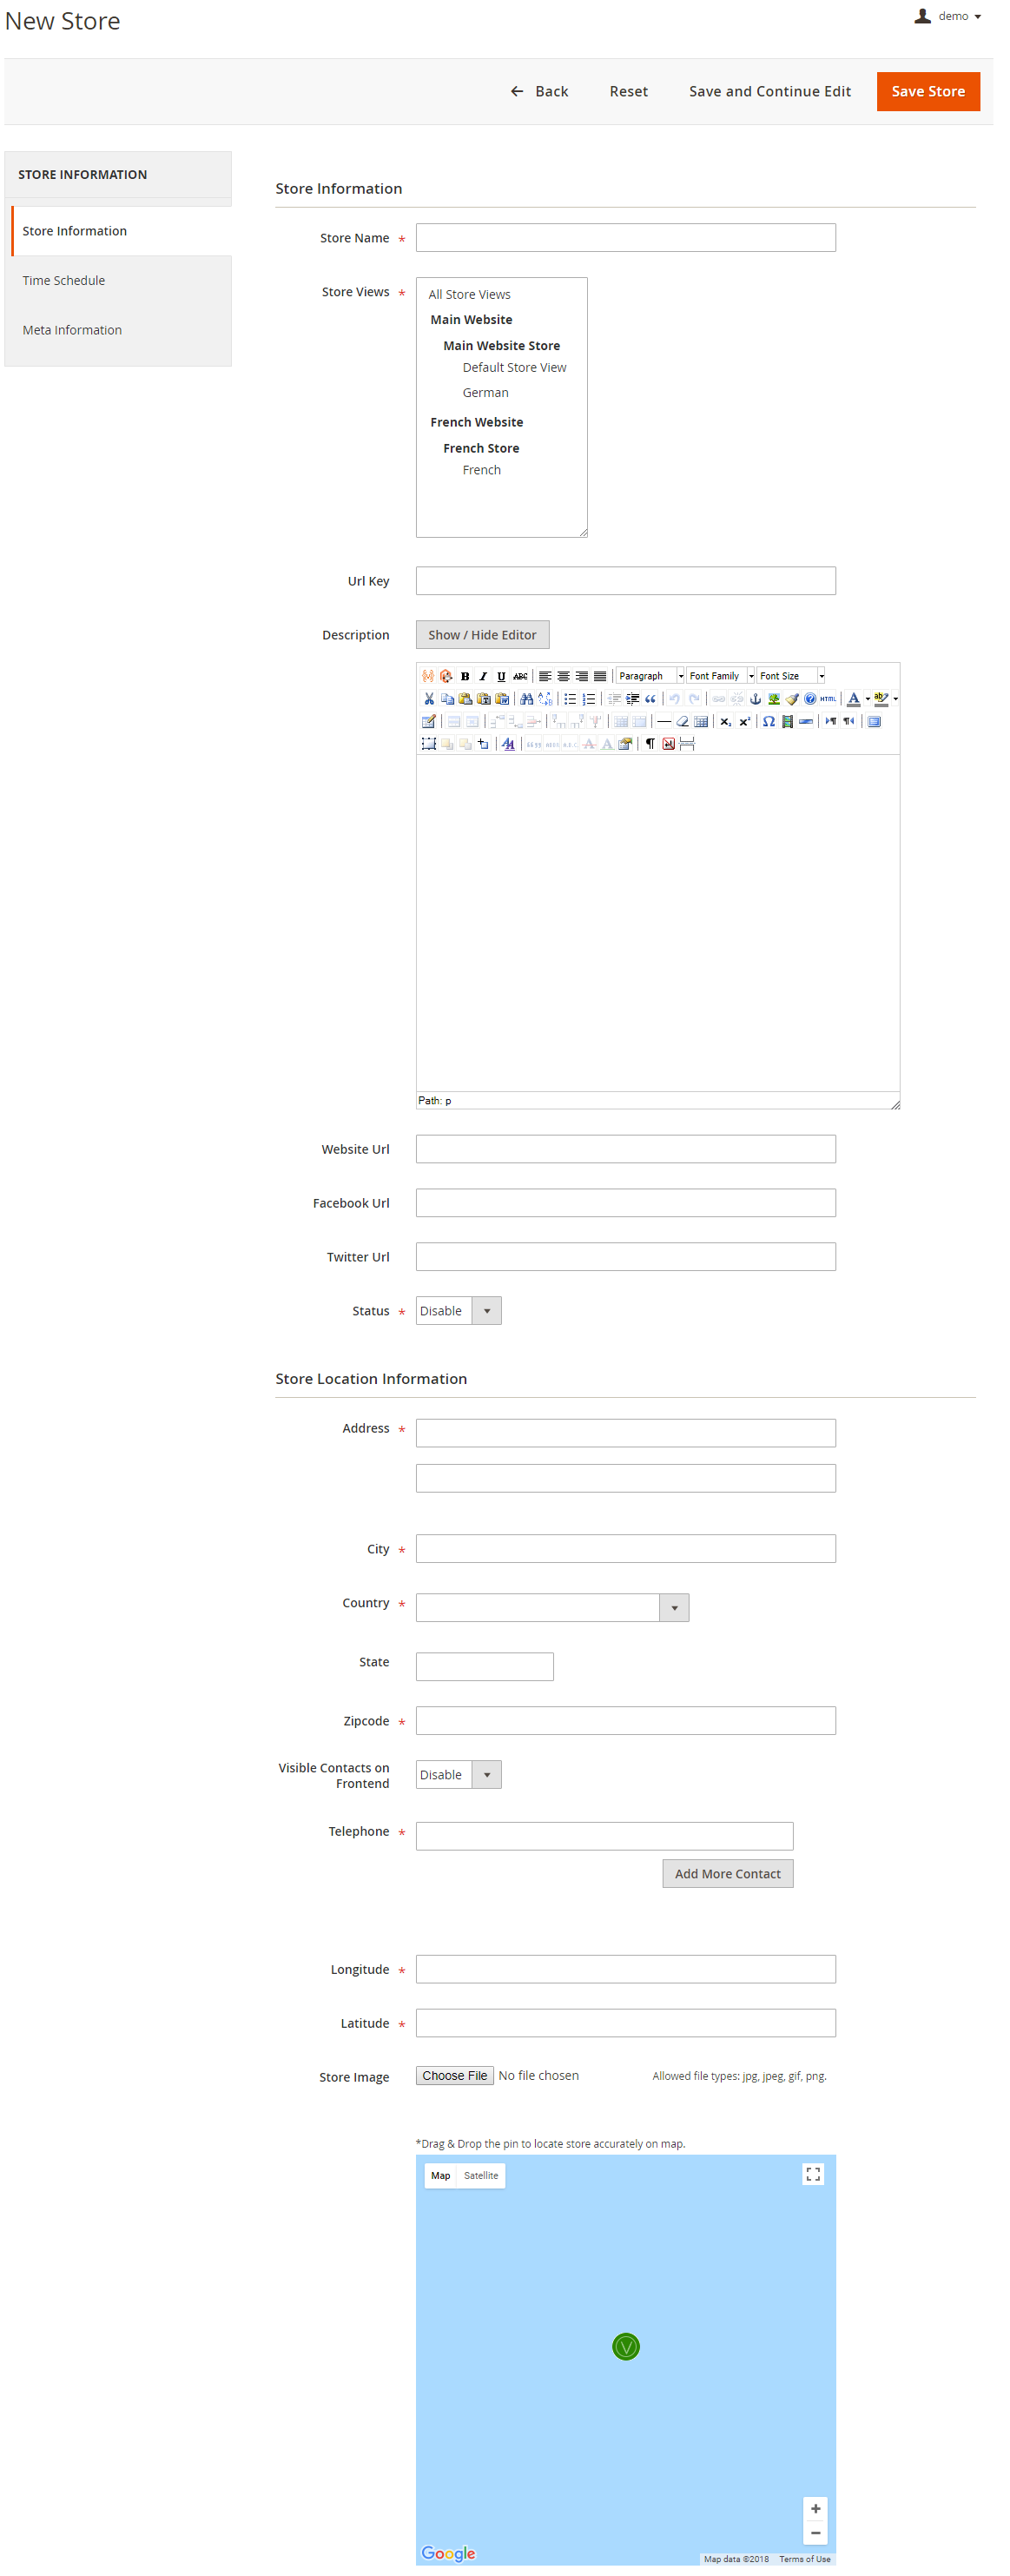
Add new Store | Panel |
|---|
|
- Store Name: Define store name
- URL Key: Define SEO friendly URL key for store details page. If not defined, it would be auto generated from store name
- Store Description: Describe store details to be shown on store detail page
- Website URL: Store website URL if have any
- Facebook URL: Facebook page to show link on store details page
- Twitter URL: Twitter URL to show link on store details page
- Status: Enable/Disable the store
- Address: Define store address details with city, state, country, zip code. Based on given address, store will be located on Google map
- Telephone: You can add multiple phone number for store
- Visible contact on frontend: Set visibility of phone number at frontend
- Store Image: upload store image/icon
- Google Map: Based on given address store will be located on Google map. However you can use drag & drop feature to show map accurately on map
- Longitude & latitude: Its value will be automatically set based on the store locate on Google map. However you can edit if needed
| Panel |
|---|
|
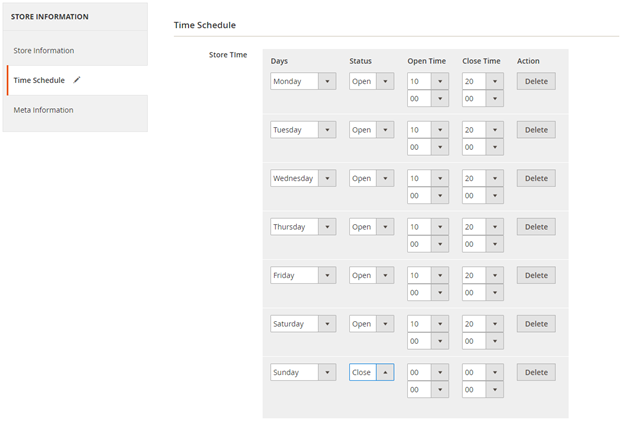
- Time Schedule: Here you can define the stores working days and working time of the store. You can define working time for each week day or even set close time too. As shown with below image
| Panel |
|---|
|
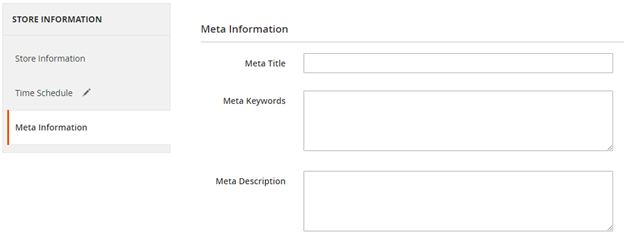
- Meta data: You can define Meta title, Meta keywords and Meta description for SEO purpose for each store detail page at frontend. As shown with below image
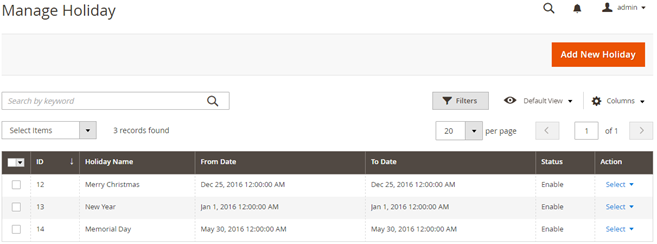
Manage Holiday You can manage holidays for each individual store or all stores. You can create holiday for one day or vacation period for multiple days. Refer below image, | Panel |
|---|
|
Add New Holiday | Panel |
|---|
|
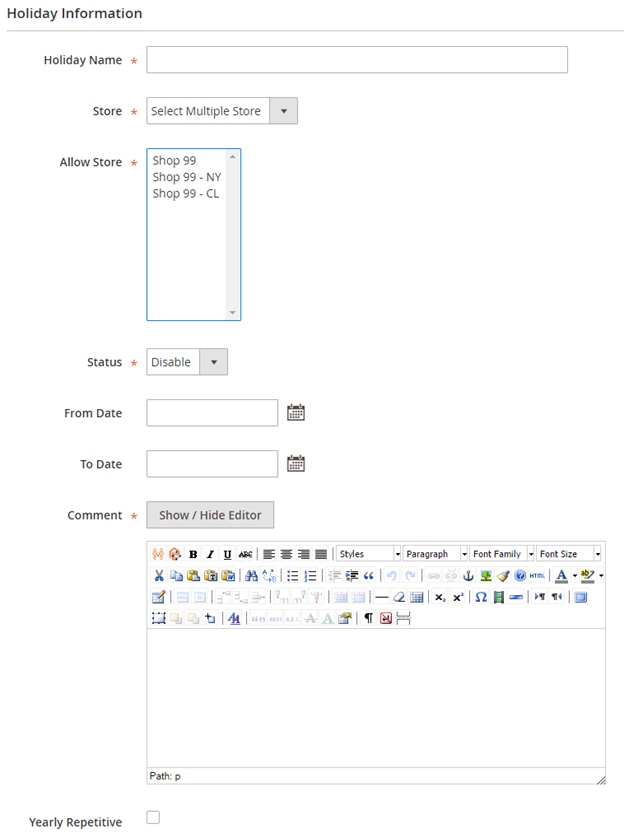
- Holiday Name: You can define
- Store: All Stores/Selected stores. You can have holiday for all store or select multiple stores.
- Status: Enable/Disabled holiday.
- From Date: Select holiday start date.
- To date: Select holiday end date.
- Comment: Specific not for holiday if have any.
- Repeat Yearly: If you check this check box, particular holiday will repeat every year on same date. For example you can define 1st Jan New Year holiday, and mark this day to repeat every year.
|
| Section |
|---|
Frontend Functionality
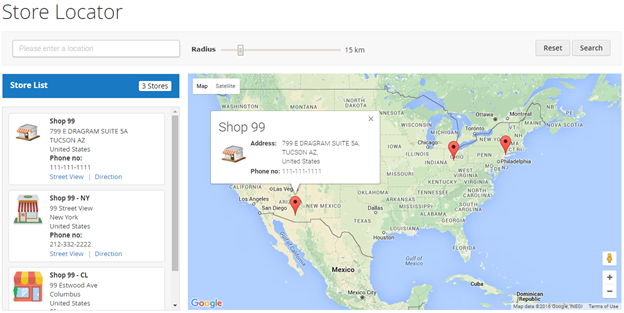
Once you configured the extension and create stores, the store will be listed on store locator page. The store locator link will be displayed on top links or with top menu, based on how it configured. Store locater page will be look link, | Panel |
|---|
|
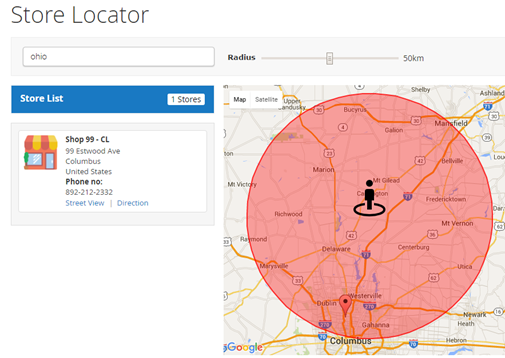
Search Store You can search nearest store with store search feature, user can use radius from to find nearest store from his current location. As shown with below location. | Panel |
|---|
|
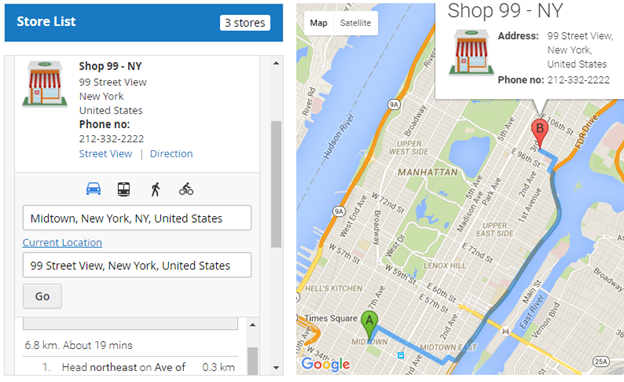
It also helps to find direction from your current location or from particular location to particular store. Refer below image, | Panel |
|---|
|
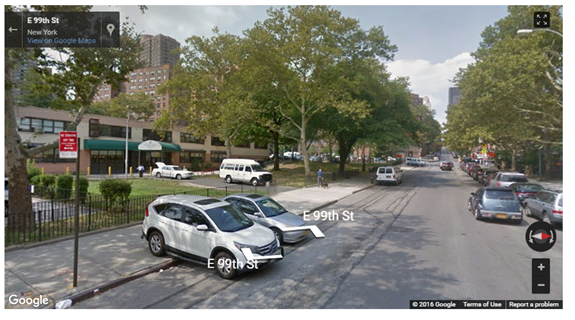
Street view That also supports street view of store, as show with below image | Panel |
|---|
|
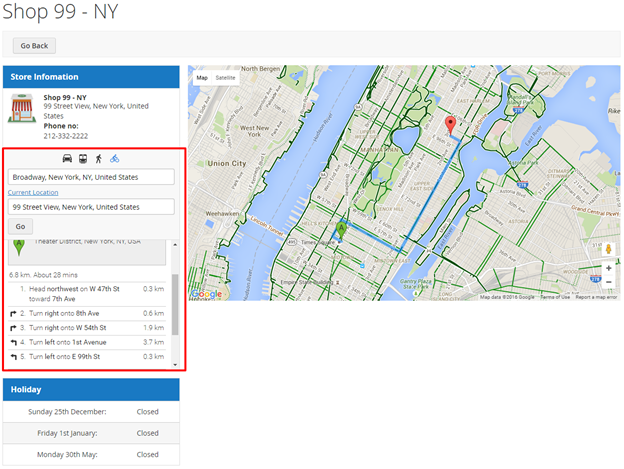
Store page Store page will contain details of particular store with store description, address. You can also have the direction finder supported by map. It also includes working days & time details, upcoming holiday list. | Panel |
|---|
|
|
| Section |
|---|
Support
Click here to raise a support ticket using your MageDelight account. |
| Section |
|---|
Additional Services
Click here to get the customized solution for this extension. |
Thank you for choosing MageDelight!