Payment Gateway Configuration
Daily Velocity FilterYou can specify velocity of the transactions per day. It allows you to specify a threshold for the number of transactions allowed per day. All transactions exceeding the threshold in that day will be flagged and processed according to the selected filter actions. You can see available filter action options in below image. | Panel |
|---|
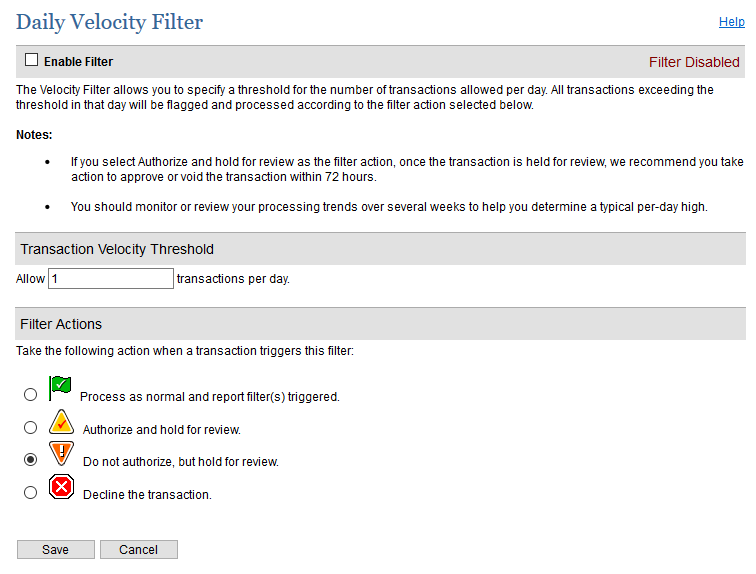 Image Added Image Added
|
Hourly Velocity FilterYou can specify velocity of the transactions per hour. It allows you to specify a threshold for the number of transactions allowed per hour. All transactions exceeding the threshold in that hour will be flagged and processed according to the selected filter actions. You can see available filter action options in below image. | Panel |
|---|
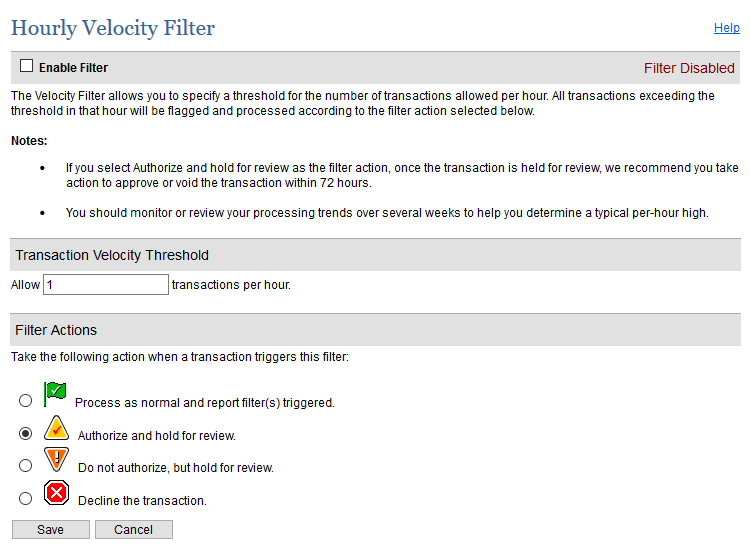 Image Added Image Added
|
Suspicious Transaction FilterThe Suspicious Transaction Filter is a proprietary tool developed by Authorize.Net Risk Management team to identify suspicious transactions. Based on a vast knowledge base of transaction behaviors and fraud detection analysis, the Suspicious Transaction Filter provides enhanced fraud detection for your account. | Panel |
|---|
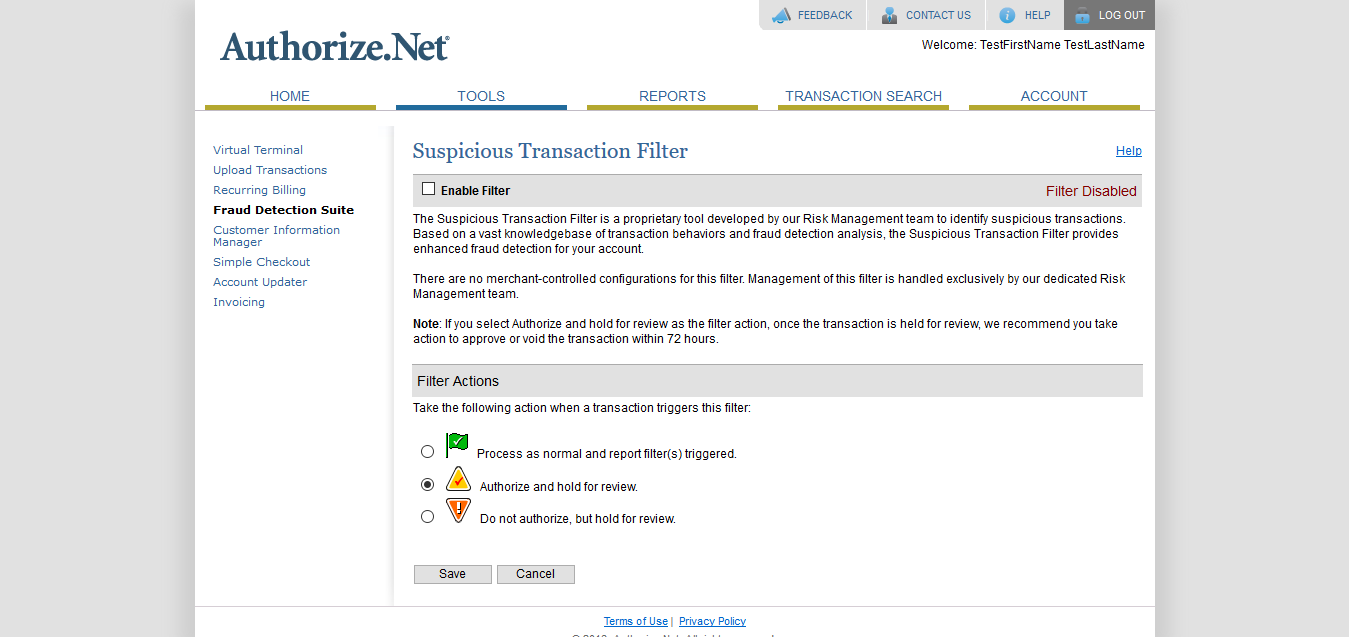 Image Added Image Added
|
Transaction IP Velocity FilterYou can specify the number of maximum transactions allowed per IP address per hour. It allows you to specify the maximum number of transactions allowed from the same Internet protocol (IP) address per hour. If your account receives more transactions from the same IP address in an hour than the threshold you set, all exceeding transactions received that hour will be flagged and processed according to the selected filter action. You can see available filter action options in below image. | Panel |
|---|
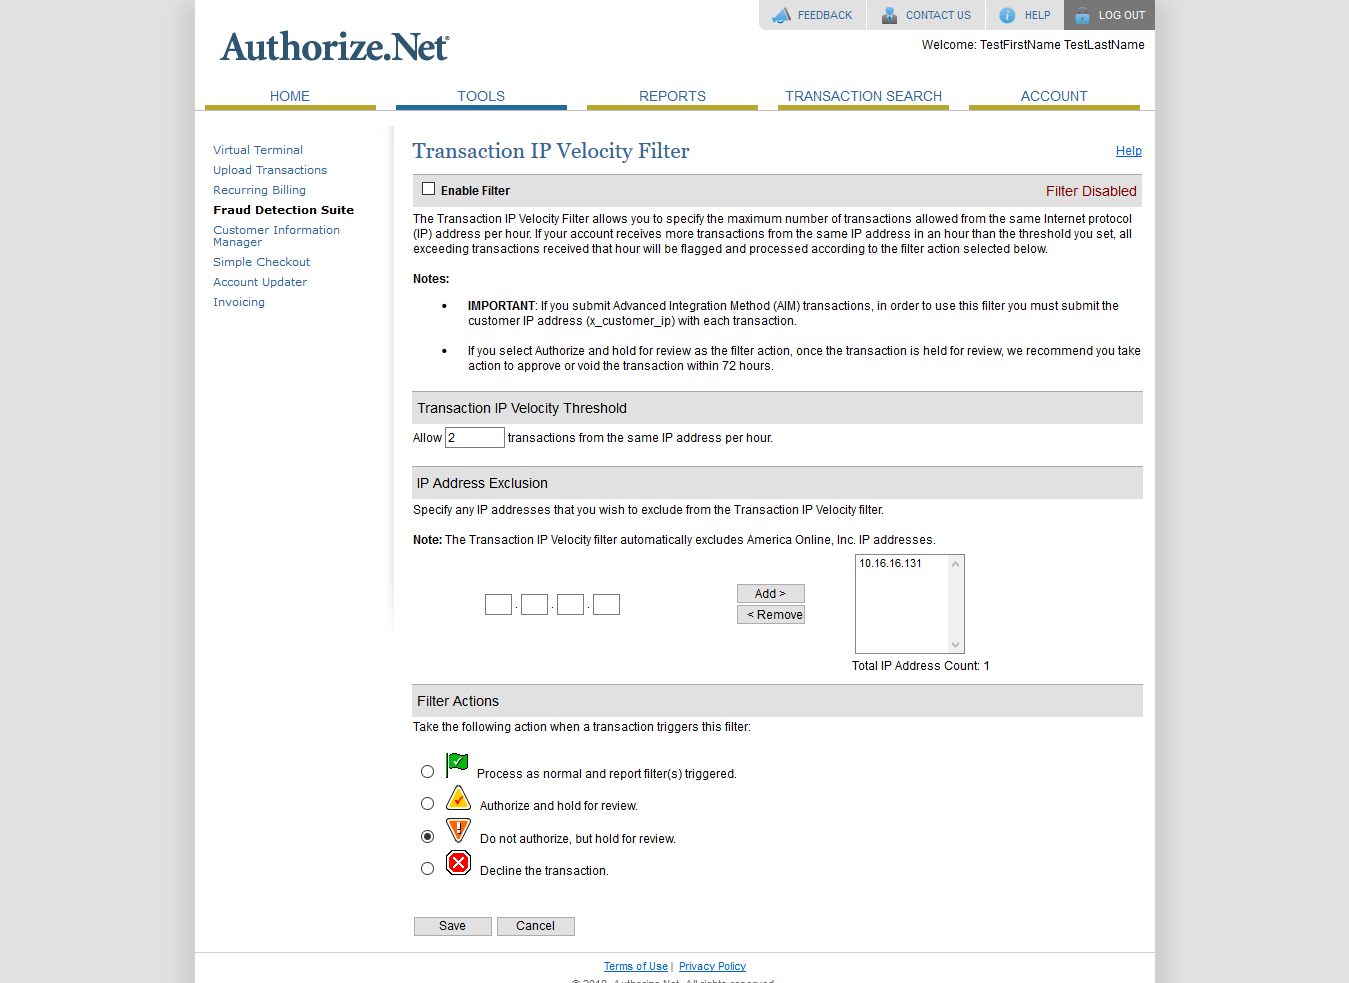 Image Added Image Added
|
Enhanced AVS Handling FilterThe payment gateway provides comprehensive Address Verification Service (AVS). It is a tool designed to assist in identifying potentially fraudulent credit card transactions. For every credit card authorization, AVS compares the billing address and ZIP code provided by the customer at the time of purchase, to the address and ZIP code on file at the card issuing bank. AVS then returns a response code indicating the results of the comparison. | Panel |
|---|
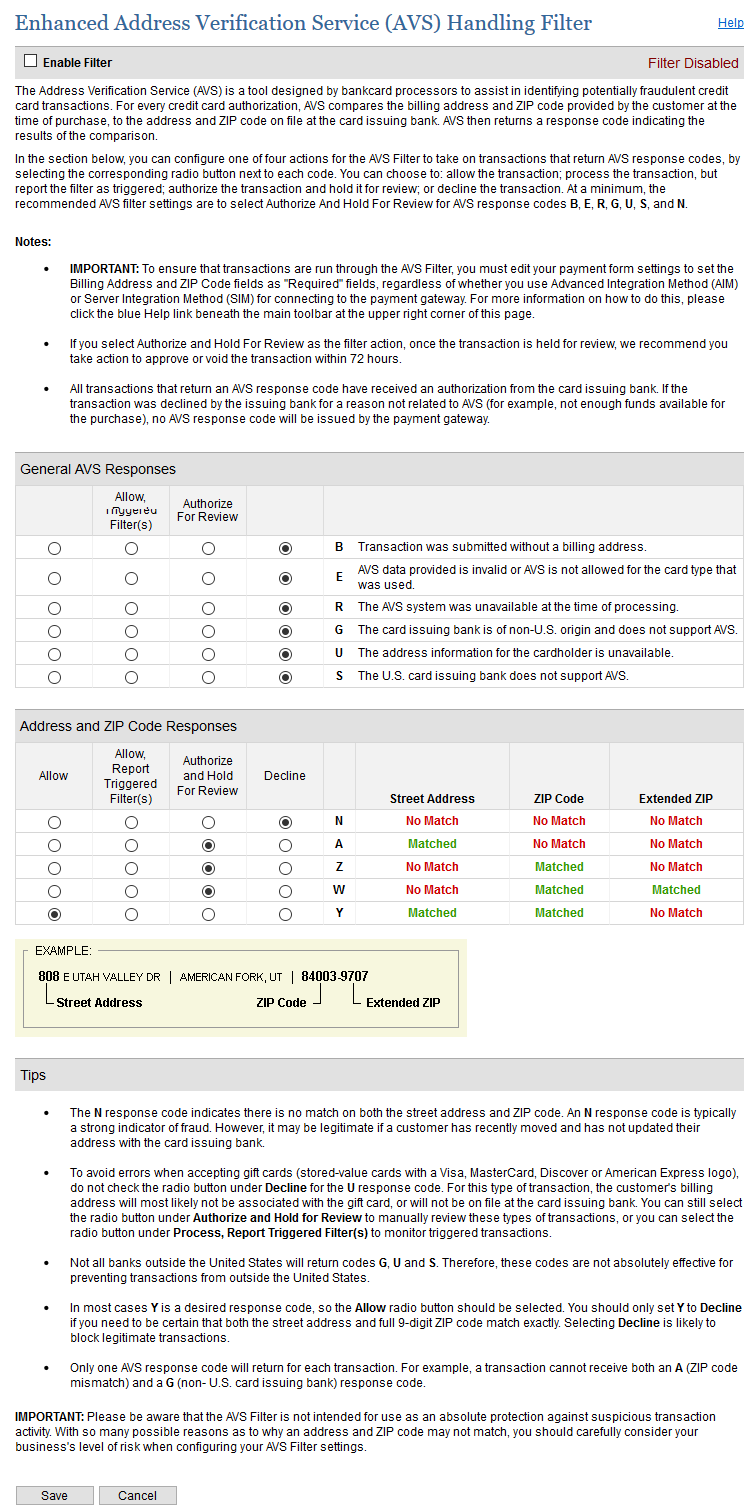 Image Added Image Added
|
Enhanced CCV Handling FilterThe payment gateway provides comprehensive code verification services. Card Code Verification (CCV) compares the three- or four-digit card code submitted in a transaction with the card code on file at the card issuing bank. Based on the results of that comparison, the bank returns a CCV response code. | Panel |
|---|
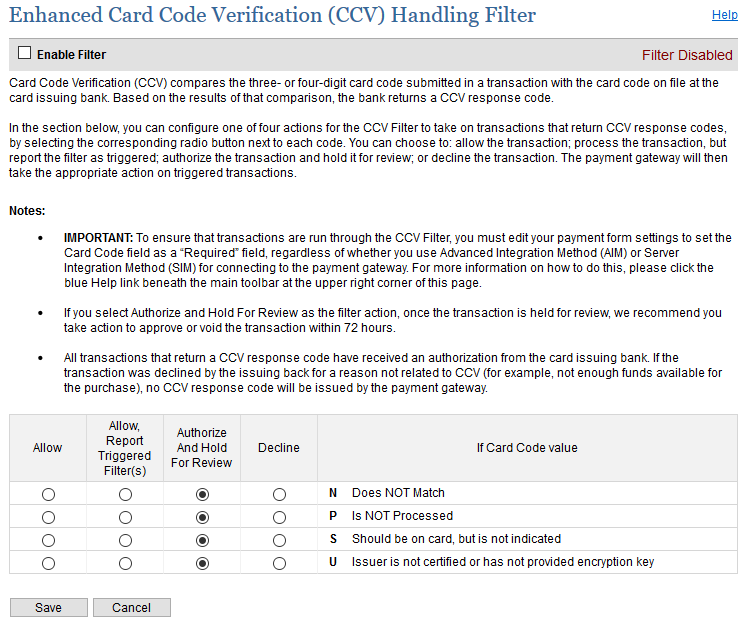 Image Added Image Added
|
Amount FilterThe Amount Filter allows you to specify a lower limit and/or upper limit for your transactions. Transactions that are submitted with an amount less than your lower limit or greater than your upper limit will be flagged and processed according to the selected filter action. You can see available filter action options in below image. | Note |
|---|
If you select Authorize and hold for review as the filter action, once the transaction is held for review, we recommend you take action to approve or void the transaction within 72 hours. |
| Panel |
|---|
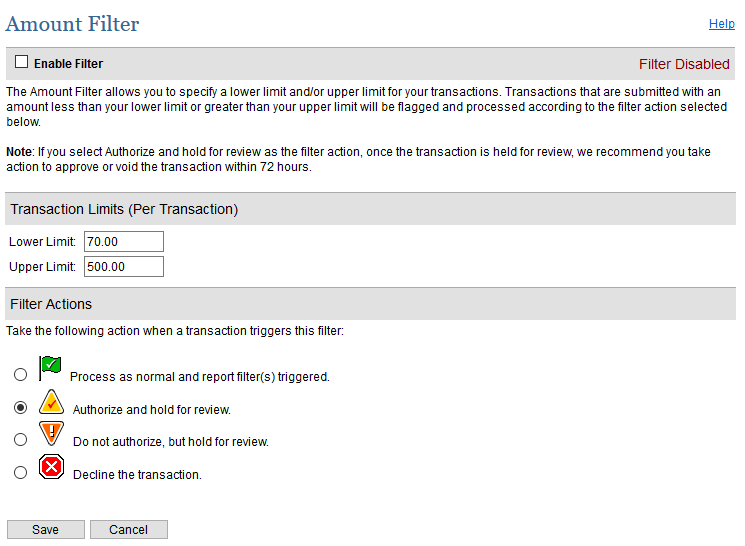 Image Added Image Added
|
Shipping Address Verification FilterThe Shipping Address Verification (SAV) Filter verifies that the shipping address received with an order is a valid postal address or not. | Note |
|---|
- IMPORTANT: To ensure that transactions are run through the Shipping Address Verification Filter, you must edit your payment form settings to set the Shipping Address, City, State and Zip Code fields as "Required" fields, regardless of whether you use Advanced Integration Method (AIM) or Server Integration Method (SIM) for connecting to the payment gateway.
- If you select Authorize and hold for review as the filter action, once the transaction is held for review, we recommend you take action to approve or void the transaction within 72 hours.
|
| Panel |
|---|
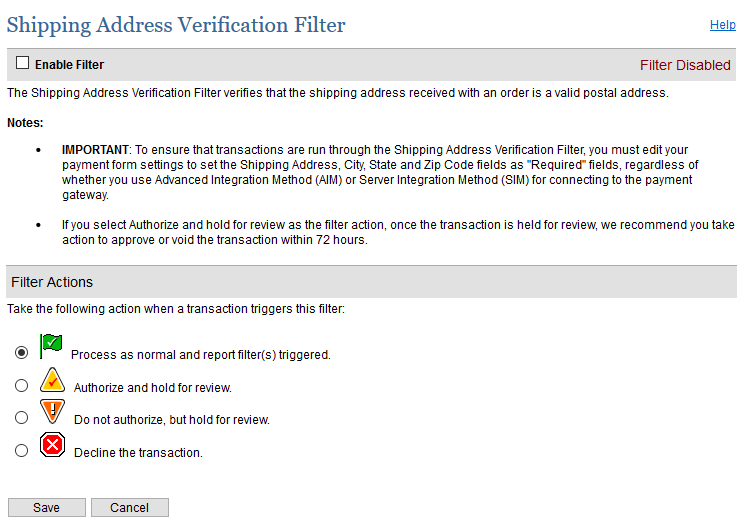 Image Added Image Added
|
IP-Shipping Address Mismatch FilterThe IP-Shipping Address Mismatch Filter compares the order’s originating IP Address with the shipping address provided. This helps to determine whether or not the order is shipping to the country in which it originated. You can see available filter action options in below image. | Note |
|---|
- IMPORTANT: If you submit Advanced Integration Method (AIM) transactions, in order to use this filter you must submit the customer IP address (x_customer_ip) with each transaction.
- If you select Authorize and hold for review as the filter action, once the transaction is held for review, we recommend you take action to approve or void the transaction within 72 hours.
- Keep in mind that mismatches are common with gift transactions and do not always indicate suspicious transactions.
|
| Panel |
|---|
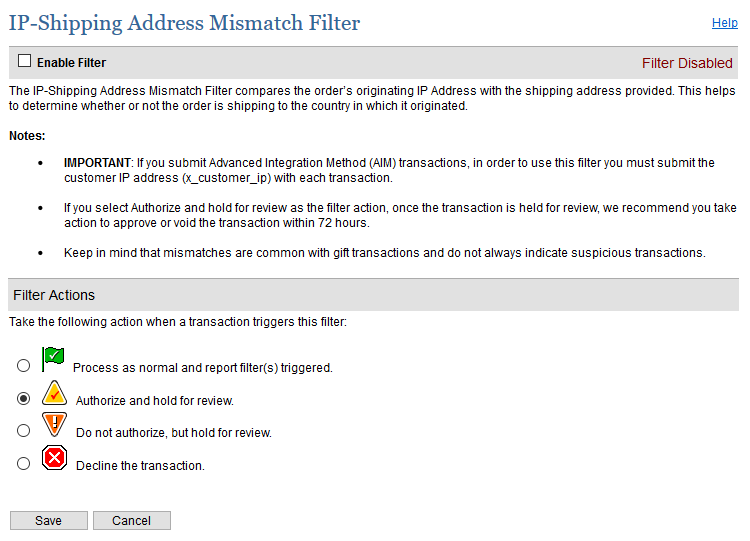 Image Added Image Added
|
Regional IP Address FilterThe Regional IP Address Filter allows you to designate regions or countries from which you do not want to accept transactions. You can choose to process normally and report; hold for review; or decline orders based on an entire geographic area, or on a country-by-country basis. To configure the filter actions based on an entire region, click Edit Regional Settings and then select the radio button that corresponds to the action you want to select. To configure filter actions for each country in a region, click Edit Regional Settings, then click Expand Geographic Region. A list of all countries in the region will display. Select the radio button that corresponds to the action you want to select for each country, then click Save when finished. | Panel |
|---|
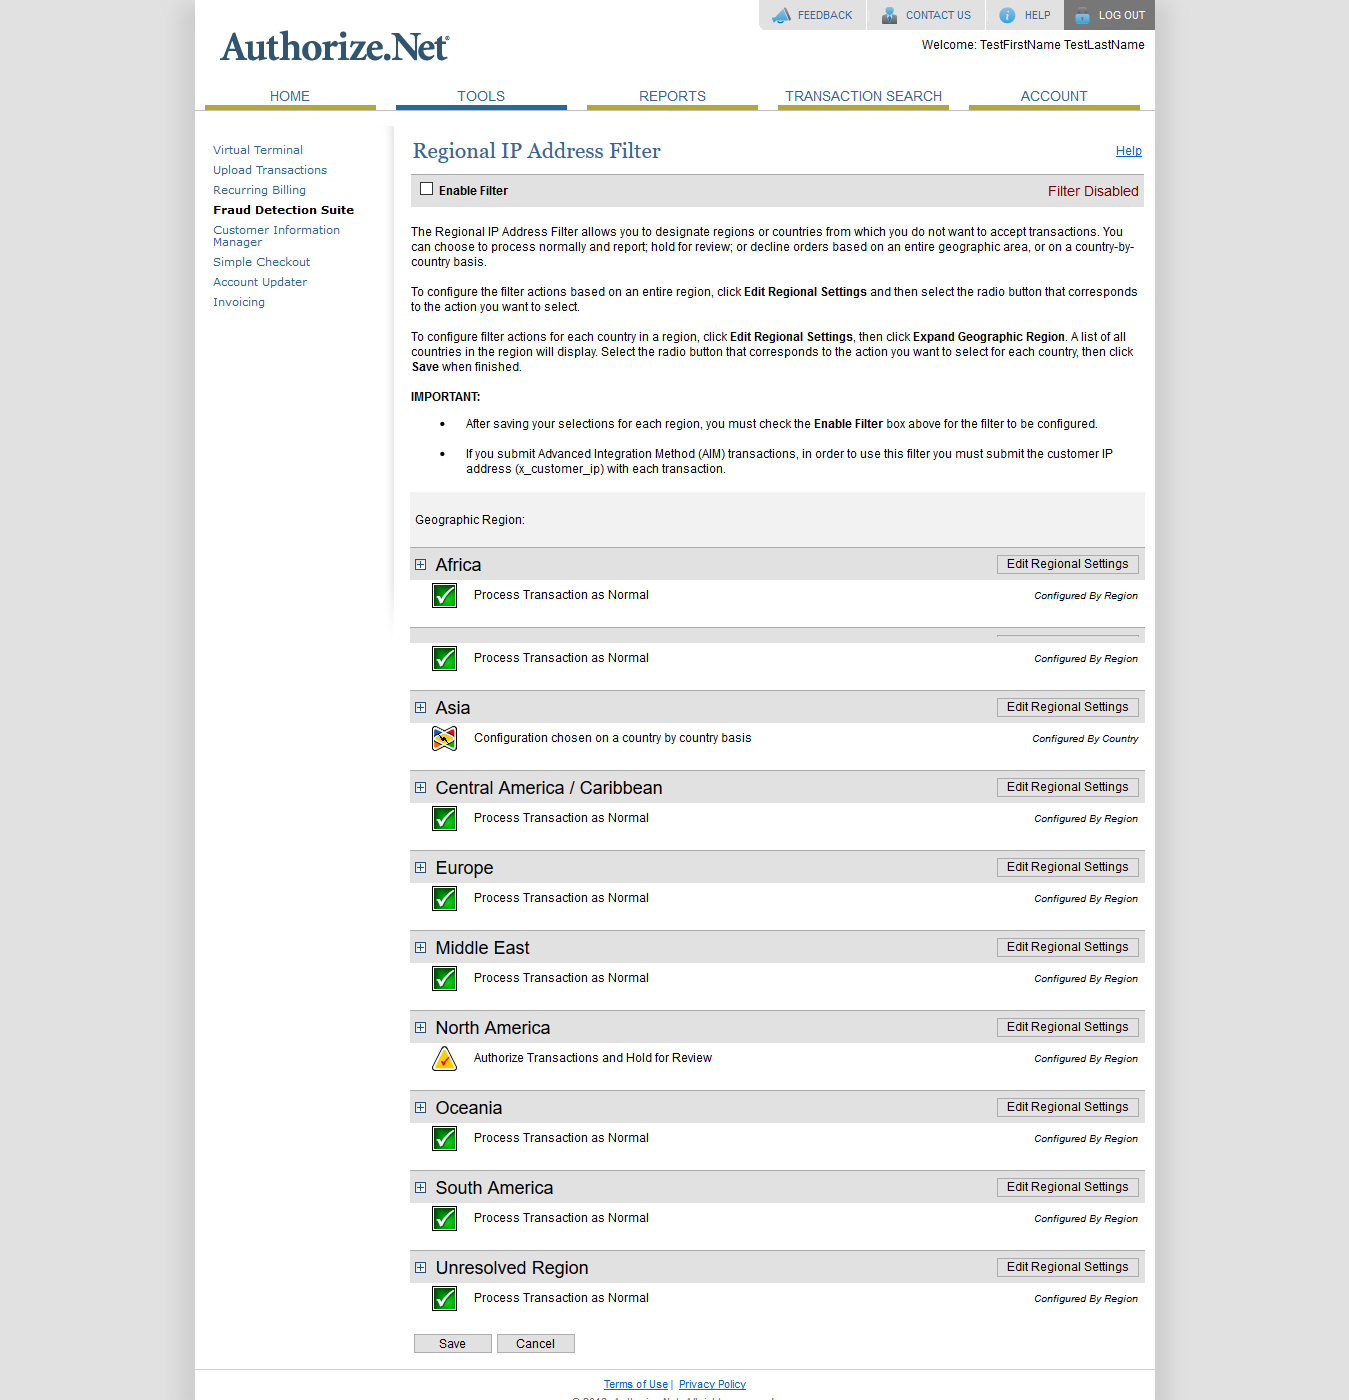 Image Added Image Added
|
Shipping-Billing Mismatch FilterThis filter permits you to compare the shipping and billing addresses provided by the client. If the two addresses do not match, the transaction is flagged and processed according to the selected filter action. | Panel |
|---|
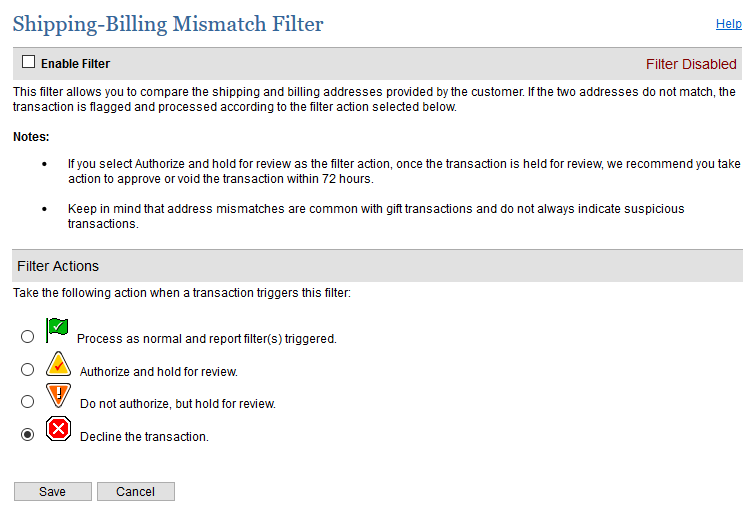 Image Added Image Added
|
Authorized API IP AddressesThe payment gateway allows IP address validation to access APIs. API can not be accessed from other IP address. You can configure a list of authorized server IP addresses from which API transactions will be accepted by the payment gateway. Any API transaction submitted from an IP address not included on this list will be rejected. | Panel |
|---|
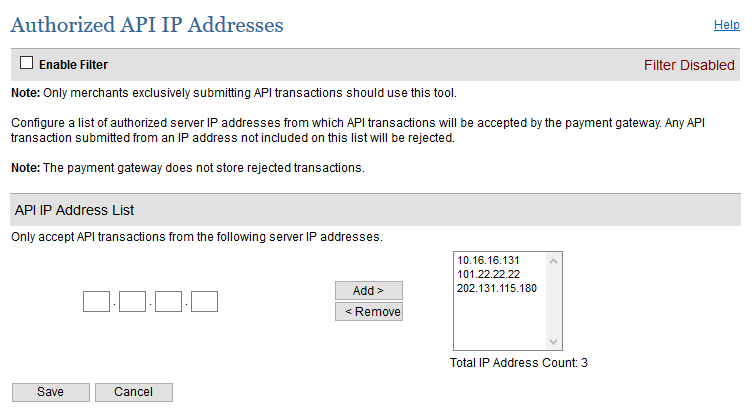 Image Added Image Added
|
IP Address BlockingAn advanced IP blocking functionality is available with Payment Gateway. IP Address Blocking allows you to block transactions submitted from IP addresses known to be the source of suspicious or fraudulent transactions. No one can access from blocked IP address. | Panel |
|---|
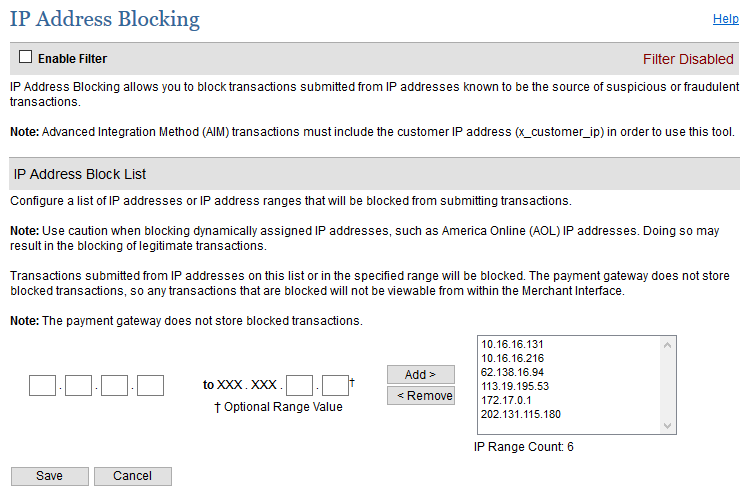 Image Added Image Added
|
| 
