
Installation
You will require to install MageDelight Base Extension first. If it is not installed then please download it from https://www.magedelight.com/pub/extensions/magedelight-base.zip and unzip the package file into the root folder of your Magento 2 installation.
Before installing the extension, please make sure to Backup your web directory and store database
- Unzip the extension package file into the root folder of your Magento 2 installation.
- Connect to SSH console of your server:
- Navigate to the root folder of your Magento 2 setup
Run command as per below sequence,
php -f bin/magento setup:upgrade
php -f bin/magento module:enable Magedelight_Megamenu
php -f bin/magento setup:static-content:deploy
- Flush store cache
- log out from the backend and log in again
Backend Configuration (Admin side)

- Enable Gift card For Gift Card Products: Enable/disable coupon code discounts with gift card purchase
- Lifetime : Set life of the gift card (This would act as a default life in days for all the gift cards if admin doesn’t set the life time for each gift card)

This setting would allow to set the sender email and name for the emails going to the gift card customers. You can define the value of “Email settings” drop down from General > Store email addresses.
Backend Functionality
Gift Card Products
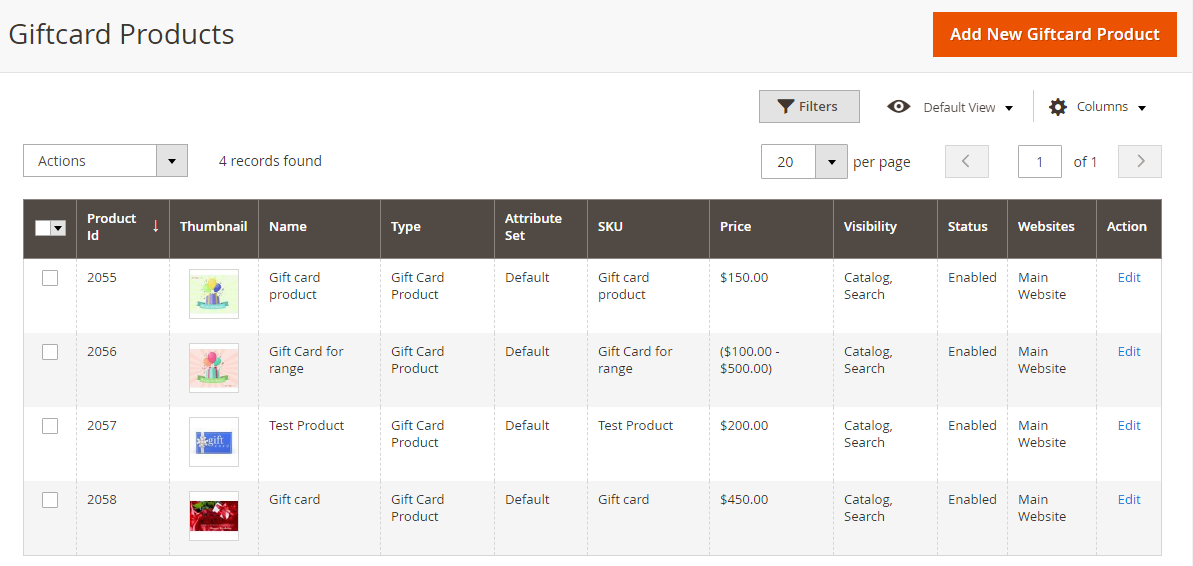
All gift card products are listed here.
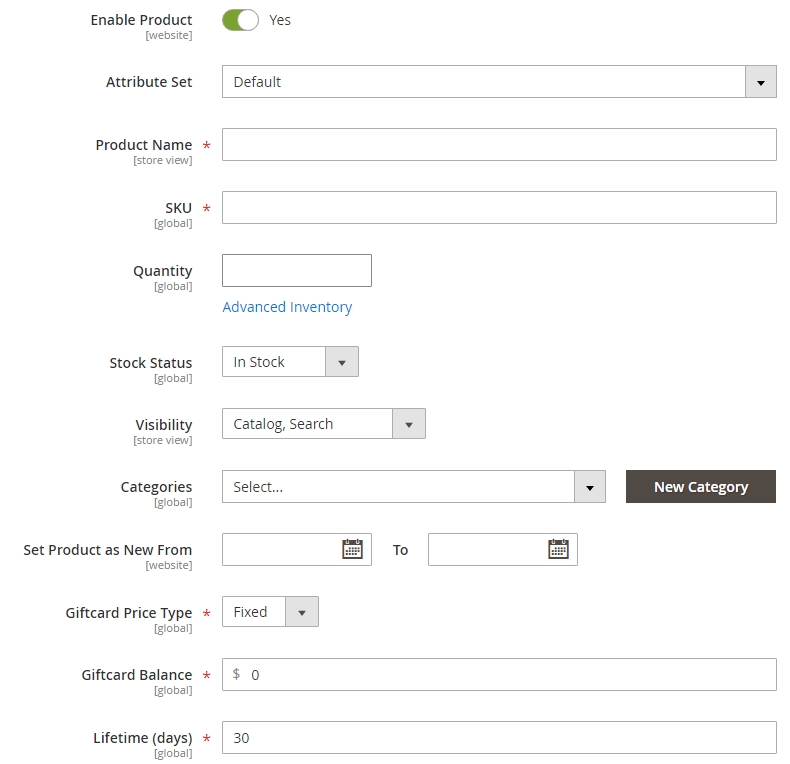
- Enable product (yes/no): To enable/disable product on frontend
- Attribute set: Select default to get all attribute of the gift card
- Product name: Give any unique name to the gift card
- SKU: This will be same as product name
- Quantity: set number of gift card products you want to sell. To set unlimited quantity of the product go to advanced inventory and “use config settings” and set “Manage stocks” to “No”
- Stock status: in stock / out of stock
- Visibility: set “Not visible individually” if you want to hide the product from frontend. Set “catalog” if you want to display under catalog only (user will not be able to search) or set “search” if you want user to view the product via search only or set “catalog and search” if you want to display the product and allow user to view the product as a search result
- Categories: Select “Giftcard” from the drop down OR select the name which you have given while creating the category from product > categories tab
- Lifetime (days): set the number of days to use the gift card from the date of purchase
Gift Card Codes
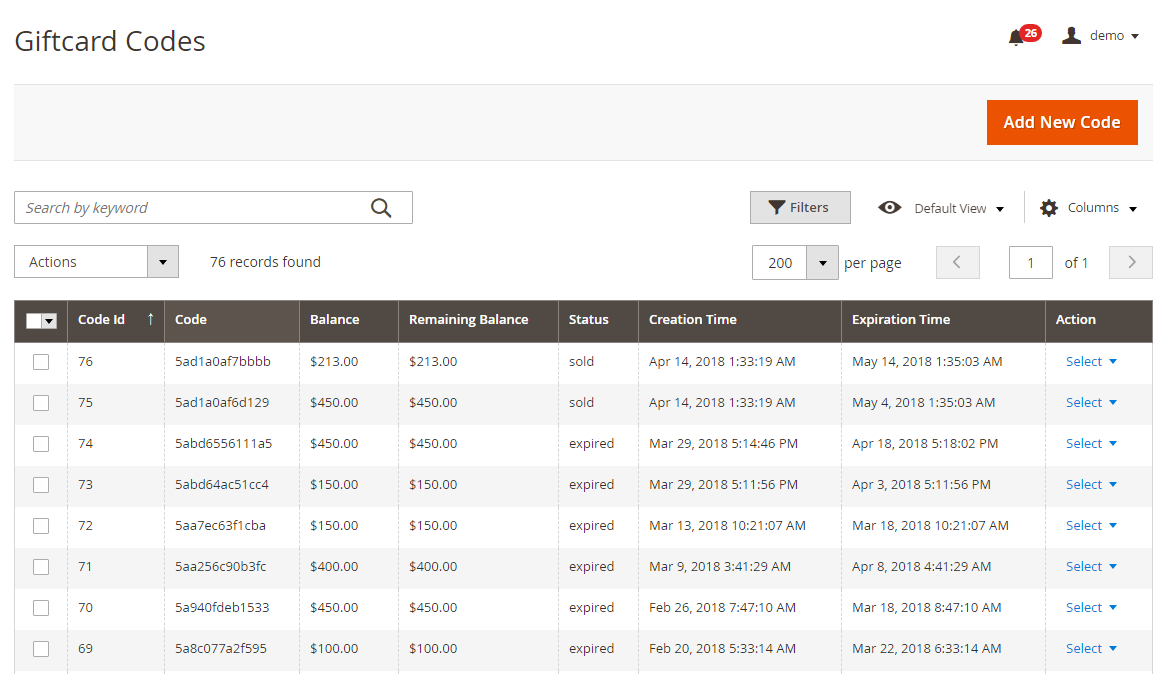
Go to Giftcard > Manage codes and it will display a grid of existing/ created gift codes and a button “Add New Code” to create new code. Click on the button and it will get redirected to create new code page as shown in picture above
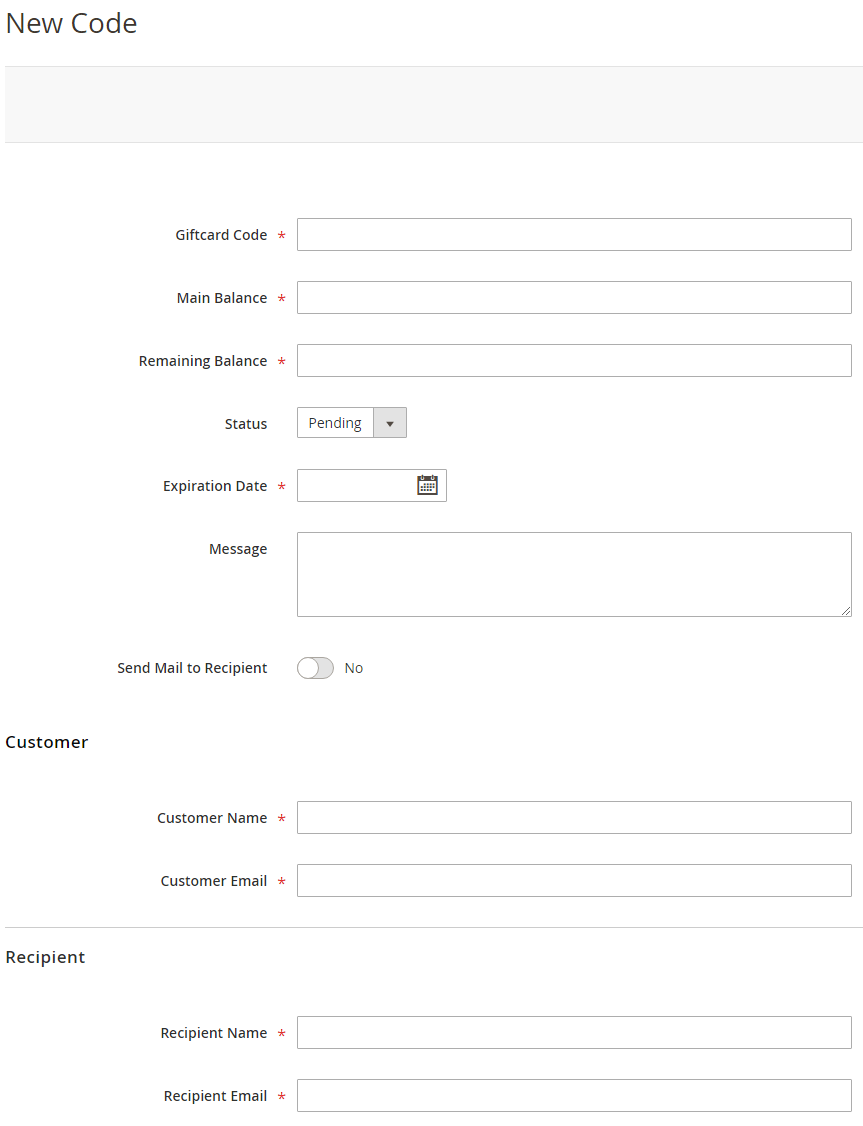
- Gift card code: give a unique gift code name (usually combination of text and numeric but not compulsory)
- Main balance: Enter the balance value you want to add for the recipient
- Remaining balance: Enter the remaining balance value you want the recipient to use from main balance
- Status: set the gift code status from here
- Pending
- Inactive
- Sold
- Active
- Expired
- Expiration date: set the expiry date to the code. After the specified date user will not be able to use the code
- Message: write a message for recipient which would be sent in email
- Send mail to recipient (yes/no): set whether you want to send email to recipient or not
- Customer Name: Enter the customer name
- Customer Email: Enter the customer email
- Recipient Name: Enter the recipient name
- Recipient Email: Enter the recipient email
Gift Card History
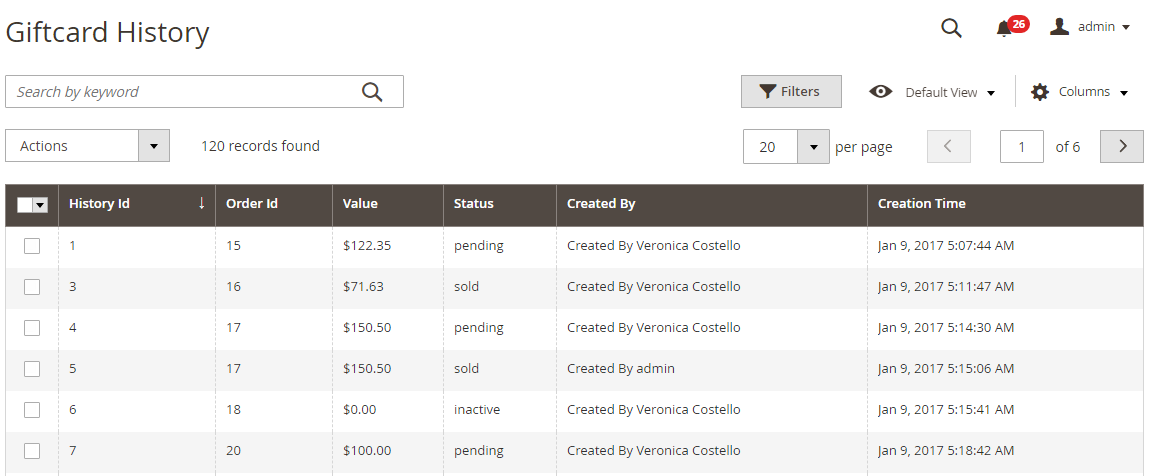
Go to Giftcard < History tab and it will get redirected to History page of the gift card as shown in picture above
- Track the status of the gift card from this page
- Check the order id and value of the sold gift card
- Delete the entries by selecting one or multiple entries and select “delete” from Action Dropbox
Frontend Functionality
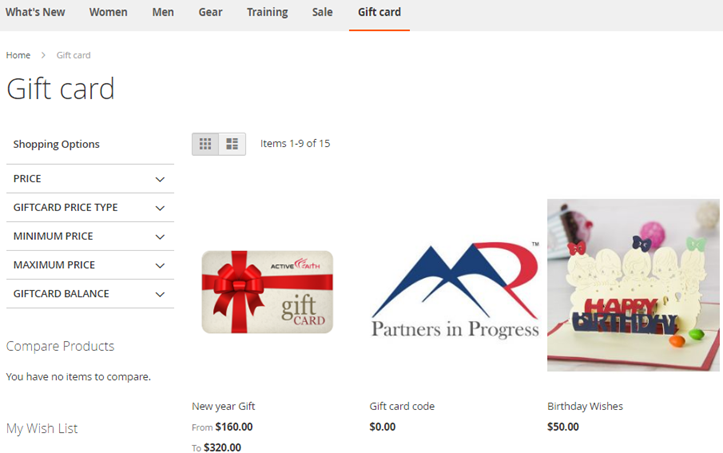
Gift card Customization on product detail page
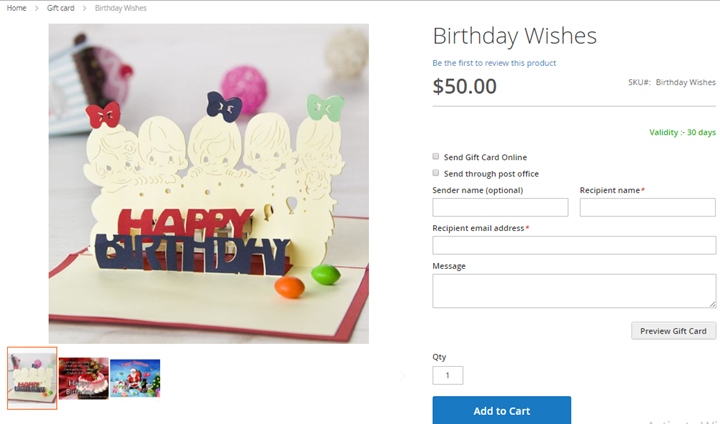
- Price – Above picture is the example of fixed price which store owner has set from backend.
- For the price range there will be a price range limit written (minimum and maximum price of the gift card) and a text box where user can enter the price of the gift card they want to purchase within given range
- Send gift card online – checkbox would allow user to purchase the gift card and send via email
- Send through post office – checkbox would allow user to purchase the gift card and send a physical card on a postal address of recipient. User is required to provide postal address of recipient during checkout
- Message – this is a custom message which would be appeared on the card
- Preview Gift Card – This would display look and feel of the gift card in a popup on product details page itself
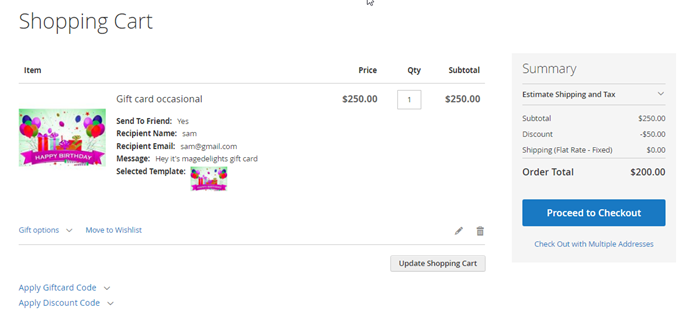
Gift card on Cart page
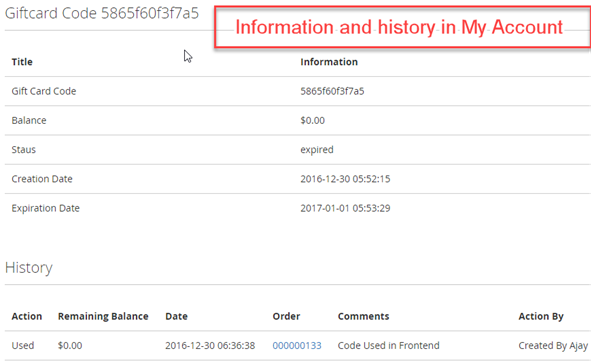
Gift card in My Account
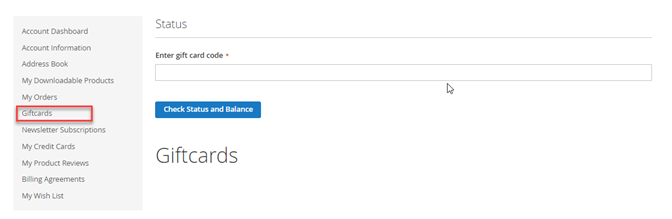
Enter the gift card code here (which user got in email on purchasing the gift card) and view all the details of gift card like status, main balance, remaining balance expiry date etc. as shown in picture below
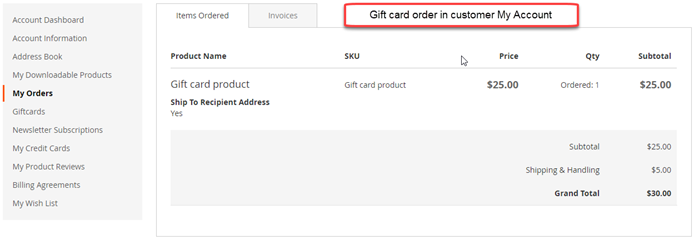
My order of purchased gift card
Thank you for choosing MageDelight!