![]()
Installation
To use this extension, you will require to install MageDelight Base Extension first. If it is not installed then please download it from https://www.magedelight.com/pub/extensions/magedelight-base.zip and unzip the package file into the app/code/Magedelight folder of your Magento 2 installation.
Before installing the extension, please make sure to Backup your web directory and store database
You will require to install MageDelight Base Extension first. If it is not installed then please download it from https://www.magedelight.com/pub/extensions/magedelight-base.zip and unzip the package file into the root folder of your Magento 2 installation.
Root Directory is - "app/code/magedelight/#YourExtensionName#"
- Unzip the extension package file into the root folder of your Magento 2 installation.
- Connect to SSH console of your server:
- Navigate to the root folder of your Magento 2 setup
Run command as per below sequence,
php bin/magento setup:upgrade
php bin/magento setup:di:compile
php bin/magento setup:static-content:deploy
php bin/magento cache:clean
- log out from the backend and log in again
If you are using Magento 2.3 or later then you do not need to activate license. Extension will be activated with silent activation mechanism and does not require activation keys to be entered manually.
Backend Configuration (Admin side)
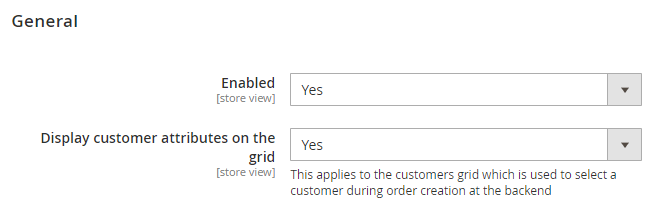
- Enabled: Select "Yes" to enable module for your store.
- Display customer attributes on the grid: Select "Yes" to display customer attributes in customer grid columns.
Backend Functionality
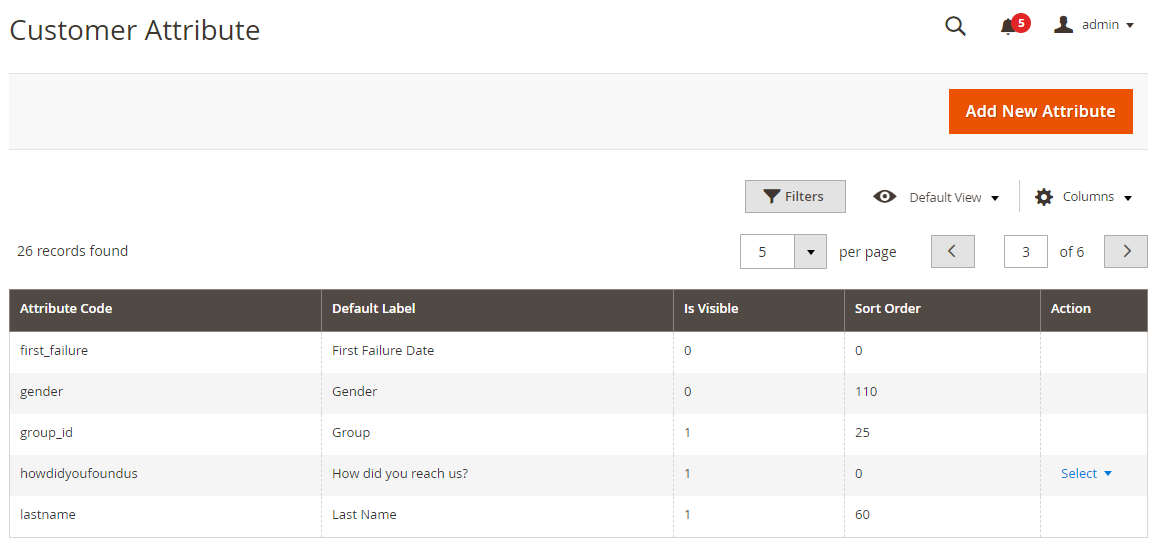
- Grid to list all customers attributes and filter it.
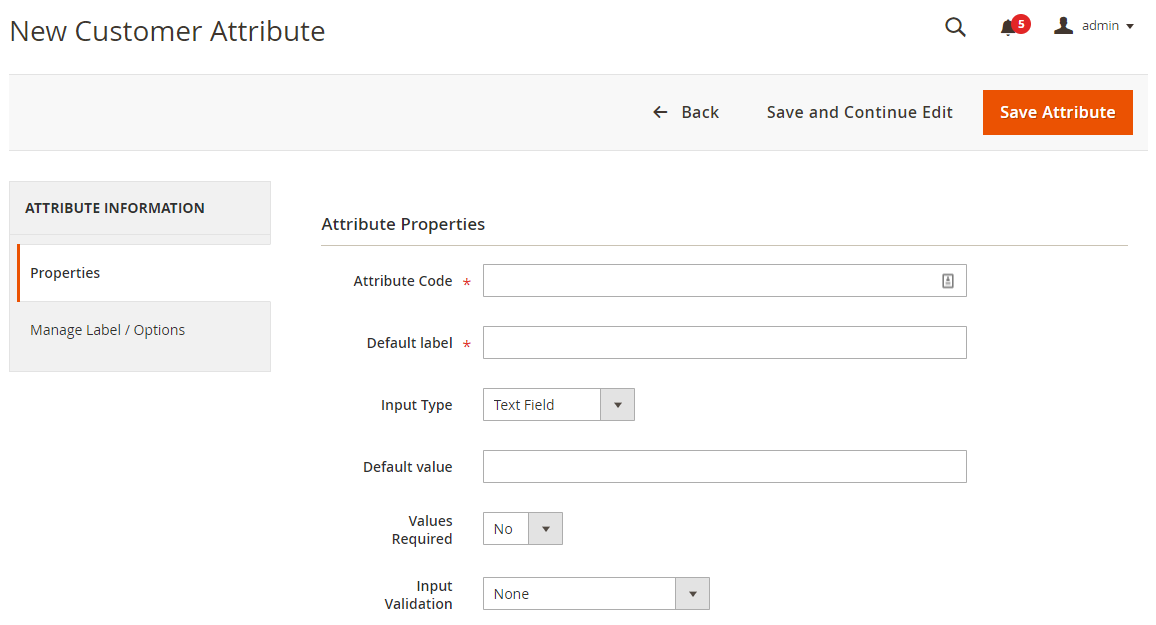
- Attribute Code: Provide customer attribute code.
- Default label: Provide default label.
- Input Type: Select input type for the customer attribute values. i.e. text box, drop down list, check box, radio buttons, etc.
- Default value: Provide default attribute values if any.
- Values Required: Select "Yes" to make attribute value required /mandatory.
- Input Validation: Select input validation if you would like to apply. i.e. alphanumeric, numeric, URLs, emails, only alphabets, etc.
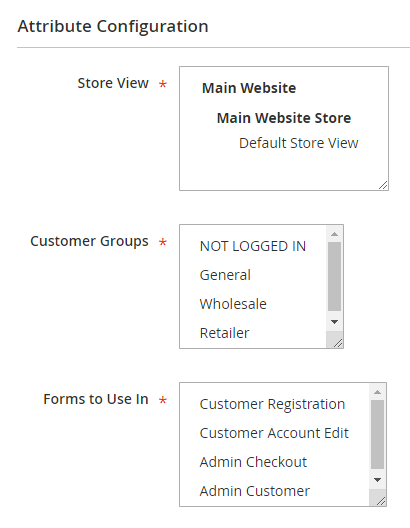
- Store View: Select store views to allow customer attributes.
- Customer group: Select customer groups you would like to enable customer attributes. By this way you can create customer group specific attributes.
- Forms to Use In: Select the Magento forms to display this attribute to customer. For example, you can only show customer attribute only on customer registration page by selecting "Customer Registration".
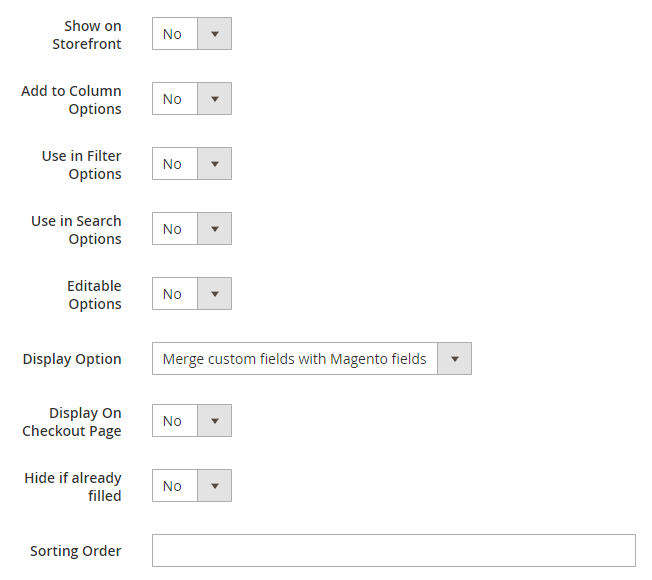
- Show on Storefront: Select "Yes" to show customer attribute on store front.
- Add to Column Options: Select "Yes" to add attribute to Grid column.
- Use in filter options: Select "Yes" to use attribute in filter options.
- Use in search options: Select "Yes" to use attribute in search options.
- Editable Options: Select "Yes" to make attribute editable by customer from My account section.
Display Options: Select option either display with default Magento or as a separate sections.
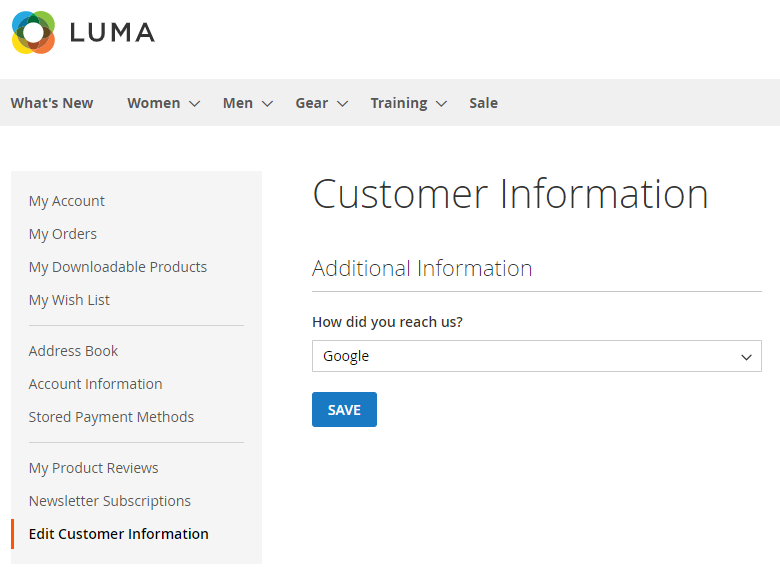
If Display option is set to "Display fields in separate group" then custom attribute created would be listed in Edit Customer Information tab.
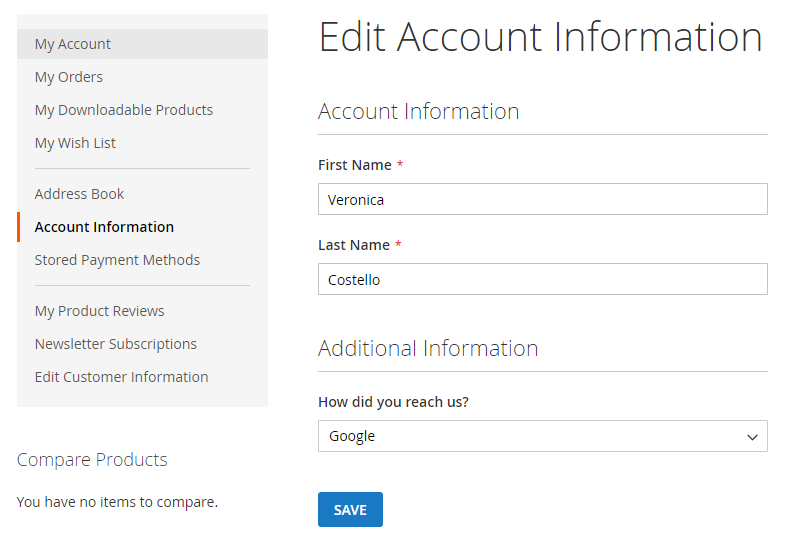
If Display option is set to "Merge custom fields with Magento fields" then customer attribute created would be listed in My Account tab as My Account->Contact Information->Edit.
- Display on checkout Page: Select "Yes" to display attribute to checkout page.
- Hide if already filled: Select "Yes" to hide attribute if already filled value by customer.
- Sorting Order: Provide sort options if you would like to arrange attribute in particular sequence.
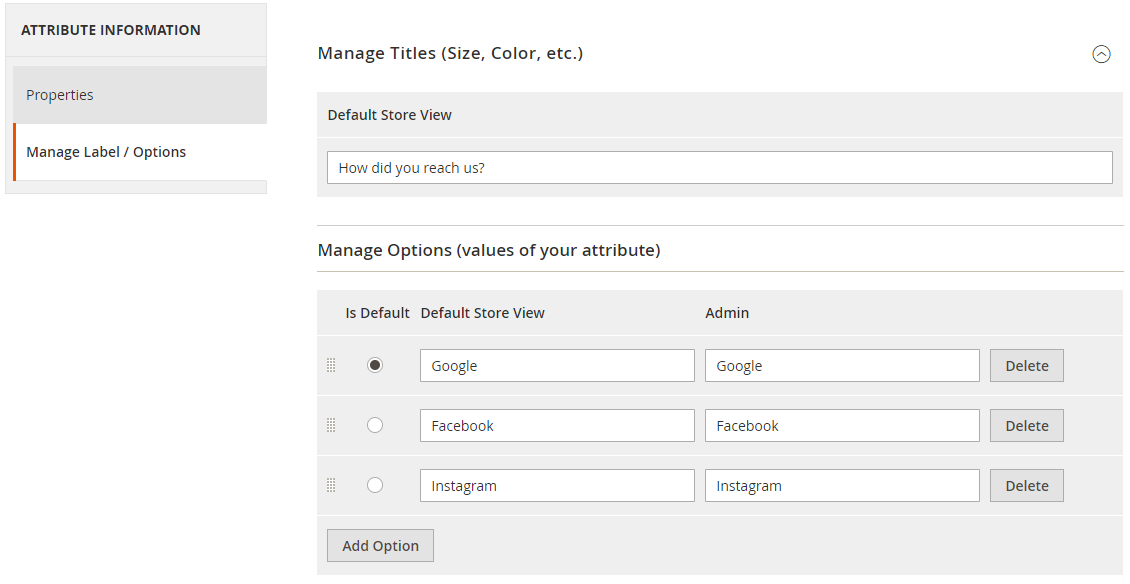
- Manage Titles: Provide labels as per store views. You can manage store view specific attribute labels from here.
- Manage Option Values: Provide values from attribute options if any. For drop down, checkbox or radio button type of attribute this will be used.
Customers >> Edit Customer
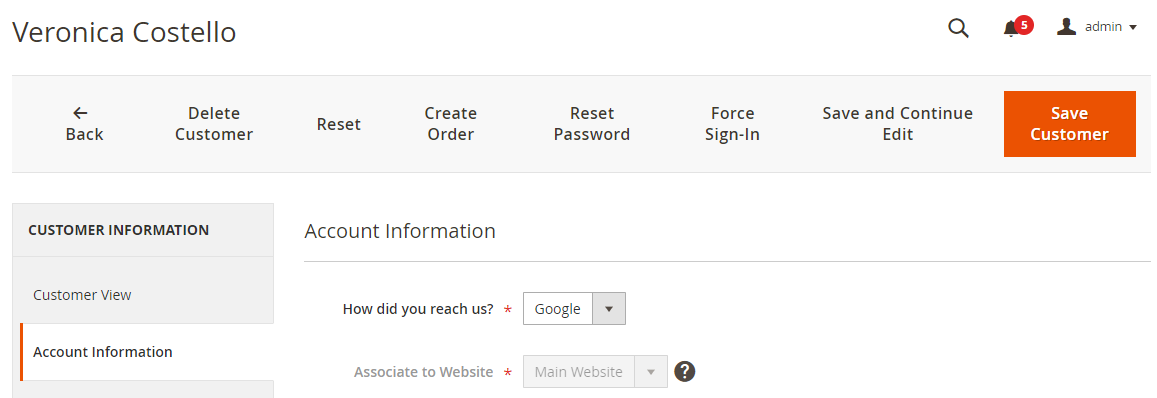
- Admin Customer section to show customer attributes.
Sales >> Order >> New Order
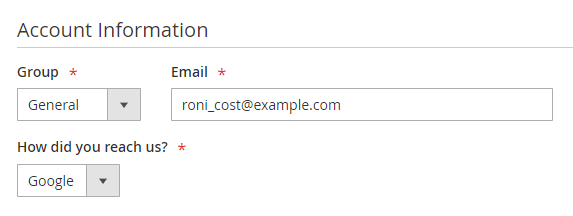
- Customer attribute while placing an order from admin panel.
Frontend Functionality

- Display Customer attribute while customer registration from store front.
- Separate section to manage customer information / attributes and its values. This will work based on attribute display options.
- Manage customer attributes with default Magento fields. This will work based on attribute display options.
Thank you for choosing MageDelight!